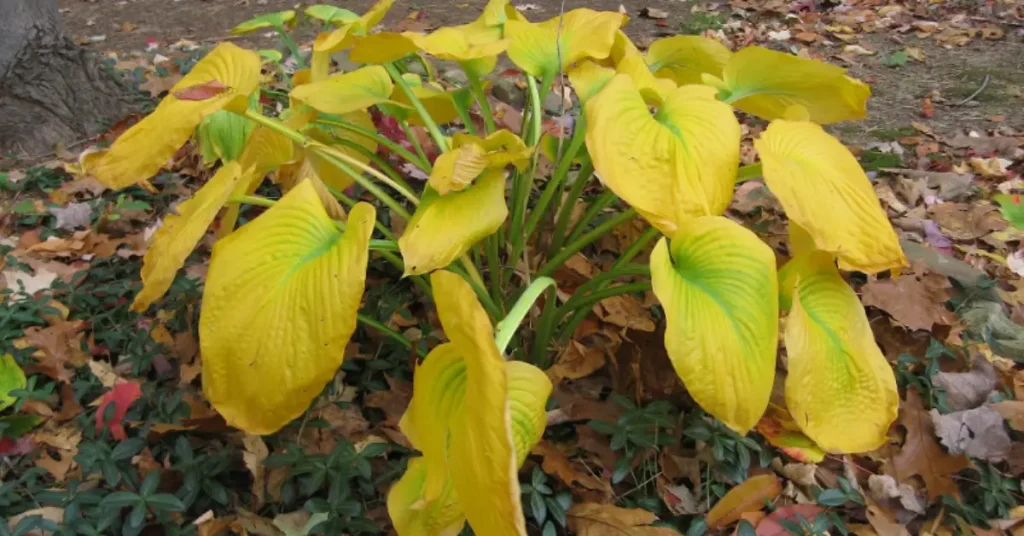
I still remember the first time I looked out at my garden one chilly October morning and saw my hostas turning yellow and slumping over. For a moment, I panicked — had I done something wrong? Those lush green leaves that filled the shady corner all summer were now a tired mess, and I wasn’t sure if I should cut them back or just leave them alone.
If you’ve ever stood in your yard wondering the same thing, you’re not alone. Hostas are tough, forgiving plants, but they also have their own rhythm — and understanding that rhythm is the difference between a healthy comeback in spring and a patch that struggles year after year.
Over time, I learned that cutting back hostas in fall isn’t just about making your garden look tidy. It’s about protecting your plants from pests, preventing rot, and giving them a clean, strong start when warmer weather returns. The timing, the tools, even the way you cut — they all matter more than most people realize.
So if you’re looking to keep your hostas thriving through winter and bursting back in spring, let’s walk through exactly when and how to cut them back the right way.
What do your hostas look like right now — are they still green, or starting to fade for the season?
Ideal Time to Cut Back Hostas in Fall (By Zone)
If you’ve ever Googled “when to cut back hostas,” you’ve probably noticed every site giving the same vague advice — “after the first frost.” That’s not wrong, but it doesn’t exactly help when you’re staring at your yard in late September wondering if your frost counts. I used to follow that advice blindly, and some years I cut too early, other years too late. What I learned is this: the right timing depends on where you live.
Hostas don’t follow the calendar — they follow the weather. Once the leaves start to yellow and droop, the plant has pulled all its energy back into the roots, and that’s your cue to start cutting. But since frost and temperature shifts vary by region, here’s a simple way to time it right.
Northern Regions (Zones 3–5)
If you live in cooler northern states — think Minnesota, Wisconsin, or Maine — your hostas will fade fast once nights dip into the 40s.
You’ll usually want to cut them back between late September and mid-October, right after the first frost.
- Wait until most of the leaves turn yellow or collapse.
- Check that daytime highs stay below 55°F — that’s a good signal they’re done for the season.
- Keep a light layer of mulch ready to protect roots once the ground cools.
Midwestern & Northeastern Regions (Zones 5–7)
For areas like Ohio, Pennsylvania, or New York, fall hangs on a bit longer. The best time is mid-October to early November, once that first solid frost has arrived.
- I like to wait until the leaves feel soft and wilted — not crispy.
- Avoid cutting if there’s still some green; let the plant finish storing energy.
- If you get surprise warm days, don’t worry — the cutback still helps tidy things before winter.
Southern & Coastal Areas (Zones 8–9)
If you’re farther south — say in the Carolinas or along the coast — your winters are mild, so the timeline shifts. You can safely cut back hostas from late November through December, once growth has clearly slowed.
- Focus on removing any mushy or diseased leaves first.
- If temperatures stay above freezing, consider a lighter trim and a deep clean-up in early winter instead of a full cutback.
Not sure exactly when frost typically hits your area? Check your local dates using The Old Farmer’s Almanac frost chart — it’s one of the most reliable tools I’ve found over the years.
Each region’s schedule may look different, but the goal is the same: let your hostas finish their natural cycle before you step in. When you do, you’re helping them store just enough strength to come back lush, green, and full next spring.
How to Cut Back Hostas – Step-by-Step Method

When I first started gardening, I made the mistake of grabbing whatever scissors were lying around and hacking away at my hostas. It looked fine at first… until the next spring, when half the plants came back weak and spotted with rot. That’s when I realised: how you cut matters just as much as when you cut.
Here’s the exact method I now follow every fall to keep my hostas clean, healthy, and ready for a strong comeback.
Tools You’ll Need
Before you start, take a minute to gather your tools. Having everything clean and ready makes the whole process smoother — and safer for your plants.
- Sharp pruning shears – dull blades crush stems and invite disease.
- Gardening gloves – hostas can get slimy as they fade; gloves make cleanup easier.
- Compost or disposal bags – for collecting the cut foliage.
I always clean my shears with rubbing alcohol or a 10% bleach solution before cutting. It may sound extra, but it’s one of the best ways to prevent fungal spread, especially if you’ve had slug problems before.
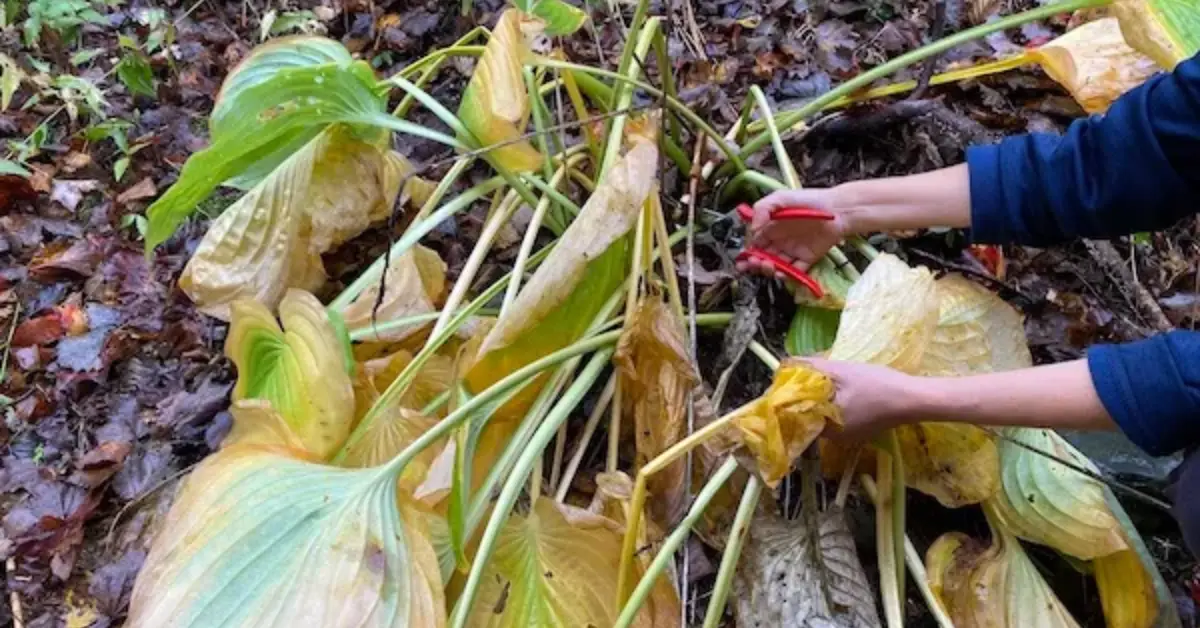
The Correct Cutting Technique
Once the leaves have yellowed and softened, it’s time to cut. Don’t just trim randomly — the way you angle your cut can protect the crown from winter moisture.
- Start by cutting each stem about 2 inches above the soil line.
- Use a 45-degree angle so rainwater doesn’t pool on the cut ends.
- Work gently around the crown to avoid nicking new buds forming underneath.
Fine Gardening has an excellent illustrated guide on pruning techniques at — it’s simple, accurate, and beginner-friendly.
I also like to keep a small rake or hand broom nearby to clear away debris as I go. Seeing that clean soil surface feels incredibly satisfying — and your hostas will thank you come spring.
Safe Disposal of Cut Leaves
This is where many gardeners slip up. It’s tempting to toss the old hosta leaves into your compost pile, but that’s a bad idea — especially if they’re mushy or spotted. Diseased or slug-damaged leaves can carry eggs and fungal spores that survive winter.
Instead:
- Bag and discard all trimmed leaves, especially if you’ve seen slug trails.
- Compost only healthy, dry foliage if you’re sure it’s pest-free.
- Give the soil surface a gentle rake to remove anything that might rot in place.
By doing this, you’re not just tidying up — you’re cutting off next year’s problems before they start.
What Not to Do (Common Fall Hosta Mistakes)
I’ve learned these lessons the hard way, so take it from someone who’s been there — a few small missteps can set your hostas back for months.
Here are the most common fall mistakes to avoid:
- Cutting too early before full dormancy. If there’s still green on the leaves, your plant’s not done storing energy yet.
- Leaving mushy leaves in place. They attract slugs and encourage rot over winter.
- Forgetting to clean your tools. Dirty shears can transfer disease from one clump to another.
- Using hedge trimmers instead of shears. It may seem faster, but it can shred stems and damage buds below the surface. If pruning feels tricky, you’ll find some helpful parallels in this detailed guide on when to prune bee balm for healthier, more vibrant blooms — it covers timing, technique, and common mistakes that apply to many perennials, including hostas.
Avoiding these few traps is honestly half the battle. Once you get into the rhythm of doing it right each fall, you’ll notice the difference in spring — cleaner crowns, stronger shoots, and fewer pests.
What’s the one mistake you’ve made with your hostas that you won’t repeat again this season?
Post-Cutback Care — Mulching, Watering, and Winter Prep
Once you’ve finished cutting your hostas back, don’t pack away the gloves just yet — this next step is what actually protects all that work you just did. Post-cutback care is where most gardeners slip up, especially when winter weather starts teasing with those early frosts.
I like to think of it this way: pruning is cleanup, but mulching and watering are your plants’ winter coat and last drink before hibernation.
Add 2–3 Inches of Mulch
After trimming, spread a 2–3 inch layer of mulch around the base of each hosta. I usually use shredded bark or leaf mulch — both work great for keeping moisture in and temperature stable.
- Don’t pile mulch directly on top of the crown — leave a small gap for airflow.
- Fresh mulch acts as insulation, preventing sudden temperature drops that can “heave” roots out of the soil.
- If you’ve divided your hostas recently, mulch helps new roots stay protected through the first cold spell.
It’s a small step that pays off big in spring — your soil will be softer, and new shoots will find it easier to break through. If you enjoy preparing your garden for spring while the soil’s still workable, you might also like how to plant evening primroses in autumn for stunning spring blooms — it’s a great companion guide for late-season gardeners who love seeing early color after winter.
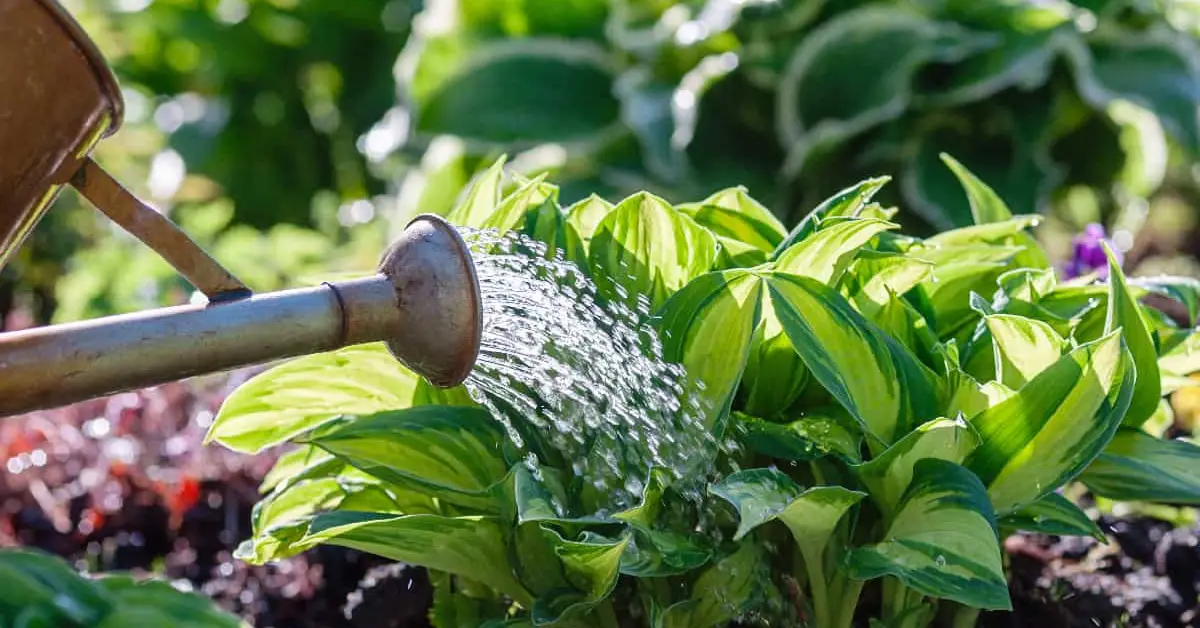
Water Before Ground Freezes
A few days before your first hard freeze, give your hostas a light, deep watering. I know it feels odd watering plants you just cut down, but trust me — this one habit has saved me from countless patchy regrowths.
- Water in the morning so soil can absorb moisture before night temperatures drop.
- Avoid overwatering; damp, not soggy, is the goal.
- This ensures the roots go into winter hydrated, not dried out.
The Iowa State University Extension actually recommends this method to help perennials overwinter more successfully — it’s one of those overlooked but science-backed steps.
Label or Divide Crowded Clumps
If you’ve been meaning to divide your hostas, late fall is the perfect time. The plants are dormant, so they’ll handle transplanting with minimal shock. I use simple wooden garden markers to label colors or varieties, so I remember what’s planted where once the snow comes.
- Lift and divide any clumps that feel too tight.
- Replant sections about 12–18 inches apart for better airflow next year.
- Labeling now saves a lot of confusion later when everything looks the same.
This quiet, last bit of fall work sets you up beautifully for spring — no guesswork, no surprise gaps, and hostas that wake up strong.
Spring Preview — What Happens If You Don’t Cut Hostas Back
I’ll be honest — there was one year I skipped pruning altogether. It had been a long fall, and I figured the leaves would just break down naturally. Come spring, I regretted it instantly. The once-smooth patch of hostas came back spotty, pale, and crawling with slugs.
Leaving hostas uncut might feel harmless, but here’s what really happens:
- Slug and fungal infestation risk: Old leaves give pests a warm, damp hiding place through winter.
- Delayed spring sprouting: New shoots struggle to push through decayed, compacted leaves.
- Yellowed or uneven leaf growth: The leftover foliage traps moisture and suffocates young shoots.
A friend once showed me two beds side by side — one trimmed in fall, the other left untouched. The difference was night and day: clean, bright shoots versus a messy tangle of half-rotten leaves. Once your hostas are ready for their spring return, consider adding early-blooming bulbs for extra color — here’s a simple guide on how to grow daffodils that pair beautifully with hostas in partially shaded beds.
Think of cutting back as pressing “reset” for your garden. It’s not just about looks — it’s about giving your plants the best possible start when spring sunlight finally hits.
Have you ever noticed your hostas bouncing back unevenly after winter? That’s usually their way of reminding you: don’t skip the cutback next time.
Eco-Friendly Alternatives – Letting Leaves Feed the Soil

Over the years, I’ve met plenty of gardeners who prefer a softer, more natural approach — and honestly, I get it. Not everyone wants to cut every leaf in sight. If you lean toward sustainable gardening, there’s a middle ground that works beautifully for hostas.
Instead of doing a full cutback, try a partial trim. I remove only the mushy or diseased leaves and let the healthy ones break down over winter. As they decompose, they form a light, natural mulch that feeds the soil and helps retain moisture. It’s nature’s recycling system — simple, clean, and effective.
Here’s how to make it work safely:
- Cut away any damaged or slimy leaves that might carry pests.
- Leave the dry, clean foliage in place to form a natural winter blanket.
- Add a light layer of fresh mulch on top if your winters are harsh.
It’s a small shift, but it keeps your garden ecosystem balanced — less waste, healthier soil, and less work for you.
Quick Reference Checklist for Fall Hosta Care
If you prefer a quick cheat sheet before you grab your tools, here’s your go-to list:
- Wait until the foliage turns yellow and begins to flop.
- Cut stems about 2 inches above the soil.
- Sanitize pruning shears before and after use.
- Add 2–3 inches of mulch for insulation.
- Discard diseased leaves instead of composting them.
Keep this list handy — it’s the perfect reminder each fall when your hostas start fading and you’re not sure where to begin.
Conclusion
Taking care of hostas in the fall isn’t just about keeping your garden neat — it’s about setting the stage for next spring’s growth. A clean cutback, a little mulch, and the right timing can make the difference between a patch that struggles and one that bursts with life.
Whether you go the traditional route or try the eco-friendly approach, the goal is the same: protect the roots, support the soil, and let your hostas rest easy through winter.
I’d love to know how you handle your fall cleanup — do you cut everything back, or let nature do its thing?
Share your experience in the comments below, and for more simple, seasonal gardening tips, visit Plant Care Dairy for guides made for real-world gardeners just like you.
Disclaimer: The information in this article is for general gardening guidance only. Always consider your local climate, soil conditions, and specific plant variety before applying any care methods. Plant Care Dairy is not responsible for outcomes resulting from individual gardening practices.