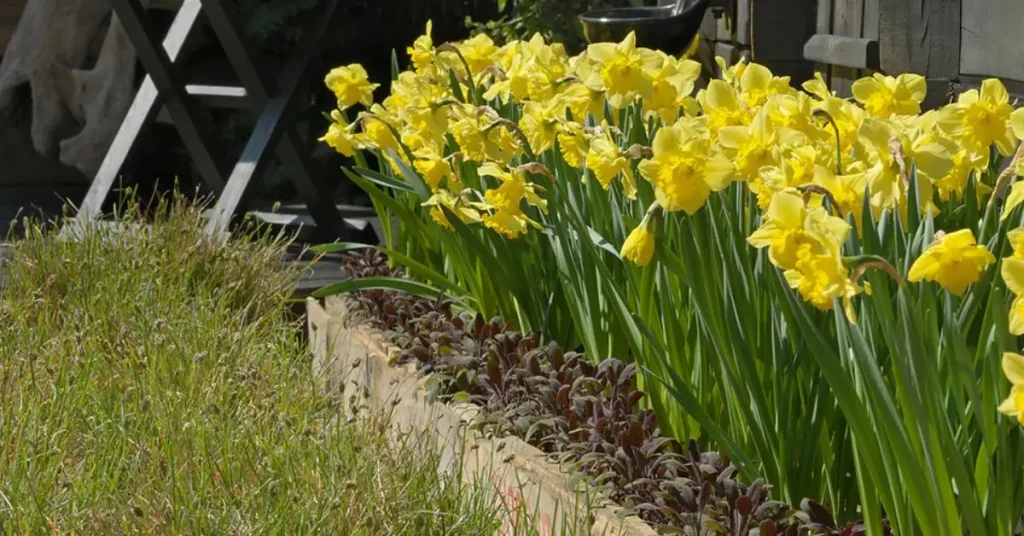
If you’re looking to add a burst of color to your garden, growing daffodils is a perfect choice. They’re not only beautiful and bright but also incredibly easy to grow, even if you’ve never planted a flower in your life. I know it can feel overwhelming when you first dive into gardening, but trust me, daffodils are forgiving and resilient. Whether you have a sprawling backyard or a small balcony, these cheerful blooms will flourish with just a little know-how.
In this guide, I’ll walk you through everything you need to get started: when and how to plant daffodils, the best soil conditions, and the simple care routines to keep them healthy. Don’t worry — we’re keeping things straightforward and stress-free. By the end of this, you’ll have the confidence to grow daffodils that will light up your garden for years to come. Ready to dive in? Let’s get started!
Best Time to Plant Daffodils
When it comes to planting daffodils, timing is everything. Planting them at the right time ensures they get the cold exposure they need to bloom beautifully in the spring. If you’re eager to see vibrant yellow and white flowers pop up when the weather warms, the ideal time to plant daffodils is in early autumn.
Here’s why it matters: Daffodil bulbs need a period of cold dormancy to trigger their growth in the spring. Planting them in the fall allows them to establish roots before the ground freezes, giving them a head start come springtime.
When to Plant Daffodils:
- In cooler climates: Plant daffodils in late September to early November. The cooler temperatures help the bulbs settle in and prepare for the cold winter months.
- In warmer climates: You can plant them a little later, as the ground may not freeze in winter. Aim for October through December, depending on when the chill hits.
Pro Tip: Make sure to plant your daffodils at least 4-6 weeks before the first frost. This gives them enough time to root properly without being damaged by the cold.
By getting the timing right, you’re giving your daffodils the best chance to thrive. For more on why early planting matters, check out The Spruce. If you’re interested in growing other plants alongside your daffodils, check out how 5 Useful Weeds That Improve Your Garden’s Soil and Plants can help enhance the health of your soil and support better plant growth.
Preparing the Soil for Daffodils
Now that you know when to plant, let’s talk about soil. Daffodils are not too picky, but the right soil conditions are crucial to their success. If you want your daffodils to grow strong, tall, and healthy, here’s what you need to do:
What Kind of Soil Do Daffodils Need?
- Well-drained soil: Daffodils don’t like sitting in waterlogged soil, which can cause their bulbs to rot. If your soil doesn’t drain well, consider adding organic material to improve its structure.
- Slightly acidic soil: A pH between 6.0 and 7.0 is ideal for daffodils. If your soil is too alkaline, you can amend it with sulfur to lower the pH slightly.
How to Improve Your Soil for Daffodils:
- Compost: Add a generous amount of compost to your soil to improve its texture, increase drainage, and provide nutrients. This is especially helpful if you have clay-heavy soil.
- Sand: If your soil is heavy and sticky, mix in some sand to increase drainage and prevent water from pooling around the bulbs.
- Bone meal: For extra phosphorus, which helps with root development, consider adding bone meal to the planting hole.
Tip for Improving Your Soil: While you’re improving your soil for daffodils, you might also be interested in learning about 5 Deep Rooted Plants That Stop Soil Erosion in Your Garden. These plants not only improve your garden’s soil but also help to prevent erosion, keeping your daffodils well-supported.
Planting Tip: When you dig the hole for your daffodils, make sure to break up any large clumps of soil and ensure there are no rocks in the way. This allows the roots to spread easily and encourages strong bulb growth.
By properly preparing the soil, you’re setting the foundation for daffodils that will bloom beautifully year after year. The more effort you put into the soil now, the better your daffodils will perform in the future.
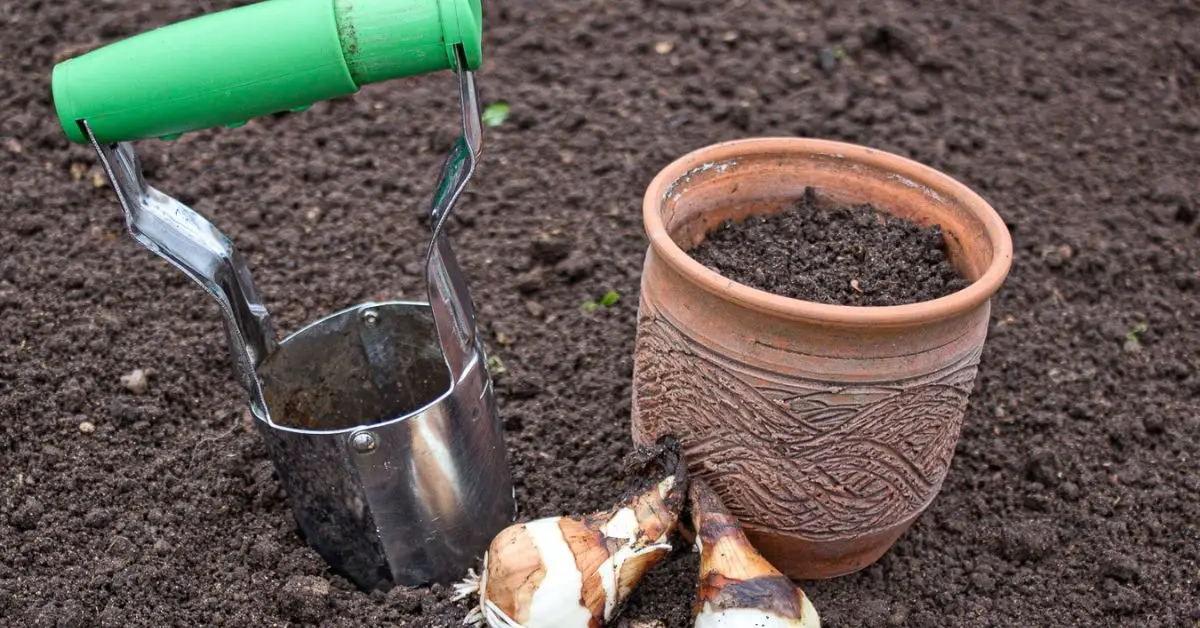
Planting Daffodil Bulbs Step-by-Step
Planting daffodil bulbs can seem like a simple task, but there’s more to it than just dropping them in the ground. To get the best blooms in the spring, it’s important to follow a few simple steps. By taking care with each stage, you’ll set your daffodils up for a healthy, vibrant future.
Here’s how to plant them for success:
- Choose the Right Spot: Find a sunny or partially sunny spot in your garden. Daffodils thrive with 4-6 hours of sunlight each day. Too much shade can result in weak growth and fewer blooms.
- Prepare the Soil: As we discussed earlier, daffodils prefer well-draining soil that’s slightly acidic. If your soil is heavy or clay-like, improve it with compost or sand to help water drain properly.
- Dig the Right Hole: Use a garden trowel or bulb planter to dig a hole about 3-4 inches deep for smaller varieties and 6 inches for larger ones. The depth is important, as planting too shallow can expose the bulbs to freezing, while planting too deep might hinder their growth.
- Spacing the Bulbs: Plant the bulbs about 3-6 inches apart to give them enough room to grow and spread. If you’re planting multiple rows, make sure they’re spaced about 6 inches apart.
- Position the Bulb Correctly: The pointed end of the daffodil bulb should face up, while the flat, root side faces down. If you’re unsure which side is which, it’s better to err on the side of caution and place them with the point up. It’s like giving them a little direction to grow towards!
- Cover and Water: After placing the bulbs, cover them with soil and lightly pat it down. Water gently to settle the soil around the bulb and keep it moist, but not soggy.
- Mulch: Apply a thin layer of mulch to help retain moisture and protect the bulbs from extreme temperatures during the winter.
By following these steps, you’ll give your daffodils the perfect environment to grow and bloom in the spring.
How Deep to Plant Daffodil Bulbs
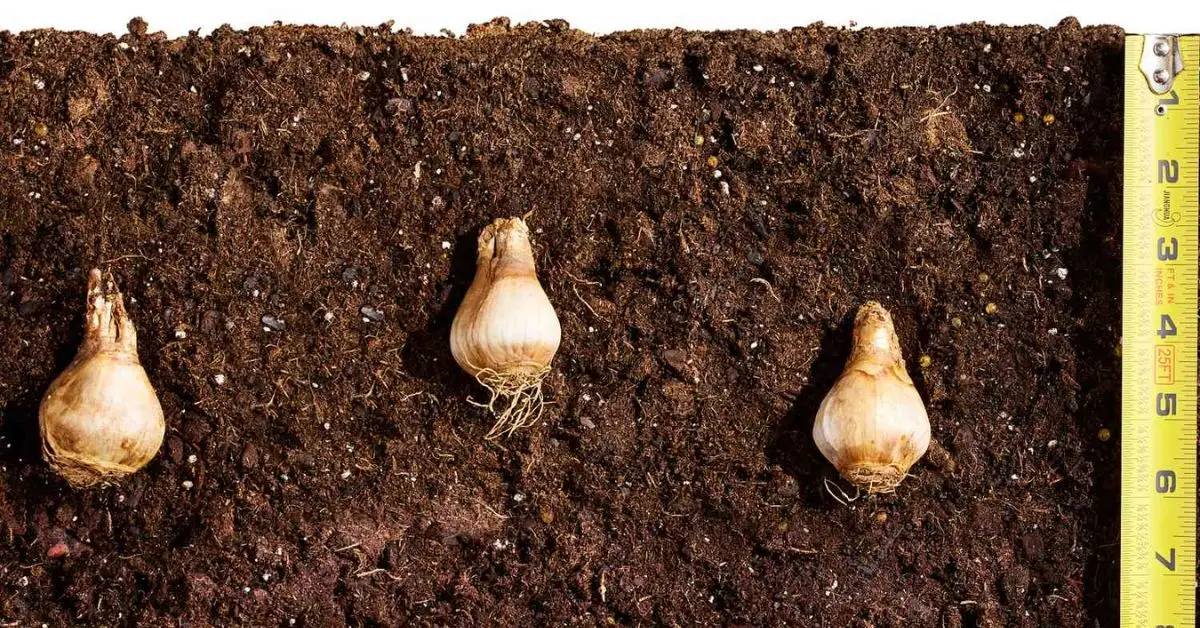
Planting daffodils at the right depth is one of the most important factors in ensuring their success. If you plant them too shallow, they may be vulnerable to freezing temperatures. On the other hand, if you plant them too deep, they might struggle to sprout and grow properly.
Here’s the ideal depth for different daffodil sizes:
- Smaller bulbs: Plant them about 3-4 inches deep.
- Larger bulbs: Plant them 5-6 inches deep for the best growth.
The general rule is to plant daffodil bulbs about three times as deep as the height of the bulb itself. This helps them establish a strong root system and protects them from harsh weather.
By planting at the correct depth, you’re giving your daffodils the right start for a beautiful bloom. For more detailed planting depth information, check out Gardener’s World.
Caring for Daffodils Throughout the Growing Season
Once you’ve planted your daffodils and they’ve started to grow, the next step is to ensure they’re well cared for throughout the growing season. With a little attention, daffodils will reward you with vibrant blooms year after year. Here’s what you need to do to keep them healthy and happy:
- Watering: Daffodils need regular watering, but it’s important not to overdo it. Water them when the soil feels dry to the touch, but make sure the soil drains well to prevent waterlogging, which can lead to bulb rot. During the growing season, water deeply but less frequently to encourage strong root development.
- Fertilizing: Fertilizing your daffodils will help them grow strong and produce the best blooms. Use a slow-release, balanced fertilizer in early spring as the shoots emerge. You can also use a high-phosphorus fertilizer to support strong roots and encourage a robust bloom. Be careful not to over-fertilize, as this can lead to more foliage growth than flowers.
- Mulching: After planting and as the bulbs begin to grow, apply a light layer of mulch around your daffodils. Mulching helps retain moisture in the soil, suppress weeds, and maintain an even soil temperature. In colder climates, mulch also provides an extra layer of protection against frost. Just be sure not to mulch too deeply, as it can smother the bulbs if packed too tightly.
- Cutting Back Leaves: After daffodils bloom, allow the leaves to die back naturally. They need this time to photosynthesize and store energy in the bulbs for next season’s growth. Don’t cut them back too early — let the foliage turn yellow and dry out before trimming it down. If you cut the leaves too soon, the bulbs may not have enough energy to bloom again.
Dealing with Common Daffodil Problems
While daffodils are generally hardy, they’re not immune to pests and diseases. Fortunately, with a little attention, most problems can be easily managed. Here’s a look at some of the most common issues and how to deal with them:
- Aphids: These tiny insects can sometimes infest daffodils, feeding on the sap of the plants and causing damage to the leaves. You can deal with aphids by spraying your plants with a mixture of water and dish soap, or by using an insecticidal soap for more severe infestations. For a natural remedy, try attracting ladybugs to your garden, as they are natural aphid predators.
- Fungal Infections: Fungal diseases, such as powdery mildew, can affect daffodils, especially in humid or wet conditions. If you notice white, powdery spots on the leaves, remove the affected parts and improve airflow around your plants. Ensure the soil is well-draining to avoid waterlogged conditions that can foster fungal growth. Fungicides may also be necessary in severe cases.
- Bulb Rot: Bulb rot is a common issue, usually caused by excessive moisture. To prevent this, ensure your daffodils are planted in well-draining soil, and avoid overwatering. If you notice bulbs rotting, remove the affected ones and replant healthy bulbs in a new, well-drained location.
For more tips on common daffodil problems and how to keep your plants healthy, check out this comprehensive guide from Royal Horticultural Society.
Aftercare: What to Do After Daffodils Bloom

Once your daffodils have finished blooming, it’s important to give them the proper care to ensure they come back even stronger next year. Aftercare is essential for maintaining the plant’s health and helping the bulbs store the energy they need for next season’s bloom.
Here’s how to care for your daffodils once they’ve finished flowering:
- Deadheading: After the flowers fade, you can remove the spent blooms by cutting the flower stalks back to the base. This process, known as deadheading, prevents the plant from putting energy into seed production and helps direct it to the bulb for next year’s growth.
- Let the Leaves Be: Resist the urge to cut back the leaves immediately after blooming. The leaves are still working to photosynthesize and store energy in the bulb. Once the foliage turns yellow and starts to die back naturally, that’s when you can trim it down. This ensures your daffodils have the energy they need to bloom again next season.
- Storing Bulbs: If you’re growing daffodils in pots or need to lift the bulbs for any reason, allow the foliage to die back first, then carefully remove the bulbs from the soil. Store them in a cool, dry place until it’s time to plant again in the fall. Make sure to keep them in a mesh bag or cardboard box for good air circulation.
Taking these steps ensures your daffodils are ready to bloom beautifully again in the spring.
Best Varieties of Daffodils for Beginners
When you’re just starting out with daffodils, choosing the right variety can make all the difference. Some daffodil varieties are easier to grow and more forgiving, making them perfect for beginners. Here are a couple of options that are sure to help you succeed:
- Tête-à-Tête: This variety is compact and perfect for small gardens or containers. It’s a miniature daffodil, so it’s easy to manage and grows reliably year after year.
- Narcissus: Known for their classic yellow blooms, Narcissus daffodils are easy to grow and thrive in a wide range of conditions. They’re perfect for beginners and come in many variations.
These varieties are not only simple to grow but also incredibly rewarding, even for those with little gardening experience. Start with these, and you’ll enjoy daffodils in your garden every spring.
Final Thoughts: Enjoying Your Daffodil Garden
Daffodils are a joy to grow, and seeing them bloom in your garden is one of the simplest pleasures in life. Not only do they add a burst of color to your landscape, but they also mark the arrival of spring, bringing life and energy to your outdoor space.
As you care for your daffodils, take a moment to appreciate how much they’ve brightened up your home. With their vibrant flowers and cheerful presence, daffodils are a testament to the beauty of nature and the rewards of gardening. Plus, knowing that these bulbs will come back year after year with minimal effort makes them a great investment for any garden.
So, enjoy your daffodil garden, and remember: each bloom is a reminder that your care and patience have paid off.
What’s your experience with growing daffodils? Share your tips, questions, or gardening stories in the comments below! If you’re looking for more gardening advice and tips, don’t forget to visit Plant Care Dairy for all things gardening and plant care.
Disclaimer: The information provided in this guide is for general gardening advice. Results may vary based on local climate and soil conditions. Always consider your specific environment and consult local experts if needed.