
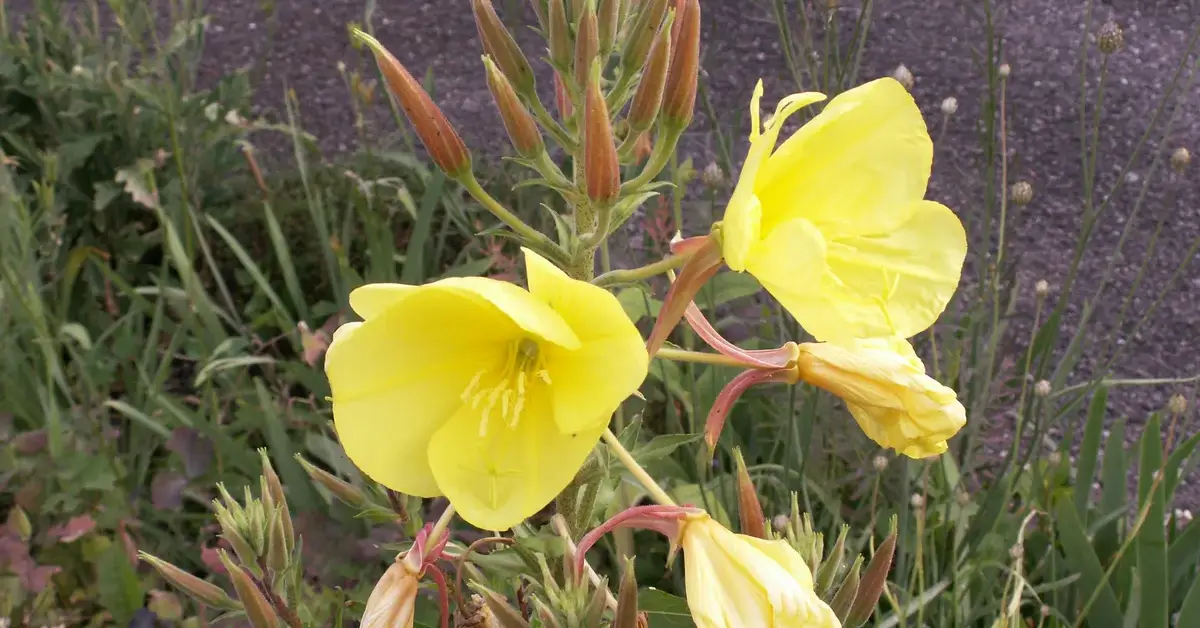
I still remember the first time I tried planting evening primroses in autumn. The air had that cool, earthy smell — leaves soft underfoot, soil damp but not frozen yet. I tucked the tiny seeds in, half wondering if they’d even make it through the cold. By spring, the garden had changed completely. Yellow blooms opened like small lanterns at dusk, and for the first time, I understood why people call them evening stars.
If you’ve ever looked at those golden flowers and thought, I want that next spring, autumn is your best window to make it happen. Most gardeners wait for warmer months, but planting now gives your primroses a quiet head start. The roots settle in while the weather’s still mild, storing energy for a stronger, earlier bloom when the frost fades. It’s nature’s version of planning ahead.
In this guide, I’ll walk you through exactly how to do it — the timing, the soil prep, and the care steps that make the difference between a patch that survives and one that truly shines next spring.
So tell me — have you ever tried planting anything in autumn before, or is this your first season experimenting with cooler soil?
Autumn Planting vs Spring Planting — Which Is Better & Why

Tennessee Farmers Cooperative
I’ve heard this debate a hundred times — should you plant evening primroses in autumn or wait for spring? Honestly, both work, but the results are very different. If you want early blooms and sturdier plants by spring, autumn wins hands down.
Advantages of Autumn Planting
When you plant in autumn, you’re working with nature, not against it. The soil still holds summer warmth, the air is cooler, and rainfall helps roots settle in quietly before winter hits. Here’s what that means for you and your plants:
- Early root establishment: The roots start growing right away, giving your primroses a stronger base before the ground freezes.
- Natural watering: Autumn moisture reduces the need for frequent watering — less stress, more steady growth.
- A head start for spring: Once winter passes, your plants are already established underground. While everyone else is sowing seeds, yours are ready to bloom.
It’s like setting your alarm an hour early and still getting enough rest — calm, efficient, and rewarding.
Risks and Constraints
That said, autumn planting isn’t magic. It’s timing. If you plant too late, the frost can undo your effort before roots have a chance to anchor. I’ve lost seedlings that way — perfectly healthy one week, mushy and gone the next.
Here’s what to watch out for:
- Frost damage: Roots that haven’t settled will freeze and rot.
- Cold, compact soil: If your soil is heavy clay or stays soggy, wait for better drainage or raise the bed slightly.
- Moisture extremes: Too much rain can drown seedlings; too little means shallow roots.
The sweet spot is planting about 6–8 weeks before your first expected frost. That gives the roots time to adjust without risking shock.
When Autumn Planting Doesn’t Work
In very cold regions, where frost arrives early and deep, the soil doesn’t stay warm long enough for roots to establish. In that case, spring planting makes more sense. On the flip side, if you live in a hot or tropical zone, your “autumn” may still feel like summer — too warm for seeds to settle properly.
If you’re unsure about your climate window, check the frost dates and soil temperatures for your area on trusted sites like Gardeners’ World. Aim for mild days and cool nights — that’s when the soil tells you it’s ready.
Understand Evening Primroses (Basics You Should Know)
Before you get your hands dirty, it helps to know what kind of primrose you’re planting. Not all are the same, and the timing of your blooms depends on their type.
Species Variance (Biennial / Perennial / Annual Traits)
Evening primroses belong to the Oenothera genus, and while most are biennials, some behave like short-lived perennials or reseeding annuals. Here’s how to tell them apart:
- Biennials: Grow leaves in the first year, bloom in the second, then die after seeding.
- Perennials: Return each year from the same rootstock.
- Annuals: Complete their life cycle in one season, then rely on self-seeding.
Knowing your variety helps you plan — whether to expect a two-year bloom cycle or recurring flowers every summer.
Growth Cycle — Year 1 (Rosette) & Year 2 (Flowering)
The first year, evening primroses focus entirely on root and leaf growth. You’ll see a flat rosette hugging the ground — that’s the plant saving energy. Don’t worry if you don’t see flowers yet; that patience pays off.
In the second year, the plant shoots up tall stems with buds that open at dusk — soft yellow petals glowing until sunrise. Those evening blooms attract moths and bees, creating a calm rhythm in your garden.
Think of the first year as foundation work and the second as celebration.
Natural Habitat & Ideal Conditions (Sun, Soil, Drainage)
Evening primroses thrive in conditions that mimic their native North American prairies — open, sunny, and well-drained.
Here’s what they love most:
- Sunlight: At least 6 hours of full sun every day.
- Soil: Sandy or loamy soil that drains well but holds some moisture.
- pH: Slightly acidic to neutral (6.0–7.0).
- Spacing: About 12–18 inches between plants to let air circulate.
If your soil tends to stay wet, mix in sand or grit to loosen it up. You’ll notice stronger stems and fewer disease issues.
By now, you already know whether autumn planting fits your garden. In the next section, we’ll walk through the exact steps for soil prep, seed depth, and mulch strategy to make your evening primroses thrive when spring finally wakes up.
Tell me — what’s your garden like right now? Damp and leafy, or still holding on to that late-summer warmth?
Pre-Planting Preparations (Autumn Specific)
Planting evening primroses in autumn isn’t just about dropping seeds into the ground — it’s about giving them the right foundation before winter locks in. A little work now means stronger roots, fewer pests, and a spring bloom that doesn’t disappoint.
If you enjoy getting your soil ready early, you might also like trying cool-season crops that thrive in the same conditions — like peas and beans. They’re simple to start once you understand timing and drainage. You can learn more in our detailed guide on how to plant peas and beans in fall.
Soil Testing & Amendments in Late Summer / Early Autumn
Before you dig, check what’s happening beneath the surface. Evening primroses prefer slightly acidic to neutral soil — a pH of 6.0 to 7.0 works best. You can buy a simple soil testing kit at any garden centre or use a local horticulture service to test for pH and nutrient balance.
If your soil is heavy or stays damp, improve drainage before planting:
- Mix in coarse sand or horticultural grit to loosen clay soils.
- Add compost or leaf mould to boost structure and organic matter.
- For sandy soil, mix in well-rotted manure to help retain moisture.
The goal is a texture that feels crumbly — not too sticky, not too loose.
Clearing Weeds, Old Growth, and Debris
Autumn planting can fail fast if weeds steal nutrients or diseases linger in the soil. Before sowing, remove:
- Old stems or dead annuals from summer.
- Deep-rooted weeds (especially dandelions and bindweed).
- Fallen leaves that might hide snails or fungal spores.
This isn’t just about appearance — it’s disease prevention. Clean soil gives your new seedlings a head start without hidden competition.
Mulch, Organic Matter & Composting Before Planting
Once your soil is clear, add a 2–3 cm layer of compost or aged manure and lightly turn it in. This replenishes nutrients lost during the summer growing season. If your compost isn’t fully broken down, apply it two weeks before planting to let it mellow.
After digging, finish with a thin layer of organic mulch — it keeps warmth in and prevents early autumn rains from compacting the soil.
Choosing the Timing Window (Before the First Frost)
The sweet spot for sowing is roughly six to eight weeks before your region’s first expected frost. That gives the roots enough time to settle before the freeze.
Here’s a general guide by climate zone:
- Cool temperate zones: Late August to early October.
- Mild temperate zones: September to November.
- Subtropical zones: October to early December (watch for heat spikes).
If your nights are consistently dropping below 10°C, that’s the signal to finish planting. For specific regional timing, you can reference the frost charts on The Old Farmer’s Almanac — it’s a reliable, climate-based planting calendar that helps you plan within your exact frost window.
Step-by-Step Autumn Planting Guide
By now, your garden bed should be ready — soft, clean, and nutrient-rich. Let’s get the seeds or seedlings into the ground.
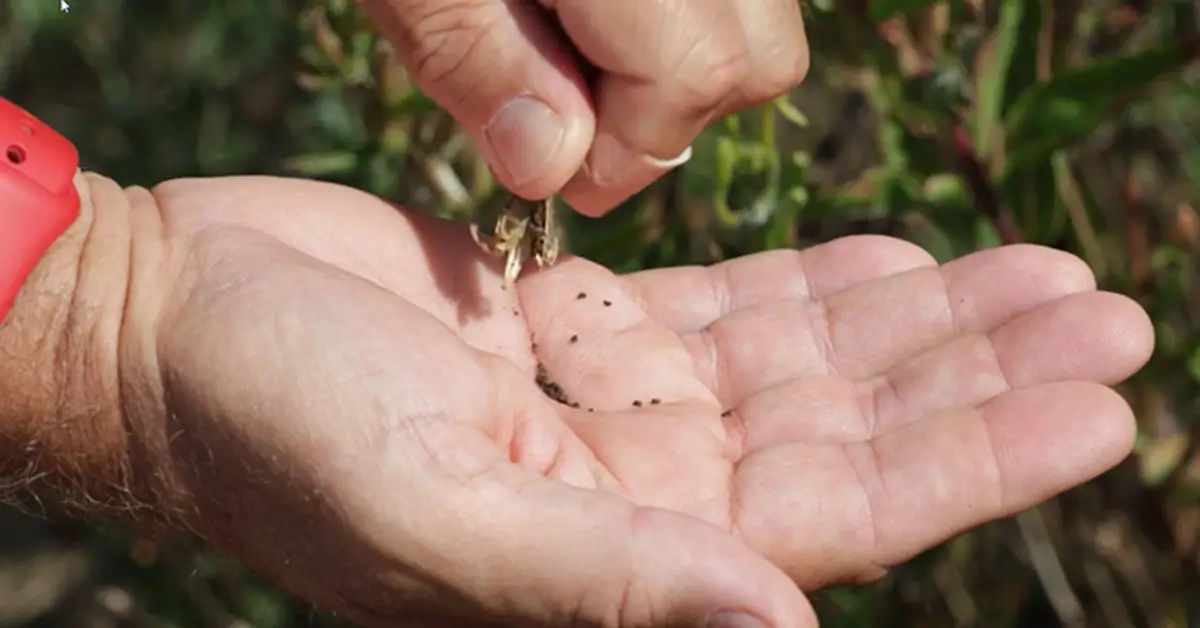
Option A: Direct-Sow Seeds Outdoors
If you prefer a natural, low-effort approach, sow your seeds directly into the prepared bed.
Here’s how I do it:
- Rake the topsoil smooth and remove stones or clumps.
- Scatter the seeds evenly — they’re tiny, so mix them with sand for better spacing.
- Depth: Cover with just a light dusting of soil (about ¼ inch).
- Spacing: Leave roughly 12–18 inches between spots to allow airflow. The process feels a lot like sowing vegetables that prefer cooler soil — such as cabbage — where timing and shallow sowing make all the difference. For step-by-step details, check out our full guide on how to grow cabbage in your garden.
- Mist gently to settle them in.
In colder regions, seeds benefit from cold stratification — a short chill period that mimics winter. You can simulate this by:
- Placing seeds in a damp paper towel inside a zip bag.
- Refrigerating for 2–3 weeks before sowing.
This small step helps trigger faster, stronger germination when spring arrives.
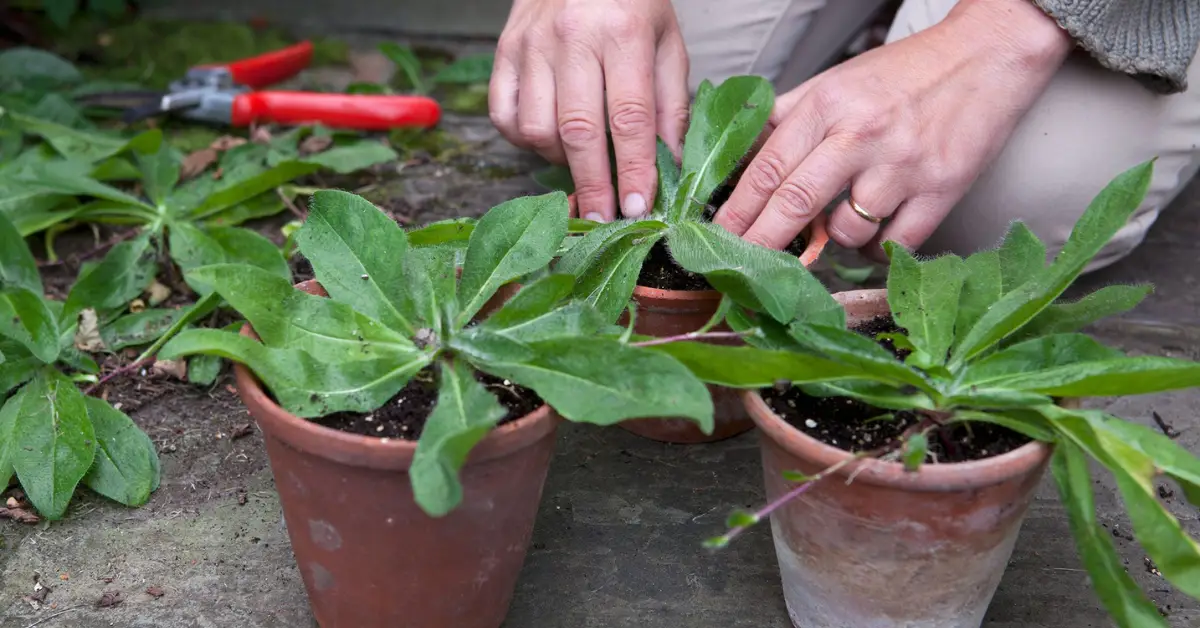
Option B: Potting Seedlings / Transplants in Autumn
If your area has unpredictable autumn rain or early frost, start primroses in pots or trays indoors.
- Sow in shallow trays filled with seed compost.
- Keep them on a bright windowsill or in a cool greenhouse (around 15°C).
- When seedlings have 3–4 true leaves, begin hardening off — set them outside for a few hours each day to adjust to cooler air.
Transplant once they’re sturdy and the days are still mild. This method protects young plants while still giving them an autumn head start.
Transplanting into Final Position Before Winter
When moving your seedlings outdoors:
- Dig holes slightly larger than the root ball.
- Place each plant so the crown sits level with the soil surface.
- Backfill gently, firm the soil with your palms, and water thoroughly.
Avoid burying too deep — the stems can rot in cold, wet conditions.
First Watering, Settling, and Mulching After Planting
Once everything’s in place, water enough to moisten the top 4–5 inches of soil — no more. Then:
- Add a thin layer (about 1 inch) of straw, leaf mulch, or pine needles to insulate roots.
- Avoid covering the crown; keep the centre open for air flow.
- If frost arrives early, you can add a lightweight fleece cover overnight.
That’s it — your evening primroses are now tucked in for the season, quietly preparing beneath the soil.
Come spring, you’ll see fresh green shoots rising before your neighbours have even unpacked their seed trays.
So tell me — are you planning to try direct seeding this autumn, or will you start yours indoors first?
Aftercare Through Autumn to Winter
Once your evening primroses are in the ground, the real test begins — helping them survive the cold without overdoing the care. The key here isn’t constant attention, but balance. These plants like to settle quietly through winter, and your job is to make that possible.
Watering Regime in Autumn / Early Winter
After planting, water deeply once to help the soil settle around the roots. After that, ease off. The cooler temperatures mean evaporation slows down, and overwatering can quickly turn deadly.
Here’s what I follow every year:
- Check moisture once a week by pressing your finger an inch into the soil. If it feels slightly damp, you’re good.
- Skip watering entirely during rainy weeks or if frost is due — wet soil + freezing nights = root rot.
- For potted primroses, tilt the pot slightly or raise it on bricks to allow drainage.
Think of this stage as “less is more.” You’re not feeding growth — you’re protecting roots.
Mulching & Insulation Strategies
A good mulch layer is your best defense against fluctuating winter temperatures. It insulates the soil and prevents frost from lifting young plants out of the ground.
Here’s what works well:
- Straw or shredded leaves: Spread a light 2–3 cm layer around the base.
- Pine needles or bark chips: Ideal if you live in wetter regions — they drain well.
- Frost cloth or garden fleece: Use only during hard freezes or cold snaps; remove once temperatures rise.
Avoid heavy mulches like wet grass clippings — they trap moisture and suffocate the plant.
Monitoring & Early Signs (Pests, Disease, Frost Damage)
Even in cold months, it’s worth doing a quick weekly check.
Watch for:
- Aphids or slugs hiding under mulch on warmer days.
- Black or mushy stems, which signal rot.
- Dry, greyish leaves, a sign of frostburn or dehydration.
If you spot frost damage, gently trim off the affected parts and re-cover with mulch. You’ll be surprised how well these plants bounce back.
When to Reduce Care / Let the Plant Rest
Once temperatures drop steadily below 5°C, stop watering and let nature take over. Evening primroses need that winter dormancy to reset for next year. No fertilizer, no pruning — just peace.
By late winter, you’ll see small rosettes staying green under the mulch. That’s your sign they’re resting, not dying.
What Happens in Spring (for Bloom Setup)
By early spring, your patience pays off. The ground warms, the days lengthen, and those quiet roots begin to push up fresh growth.
Removing Mulch / Awakening Growth
Wait until frost danger has passed before removing mulch — usually when daytime temperatures stay above 10°C. Gently pull it back by hand, don’t rake. You’ll notice the rosette beneath, ready to stretch upward.
For cold regions, remove mulch gradually over a few days so the roots adjust to light and air slowly.
Fertilizer / Feeding (If Needed)
Evening primroses aren’t heavy feeders, but a light meal helps them kick into gear.
- Mix in a handful of organic compost or slow-release granules around the base.
- Avoid high-nitrogen fertilizers — they push too much leaf growth, delaying blooms.
- Water lightly afterward to let nutrients soak in.
A little organic matter here sets the stage for stronger stems and more abundant flowers.
Early Pruning, Tidying & Support for Stems
As stems shoot up, remove any dead leaves or winter debris to improve airflow. For tall varieties, add a small bamboo stake or ring support — it’ll prevent bending once blooms appear.
Light pruning encourages fuller growth, especially if plants grew leggy over winter.
Deadheading & Managing Self-Seeding
Once flowering begins, remove spent blooms regularly to keep energy focused on new buds. But if you love a naturalized look, let a few flowers go to seed — they’ll scatter and regrow the following year.
In small gardens, it’s best to trim seed heads before they burst to prevent over-spreading. For guidance on controlling reseeding, you can refer to Missouri Botanical Garden, which outlines responsible management for self-seeding perennials.
Pests, Diseases & Troubleshooting (Especially for Your Climate)
Evening primroses are hardy, but autumn moisture and spring thaw can invite problems if you’re not alert.
Common Issues (Aphids, Root Rot, Fungal Diseases)
- Aphids: Look for sticky residue or curled leaves. Rinse with water or use neem oil spray.
- Root rot: Caused by heavy, soggy soil. Improve drainage and avoid frequent watering.
- Powdery mildew: Appears as white dust on leaves in humid climates — trim affected parts and improve air circulation.
Mistakes to Avoid
- Overwatering: The most common reason young plants die over winter.
- Planting too deep: Buried crowns can rot under mulch.
- Neglecting frost protection: A single hard freeze without cover can wipe out seedlings.
Rescue Tips (If Seedlings Struggle or Frost Hits)
- Move potted plants to a sheltered porch or greenhouse temporarily.
- If frost damage occurs, trim back blackened areas and apply compost around the base to stimulate recovery.
- For fungal spots, use a mild baking soda spray (1 tsp soda + 1 litre water + a few drops of soap).
By watching your plants weekly and adjusting with the weather, you’ll avoid most common losses. Remember — primroses are tougher than they look. Give them the right start, and they’ll reward you with a show that feels like spring arrived early.
So, how’s your autumn shaping up — mild and forgiving, or are you bracing for those first frosty mornings already?
Timeline & Seasonal Calendar (Autumn → Spring)
Evening primroses have their own rhythm — quiet in winter, lively in spring. This timeline helps you stay in sync without second-guessing what to do next.
Month-wise Schedule (Sept → Mar)
- September:
- Test soil pH and drainage.
- Clear weeds and leftover summer growth.
- Add compost or aged manure and mix lightly.
- Start cold-stratifying seeds if your region frosts early.
- October:
- Direct-sow seeds outdoors or plant seedlings in pots.
- Keep soil slightly moist — not soggy.
- Begin adding light mulch after first cool nights.
- November:
- Add straw or leaf mulch as temperatures drop.
- Inspect for slug or aphid activity under mulch.
- Avoid overwatering; rely on rainfall.
- December:
- Plants rest. Check mulch hasn’t compacted or turned soggy.
- Replace any frost cloths after heavy rain or snow.
- January:
- Minimal action month. Remove any mouldy mulch or debris.
- Watch for early rosettes staying green under cover.
- February:
- Gradually reduce mulch thickness as days warm.
- Water lightly if soil cracks or dries out.
- March:
- Remove mulch completely once frost risk fades.
- Apply organic compost around the base.
- Expect new shoots — your spring display is starting.
Weekly Checklist for Each Month
- Check moisture: touch test once a week.
- Inspect mulch: dry and fluffy, not heavy or mouldy.
- Watch for pests: aphids, slugs, or fungal spots.
- Light tidy-up: remove dead leaves, maintain air flow.
- Enjoy observing: note how the soil, temperature, and buds shift through the months.
A small notebook or digital tracker helps you notice patterns year to year — what worked, what didn’t, and when your first bloom arrived.
If you’re planning a mixed fall garden, consider adding a few low-maintenance veggies alongside your flowers. Some of the easiest options hardly need any effort at all, yet bring life back to your soil through the season. Take a look at our list of 10 easiest vegetables and fruits to grow with zero effort for inspiration.
Design & Companion Planting Suggestions
BBC Gardeners World Magazine
Evening primroses glow brightest when they have the right neighbours.
Where to Place Evening Primroses in the Garden Bed (Height, Backdrop)
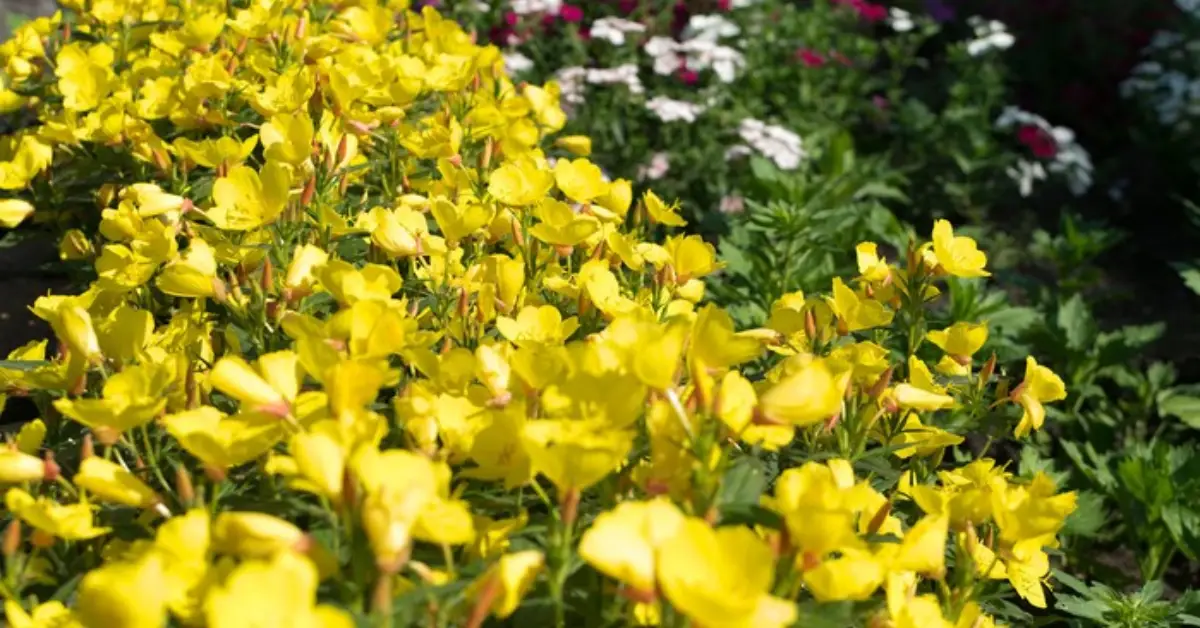
They can reach 2–4 feet tall, so treat them as mid-to-back border plants. They shine against fences, stone paths, or darker shrubs that make their yellow blooms pop at dusk. For wildflower gardens, group them in patches of three to five — the staggered height looks natural and attracts night pollinators.
Good Companion Plants (Night-Bloomers, Low Natives, Grasses)
To create a balanced display and help pollinators, pair them with:
- Moonflowers or nicotiana: for a full evening scent garden.
- Coreopsis or coneflowers: share similar sunlight and drainage needs.
- Ornamental grasses like blue fescue or feather grass: soften the look and stabilize the soil.
- Lavender or salvia: add colour contrast and natural pest resistance.
These companions echo the same low-maintenance rhythm — they thrive in well-drained soil and sunny spots.
Avoid Planting Near Aggressive Spreaders or Shade Trees
Stay away from:
- Mint, bamboo, or creeping Jenny: they crowd roots and steal moisture.
- Large shade trees: they block the sunlight primroses need.
Keeping space around each clump ensures airflow and healthy self-seeding next year.
Cost, Time & Resource Estimate
You don’t need a huge budget — just consistency.
Approximate Time Investment
- Initial prep: 2–3 hours for soil testing and bed clearing.
- Planting day: 1–2 hours for sowing or transplanting.
- Maintenance: 10–15 minutes a week during autumn and spring.
Budget Tiers
- Low-cost (DIY): basic hand tools, seed packet, compost — around $10–$20.
- Moderate: add mulch, trays, frost cloth — about $30–$50.
- Premium: include decorative beds, edging, or irrigation setup — $75+.
Return on Effort
- Expect blooms from late May through August.
- One mature plant can produce dozens of flowers nightly, and self-seeding creates natural drifts over time.
It’s the kind of investment that pays back every year in colour, pollinators, and that quiet pride of “I grew this myself.”
Key Takeaways & First 3 Steps You Should Do Tonight
Three Actionable First Steps
- Test your soil. Grab a pH kit or send a small sample to your local nursery.
- Order your seeds early. Look for Oenothera biennis or similar hardy varieties.
- Clear your planting bed. Remove weeds and old roots so your primroses get a clean start.
What to Avoid Doing Prematurely
- Don’t plant before the first cool nights — soil must lose summer heat.
- Don’t add too much fertilizer; it encourages leaf, not bloom.
- Don’t skip mulch — frost heave can undo weeks of effort.
When you plan your timing and prep right, the payoff is effortless beauty in spring — flowers that open as the sun goes down, glowing like little lanterns across your garden.
Have you tried autumn planting before, or is this your first experiment with cooler-season sowing? Share your experience or questions in the comments — your tip might help another gardener get their first spring bloom right.
For more practical, experience-based gardening guides and plant care tips, visit Plant Care Dairy — where real gardeners grow together, one season at a time.
Disclaimer: The information in this guide is based on general gardening practices and personal experience. Always consider your local climate and soil conditions before planting. For region-specific advice, consult a certified horticulturist or your local agricultural extension service.