
Every gardener I know has a moment like this: you’re walking through your yard one cool September morning, feeling that soft chill in the air, and suddenly you wonder—is it too late to plant anything now? You look at the half-empty beds, maybe a few tired tomato vines, and think the season’s over. I’ve been there too.
The truth? Fall is one of the best-kept secrets in gardening. It’s quieter, the soil’s still warm, and pests finally start to disappear. If you’ve ever struggled to keep plants alive through the brutal summer heat, planting peas and beans in fall feels almost effortless. These crops love the cooler temperatures, and with the right timing, you can harvest sweet, crisp pods long after most people have packed up their trowels.
But most guides online stop at “just plant early.” That’s not helpful. What you really need is a clear plan—which varieties to choose, how to prep the soil, and how to protect your plants from the first frost. That’s what we’ll walk through here, step by step. I’ll show you how to make your fall garden work with the season instead of against it.
Have you ever tried growing peas or beans after summer ended? Tell me what happened—did they thrive or struggle? I’d love to hear your story in the comments.
Understanding What Peas and Beans Need to Thrive
Soil Temperature, Light, and Moisture – The Holy Trio
If there’s one thing I’ve learned after years of planting, it’s this: peas and beans don’t just grow anywhere — they thrive only when the basic trio of soil temperature, light, and moisture is right. You can have the best seeds in the world, but if your soil’s too cold or your light’s too weak, nothing happens.
- Soil Temperature: Peas are early risers. They germinate best when the soil sits between 50°F and 70°F, according to research from the University of Minnesota Extension. Beans, on the other hand, need slightly warmer conditions — around 65°F to 85°F. If you plant too early in cold soil, the seeds can rot before they sprout.
- Light: Both crops crave sunlight, but they’re surprisingly tolerant of shorter fall days. Aim for 6 hours of direct sun daily, and try to keep them away from shaded corners.
- Moisture: Fall’s cooler air means soil doesn’t dry out as fast, but that can also cause overwatering. Keep the soil evenly moist, not soggy, and use mulch to lock in the warmth.
A little trick I use: press your finger into the soil up to the first knuckle — if it feels cool and slightly damp, it’s just right. Fall gardening is less about perfection and more about balance.
Key Differences Between Peas and Beans You Must Know Before Planting
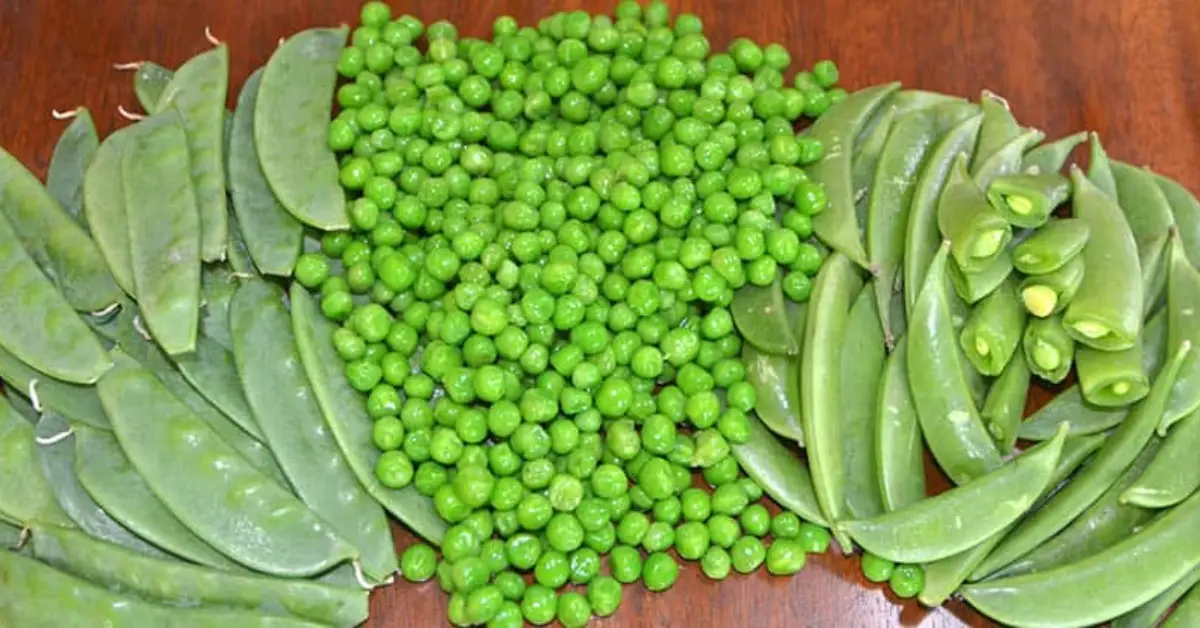
When you’re standing in the seed aisle, it’s easy to treat peas and beans like cousins who behave the same way. They’re not. Knowing what sets them apart can save you weeks of confusion and disappointment.
- Peas prefer cool weather and can handle light frost, making them perfect for early fall or even late summer sowing. They climb gently and don’t like hot soil.
- Beans are heat lovers. They grow fast but stop producing once nights get too cold. If you’re planting in fall, go for quick-growing bush beans so they mature before frost hits.
- Root depth: Peas have shallow roots and do best in well-drained, loamy soil, while beans dig deeper, needing loose, nutrient-rich ground.
- Fertilizer needs: Peas fix nitrogen naturally — they don’t need heavy feeding. Beans benefit from a light compost mix before planting.
Think of peas as the calm, patient growers of fall — and beans as the fast sprinters. Once you understand their pace, your planting schedule practically plans itself.
Choosing the Right Varieties for Fall Planting
Fast-Maturing Pea Varieties for Cooler Climates
Fall doesn’t give you months to experiment — so your best bet is to choose quick-maturing varieties that can beat the frost clock. Over time, I’ve learned that not every pea loves cold nights, but these ones consistently deliver:
- Sugar Ann: One of the earliest snap peas, ready in 50–55 days. Compact and easy to grow in containers.
- Oregon Giant: Large, tender snow peas that handle mild frost well. Great for late-season planting.
- Little Marvel: A classic shelling pea that matures in just 60 days and tolerates cooler soil.
If your fall season runs short (like mine does), start them from seed directly in the soil instead of trays — they hate root disturbance. Just keep the soil evenly moist, and they’ll sprout fast once the temperature stabilizes.
Bush vs. Pole Beans – Which Works Best in Fall?
Here’s the big question I get every autumn: “Should I plant bush beans or pole beans?” The answer depends on how much time you have before frost.
- Bush beans are your best friend for fall. They mature in 45–60 days, grow low, and don’t need staking. Varieties like Provider, Contender, or Topcrop can give you solid yields before the first cold snap.
- Pole beans take longer — often 70–85 days — but keep producing longer once they start. Unless you’re in a warm southern zone, they may not fully mature before winter.
- For a small garden, bush beans are easier to manage, while pole beans suit raised beds or vertical spaces.
If you’ve never tried it before, plant both side by side once — you’ll see how dramatically their timing differs. Watching them race against the season teaches you more than any guide ever could.
Step-by-Step Guide to Fall Planting
Step 1 – Prep Your Soil With Compost and Drainage in Mind
Before you even touch the seed packets, spend time with your soil. Fall planting succeeds or fails right here. I always start by clearing out old summer plants, loosening compacted soil, and mixing in aged compost or well-rotted manure. This adds nutrients and improves structure for better drainage — crucial when cooler weather brings more moisture.
If your garden tends to hold water after rain, raise your beds slightly or mix in coarse sand to prevent root rot. Healthy soil should crumble in your hand — not clump or feel sticky. Think of this as setting a comfortable bed for your peas and beans to rest in.
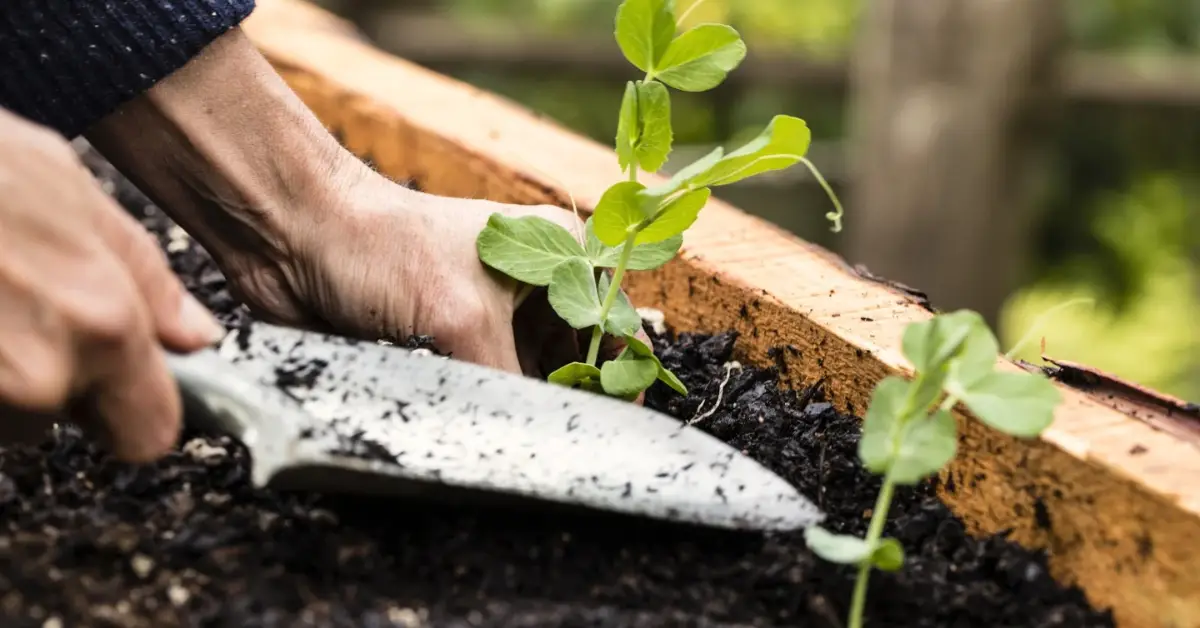
Step 2 – Soak, Sow, and Space the Seeds Properly
Pea and bean seeds love a little hydration boost before planting. I soak mine in room-temperature water for 4–6 hours — long enough to soften the outer shell but not so long that they split. This jump-starts germination, especially in cooler fall soil.
When sowing:
- Peas: Plant 1 inch deep, spacing seeds about 2 inches apart in rows 18–24 inches apart.
- Beans: Go slightly deeper, around 1.5 inches, with 3–4 inches between seeds.
- Cover lightly with soil, pat gently, and don’t overpress — roots need oxygen as much as moisture.
A simple garden string line helps keep rows straight. I know it sounds fussy, but trust me — neat rows make watering and harvesting much easier later.
Step 3 – Timing Is Everything: When Exactly to Plant in Fall
This step separates guesswork from success. You don’t want to sow too early (heat stress) or too late (frost bite). Here’s how I calculate it:
- Check your local frost date and count back 8–10 weeks — that’s your ideal sowing window.
- For most areas, that’s late August through mid-September, though warmer regions can stretch into early October.
- Peas tolerate cooler soil, so plant them first. Wait a week or two before sowing beans, which need slightly warmer ground.
If you’re unsure of your exact window, use the frost date calculator from The Old Farmer’s Almanac. It’s free, location-based, and saves a lot of disappointment.
Step 4 – Watering and Mulching for Temperature Stability
Watering in fall feels easier, but it still needs consistency. I’ve found that deep watering twice a week works better than daily surface sprinkling. It pushes roots deeper, making plants sturdier against sudden chills.
After watering, add a 2–3 inch mulch layer of straw or shredded leaves around your plants. It keeps soil temperature steady, prevents weeds, and locks in just the right amount of moisture. A few stubborn weeds might still sneak through, but you can handle them safely using a simple, eco-friendly method — here’s how to kill weeds with salt without harming your plants.
If you’re using raised beds, be careful not to overwater — cooler weather slows evaporation, and soggy soil suffocates roots. Think of mulch as your crop’s thermal blanket; it protects without overheating.
Protecting Your Fall Crop From Frost
How to Use Row Covers and Cold Frames for Extra Warmth
When temperatures start flirting with freezing, it’s time to act fast. I keep lightweight row covers folded nearby — they’re cheap, reusable, and can raise the temperature underneath by 4–6°F. You can drape them over stakes or hoops to keep them off the plants.
If you’re serious about extending your harvest, cold frames are a game changer. I built mine using old window panes and scrap wood — nothing fancy, just effective. They trap daytime heat and release it slowly overnight, creating a mini greenhouse effect that peas and beans love.
Quick tip: prop one corner open during sunny days to prevent overheating and condensation buildup.
When to Harvest Before the First Frost Arrives

Peas are generous; they’ll signal readiness when pods feel plump and bright green. Beans, however, need you to stay alert — pick them before the pods harden or seeds bulge. Waiting too long makes them stringy and tough.
I usually start harvesting 2–3 weeks before the average frost date, even if pods aren’t fully mature. That small sacrifice ensures you get crisp, sweet produce instead of frostburned vines.
And if frost sneaks in early, don’t panic. Pick whatever’s ready and cover the rest overnight — sometimes, a single mild frost won’t kill the plants if they’re healthy.
Organic Pest and Disease Control for Cool-Season Legumes
Watch Out for Aphids, Slugs, and Root Rot
Even in the cooler months, pests don’t take a break — they just move slower. I’ve seen many fall gardens fail, not because of cold, but because of hidden pests that thrive quietly in damp soil.
Keep an eye out for:
- Aphids: Tiny green or black insects that cluster under pea leaves and suck the sap, leaving the plant weak and curled.
- Slugs and snails: They love moisture and can chew through young bean shoots overnight.
- Root rot: Common in poorly drained beds; it turns roots brown and mushy. Once it starts, there’s no recovery.
The trick is prevention — not reaction. Make sure your soil drains well, avoid overwatering, and check leaves regularly. A single slug can undo a week of growth, so catching them early saves frustration later.
Natural, Non-Toxic Fixes Using Kitchen Ingredients
You don’t need harsh chemicals to keep your plants safe. I’ve been using a few easy, kitchen-based remedies for years, and they work surprisingly well for fall crops:
- Neem oil spray: A gentle, organic solution that disrupts pest growth without harming pollinators.
- Vinegar-water mix: A light mist (1 part vinegar to 10 parts water) repels slugs and mites — just don’t overuse it on tender leaves.
- Garlic and chili infusion: Boil crushed garlic and chili flakes in water, cool it down, and spray on leaf undersides. It’s a natural deterrent that doesn’t harm the soil.
- Beer traps: For slugs, bury small bowls of beer at soil level — they’re drawn in and can’t escape. Simple, cheap, and chemical-free.
These gentle fixes not only protect your plants but also keep your soil life healthy — which is something pesticides often destroy. Fall is all about balance: enough control to protect your crop, but not so much that you lose the life that helps it thrive.
Extending Your Harvest – Companion Crops and Succession Planting
Crops That Pair Well With Fall Peas and Beans (Spinach, Radish, Lettuce)
If you want your garden to stay productive longer, don’t stop at peas and beans. Companion planting is one of the smartest ways to get more yield from the same space — and it helps keep pests away naturally.
Here are a few fall crops that work beautifully alongside legumes:
- Spinach: Grows quickly and benefits from the nitrogen peas add to the soil.
- Radish: Its short harvest time (25–30 days) makes it perfect for filling gaps between rows.
- Lettuce: Thrives in cool weather and enjoys the partial shade from taller pea vines.
I often tuck lettuce seedlings between pea rows — they stay tender and crisp longer, even when the air starts to chill. Just remember not to overcrowd; every plant needs space to breathe.
If you’re short on garden space, try companion planting with container crops like green onions — they grow fast, need little maintenance, and make perfect use of the gaps between pea or bean rows.
How to Stagger Planting for Continuous Yield
Fall’s biggest challenge is time. Once frost arrives, it can end your harvest overnight — unless you plan ahead. The secret is succession planting: sowing new seeds every couple of weeks so that something is always growing.
Here’s what works for me:
- Start with peas and bush beans in early fall.
- Two weeks later, add another row of peas or quick greens like spinach.
- Mid-fall, switch to frost-tolerant greens or overwintering onions once beans finish.
Each round keeps your soil active and your harvest continuous. It’s a small rhythm — plant, wait, harvest, repeat — that turns even a tiny garden into a steady food source.
Simple Harvest and Storage Tips
When Peas and Beans Are Ready to Pick
Harvesting at the right time makes all the difference. I’ve learned that picking just a few days too late can turn tender pods into tough, fibrous ones.
Here’s what to watch for:
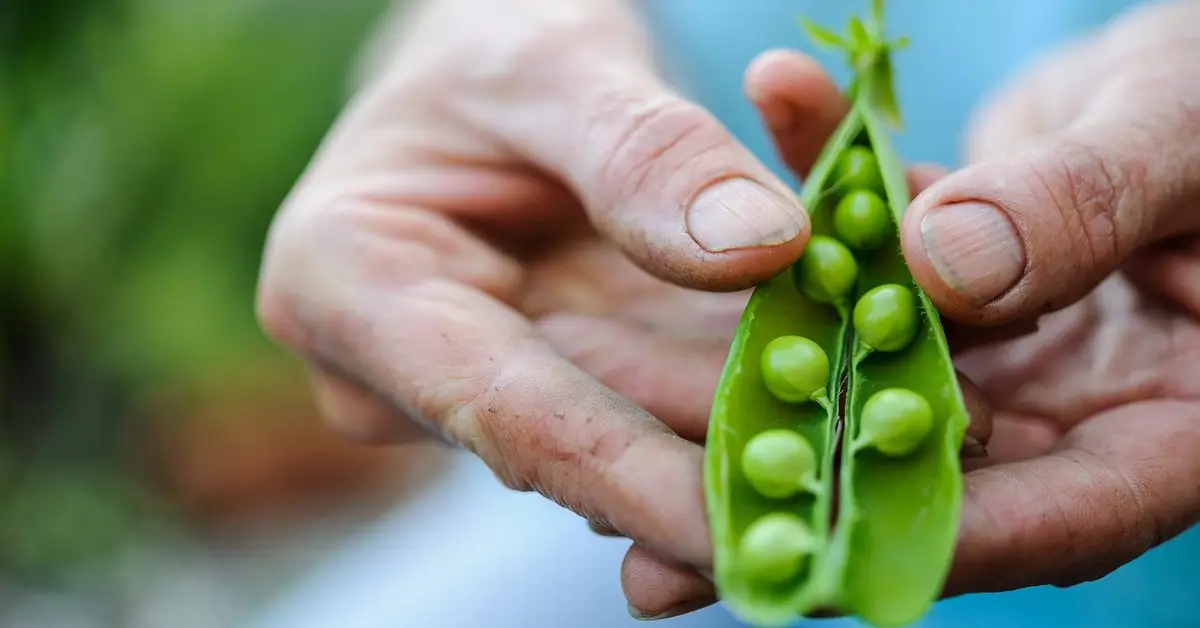
- Peas: Check the pods every few days once flowers fade. They should look plump, bright green, and slightly glossy. If they start to bulge or feel stiff, they’re overripe.
- Beans: Pick when pods are firm and smooth, before the seeds inside swell too much. Continuous picking encourages new flowers — skip a few days, and the plant thinks it’s done for the season.
- Always harvest gently, using two hands — one to hold the vine, one to snap the pod. It prevents tearing delicate stems that could still be producing.
A quick tip I swear by: harvest in the morning, when the pods are crisp and hydrated. They store better and taste sweeter that way.
If you enjoy that crisp satisfaction of harvesting at just the right time, you’ll also love learning how to harvest eggplant the right way — it’s another crop where timing makes all the difference in taste and texture.
Best Ways to Dry, Freeze, or Save Seeds for Next Season
Once you’ve picked your crop, the goal is to lock in freshness — or, if you’re planning ahead, save seeds for next year’s planting.
Here’s how I handle it:
- Drying: Lay peas or beans in a single layer on a tray indoors for 2–3 days. When pods rattle, they’re ready to shell. Store dried beans or seeds in airtight jars in a cool, dark place.
- Freezing: Blanch fresh pods in boiling water for 2–3 minutes, cool them quickly in ice water, pat dry, and freeze in small portions. This keeps flavor and color vibrant for months.
- Saving Seeds: Choose your healthiest pods and let them dry completely on the plant. Once crisp, shell them and store the seeds in paper envelopes — never plastic — to prevent moisture buildup. Label them with variety and date.
Doing this turns every harvest into an investment for the next season. There’s nothing more satisfying than growing a plant from your own saved seeds — it feels like your garden’s legacy continuing.
Key Takeaways – Your Fall Garden Game Plan
Quick Recap Checklist for Pea and Bean Success
Before you hang up your gloves, here’s a quick recap to keep handy for your next round of fall planting:
- Choose fast-maturing varieties like Sugar Ann (peas) and Provider (beans).
- Plant in well-drained, compost-rich soil between 50°F–70°F.
- Soak seeds before sowing for faster germination.
- Water deeply twice a week and mulch for warmth.
- Protect young plants with row covers when frost looms.
- Watch for aphids, slugs, and rot — act early with natural fixes.
- Harvest in the morning for best flavor and freshness.
- Save healthy pods for next season’s seeds.
This list may look simple, but following it each year gives your garden a rhythm that feels second nature.
Bonus Tip – How to Enrich Soil for Spring After Harvest
Once your fall crops finish, your garden doesn’t need to rest — it needs renewal. I always spread a thin layer of compost and shredded leaves right after clearing the beds. This keeps microbes active through winter and adds nutrients that spring crops will love.
If you want to go the extra mile, try planting cover crops like clover or winter rye. They prevent erosion, improve texture, and add nitrogen — all while protecting your soil from frost damage.
Think of it as your garden’s version of self-care: a quiet recovery phase that ensures stronger growth next time.
Your turn: What’s your favorite way to store beans or prep your soil after harvest? Share your best fall garden hack in the comments — your tip might inspire a new gardener this season.
For more expert plant care tips, seasonal guides, and eco-friendly gardening ideas, visit Plant Care Dairy — your trusted companion for growing a greener home garden.
Disclaimer: The gardening tips shared in this article are based on general best practices and personal experience. Always consider your local climate, soil conditions, and frost dates before planting. Plant Care Dairy is not responsible for individual results or regional variations.