The first time I planted blackberries, I got scratched up, the canes tangled, and the fruit tasted more tart than sweet. What fixed it wasn’t a magic product—it was getting a few basics right: the right variety, a simple pruning plan, and steady water when the plants actually need it.
A lot of advice online feels mixed because blackberries aren’t one-size-fits-all. Some grow upright, others trail and need support; most fruit on last year’s canes, and your climate changes the timing. What works in your neighbour’s yard might flop in yours—and that’s normal.
Here’s what I’ll do for you in this guide: cut the fluff and focus on what moves the needle. We’ll pick a type that fits your space, plant in sunny, well-drained soil, set up simple horizontal wires early so pruning is painless, and keep moisture consistent—especially around flowering and ripening. Experts note that blackberry bushes generally need about an inch of water a week, sometimes up to four inches during harvest.
I’ll also cover the things most articles skip: how to stop plants from taking over, when to remove fruited canes so new canes have room, and low-stress ways to protect berries from birds without turning the bed into a fortress.
If you’ve been fighting thorns, floppy canes, or small harvests, you’re in the right place. I’ll show you a clean, seasonal routine you can actually keep. No jargon—just practical steps that give you sweeter bowls and fewer headaches.
Before we dive in, tell me: what’s your biggest blackberry headache right now—not enough fruit, canes out of control, or birds beating you to the crop?
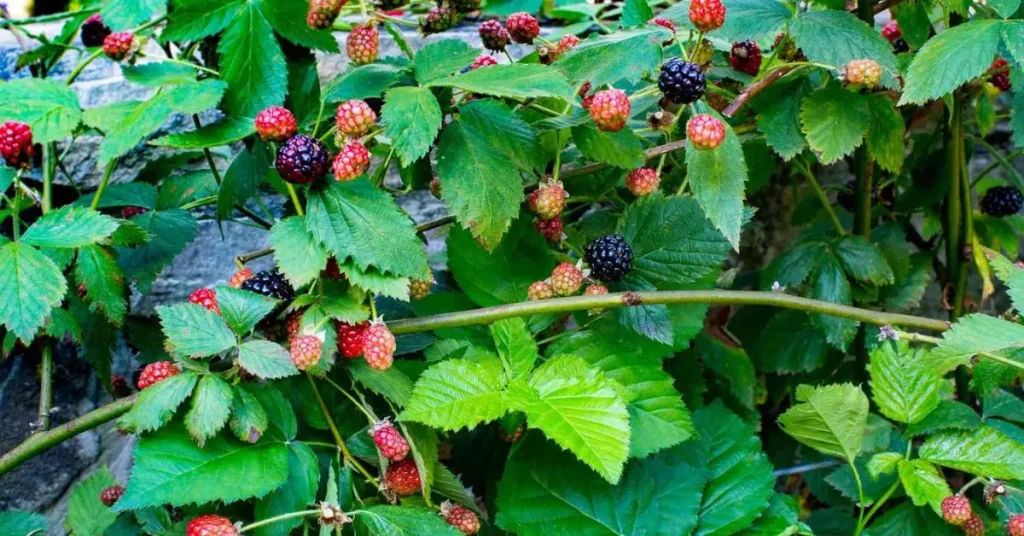
1. Know Your Bush—Variety Matters

Choose the Right Type (Erect vs Trailing, Thornless vs Thorny)
When I first started with blackberries, I didn’t even know there were different types. I just thought a blackberry was a blackberry. The truth is, the type you pick makes a huge difference in how much space you need, how much work you’ll put in, and even how often you’ll get scratched.
Here’s how I think about it:
- Erect varieties – These grow upright, don’t sprawl as much, and usually don’t need heavy trellising. Perfect if you have a smaller space or don’t want to mess with a lot of support systems.
- Trailing varieties – These send out long, flexible canes that must be tied to wires or trellises. They can produce heavily but only if you manage them well.
- Thorny varieties – Old-school types, often with bigger yields and strong flavor, but you’ll pay with scratches and thick gloves.
- Thornless varieties – Friendlier for beginners and kids, much easier to manage, and still capable of producing great crops. If you’re trying to make the most of your small space, growing edible flowers can be an excellent companion to your blackberries, creating a vibrant garden while offering a low-maintenance addition.
If you’re short on time and space, go with erect and thornless. If you’re chasing the most fruit and don’t mind extra effort, trailing or thorny might suit you.
Spotlight on ‘Navaho’ Thornless Blackberry
One variety I recommend for home gardeners is the ‘Navaho’ thornless blackberry. It’s upright, easy to prune, and doesn’t claw you every time you walk past it. What I like about it most is that it’s disease-resistant and doesn’t sprawl everywhere.
Gardeners often note a few standout points with Navaho:
- Produces large, sweet berries that ripen evenly.
- Has a compact habit, so it’s perfect if you’re working with raised beds or a small backyard.
- Requires less aggressive pruning compared to trailing types.
- Handles hot summers fairly well as long as you keep watering consistent.
If you’ve ever struggled with blackberries taking over, Navaho gives you a lot of the fruit without the chaos.
2. Planting Right Sets the Foundation
Best Time & Place to Plant
Planting blackberries in the wrong spot is like setting up a tent in a swamp—you’ll regret it later. I learned the hard way that shade and soggy soil are your biggest enemies.
Here’s what works best:
- Time: Plant when the bush is dormant—late winter or very early spring is ideal.
- Location: Choose a sunny spot with at least 6–8 hours of direct light. Shade leads to weak growth and sour berries.
- Spacing: Give each plant at least 3–5 feet apart so air can move freely and disease doesn’t spread. When preparing your planting site, make sure to avoid any common bird bath placement mistakes, as the wrong positioning can attract pests and disrupt the balance in your garden.
- Avoid planting near raspberries—they share diseases and pests that can cross over.
- Room for suckers: Blackberries love to send up new shoots from the roots. Plan a space where you can either let them spread or cut them back easily.
Soil Prep, Planting Steps & Watering Schedule
The way you start your blackberry bush often decides how well it performs in the years ahead. I like to think of it as “set them up right once, and they’ll feed you for a decade.”
Steps I follow for planting:
- Loosen the soil about 12–18 inches deep and mix in compost.
- Dig a hole just wide enough for the roots to spread comfortably.
- Soak the roots in water for an hour before planting—this gives them a head start.
- Set the crown of the plant at soil level and cover with soil.
- Press the soil down gently and water immediately.
Watering tips to remember:
- For young plants, keep the soil evenly moist during the first year.
- Blackberries usually need about 1–2 inches of water per week; during harvest, that can jump up to 4 inches, according to the Arbor Day Foundation.
- Use mulch around the base to hold moisture and keep weeds away.
If you follow these basics, your plants won’t just survive—they’ll thrive, giving you healthier canes and better berries year after year.
3. Train & Tame—Support & Trellis Tactics

Support Tips for Different Types
One thing I wish I had understood earlier is just how wild blackberry canes can get. Without some kind of support, they’ll sprawl on the ground, root wherever they touch, and quickly turn into a tangled mess. The type of blackberry you grow decides how much structure you’ll need.
- Erect types: These can stand more or less on their own but still benefit from a single horizontal wire or simple post system. It keeps the canes off the ground, which means fewer diseases and easier harvesting.
- Semi-erect types: A bit in-between—sturdier than trailing but still need support. A two-wire trellis usually works well.
- Trailing types: These absolutely need a trellis. Systems like a T- or V-shaped trellis make it easier to spread the canes and keep air flowing through the bush.
Good trellising not only makes your blackberry patch tidier but also helps you get bigger, cleaner, and sweeter fruit because the canes stay healthier and easier to manage.
Gardener Advice: DIY Trellis Hacks from Reddit
Not every gardener wants to spend big money on a trellis system, and honestly, you don’t have to. Many home growers get creative with simple supplies.
This kind of approach is easy to scale up or down depending on your space. It also proves that blackberry care doesn’t have to be complicated—you just need a system that keeps canes upright and organized.
4. Pruning—Your Bush’s Health Blueprint
Understanding Cane Life and Pruning Timing (Primocane vs Floricane)
Here’s where a lot of people slip up. Blackberries grow on a two-year cycle. The first-year canes (primocanes) grow tall and leafy but won’t fruit until their second year. The following summer, those second-year canes (floricanes) bear fruit—and then they die.
If you don’t remove those old canes, they’ll crowd the plant and block sunlight from reaching the new growth. Once you understand this cycle, pruning stops feeling intimidating. It’s just about clearing the old to make way for the new. After getting your blackberry canes under control, it’s a good idea to learn about how to plant pumpkins in the fall for additional crop rotation and improved soil health.
Seasonal Pruning Guide—Winter, Summer, Fall
Pruning isn’t a once-a-year task. The best results come when you adjust care across the seasons.
- Winter: Cut out the dead floricanes after they’ve fruited. You’ll spot them because they’re brown, brittle, and no longer producing healthy leaves.
- Summer: Tip back primocanes once they reach about 3–4 feet tall. This encourages them to branch, which means more potential fruiting wood next year.
- Fall: Do a light tidy-up—remove weak or broken canes and clear debris at the base to reduce overwintering pests.
If you keep this rhythm, your plants will stay balanced and productive. A messy, unpruned blackberry patch quickly loses vigor and is much harder to recover.
For more detailed trellis and pruning systems, the LSU AgCenter has excellent diagrams and guidance that home gardeners can easily adapt.
5. Watering, Mulching & Feeding for Healthy Growth

Smart Watering Through The Year
I’ve learned the hard way that blackberries don’t like extremes. If you let them dry out, the berries shrivel. If you soak them constantly, the roots suffocate. What they need is steady, deep watering.
- In spring, give young plants consistent moisture so new canes can push strong.
- During fruiting, plan for 1–2 inches of water per week, and in peak summer heat, closer to 4 inches.
- Always water at the base—wet leaves invite disease.
- A slow soaker hose works best, because it delivers moisture straight to the roots.
Blackberries reward consistency. Think of it as keeping a steady pulse in the soil.
Mulch & Nutrients—When to Feed
Mulch is your blackberry bush’s silent worker. It keeps the soil cool, traps moisture, and blocks weeds without you lifting a finger. I usually spread a thick layer of straw or bark mulch each spring.
Fertilizer, though, is one place where less is more. The first year, your plants don’t need much—they’re busy settling in. From the second year onward, you can feed lightly in spring if the growth looks weak. Overfeeding just pushes leafy growth instead of sweet berries.
As noted by The Spruce, a balance of mulch, compost, and careful feeding usually keeps blackberries productive without any fuss.
6. Pest, Disease & Spread Control—Stay Ahead
Common Pests & Disease Watchlist
Blackberries can look tough, but they’re not immune to trouble. A few things to watch for:
- Cane borers that cause swelling and weaken stems.
- Orange rust or anthracnose, which show up as yellowing or spotted leaves.
- Stink bugs and beetles that chew through berries before you get to them.
Your best defense is prevention. Keep the patch airy, prune out old canes, and avoid wetting the leaves when watering. A clean, open patch is far less likely to attract disease.
Invasiveness & Volunteer Management
This is where blackberries show their wild side. If you don’t keep up, they’ll spread fast—sending up shoots feet away from the main plant and rooting wherever a cane touches the ground.
Gardeners often say things like:
“Anything that touches the ground will root… control them.”
“They spread underground and can take over fast.”
The fix is steady maintenance:
- Mow or cut down unwanted shoots.
- Pull out young runners before they settle in.
- Use heavy mulch or barriers where you don’t want spread.
- Stay disciplined with pruning so the patch doesn’t choke itself out.
7. Harvesting & Post-Harvest Tips
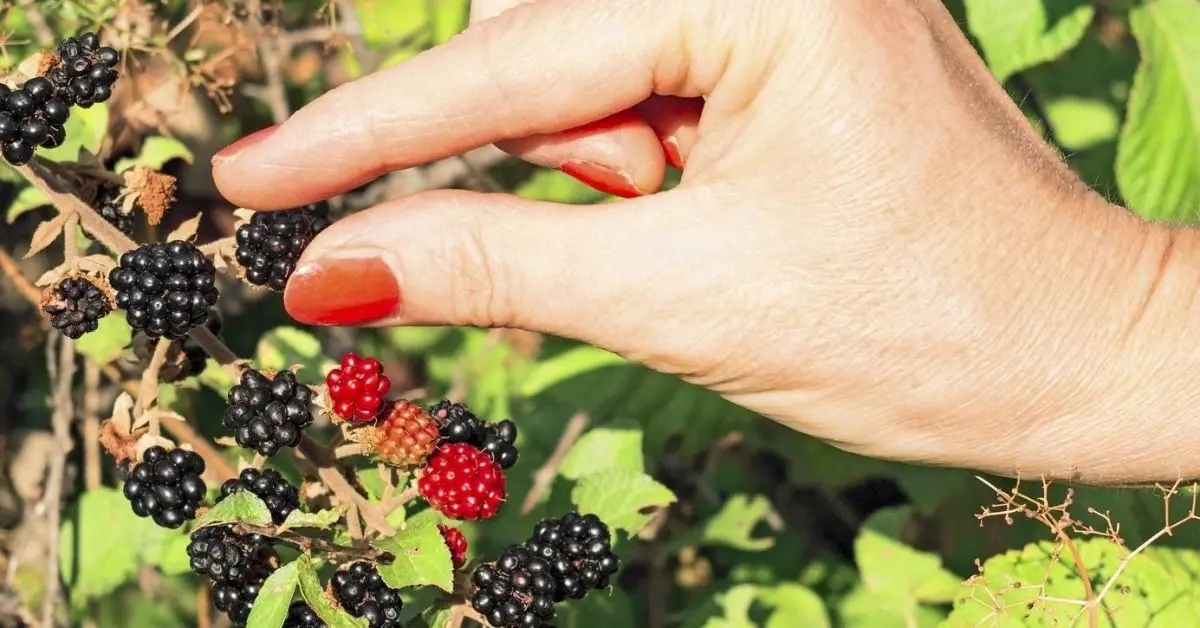
When & How to Harvest for Sweetest Berries
The hardest part of growing blackberries is waiting just a little longer. They may look ripe when they turn dark, but the sweetest berries only slip off the stem with a gentle tug. If you have to pull hard, they’re not ready.
- Harvest in the cool morning for firm, fresh berries.
- Collect in shallow baskets so they don’t crush each other.
- Hold off on washing until just before eating—it shortens shelf life.
That extra patience makes all the difference in flavor.
Storage & Aftercare
Once picked, blackberries are fragile. Straight into the fridge is best, and even then, they’ll last about 4–5 days. For longer storage, freeze them in a single layer first, then bag them—no clumps, no mess.
And don’t forget your plants. After harvest, cut out the old canes that fruited so new ones have space and energy for the next season.
Bonus Tips from the Field
Natural Pest Deterrents—Garlic Spray, Hand Wiping, Netting
Not every problem needs chemicals. A few home fixes go a long way:
- A light garlic spray can deter aphids.
- Wiping leaves by hand works when pests are just starting.
- Bird netting keeps your crop safe when berries ripen—you’ll get them before the birds do.
Simple steps, but they add up to a healthier harvest.
Final Section: Smart Planning for Long-Term Success
Keep It Sustainable—Rotate Varieties, Clean Tools, Plan Ahead
One thing I’ve learned after years of tending blackberry bushes is that long-term success doesn’t come from quick fixes. It comes from steady habits. If you keep planting the same type in the same spot year after year, pests and diseases eventually catch up. Rotating varieties or even shifting your patch every so often keeps the soil and plants healthier.
Another simple but overlooked step is cleaning your tools. Pruners, shears, even gloves can carry spores and pests from one cane to the next. A quick wipe with alcohol after pruning goes a long way toward preventing disease build-up.
And most importantly, plan ahead. Blackberries are perennial—they’ll reward you for a decade if you treat them right. Think about spacing, trellis strength, and harvest handling not just for this year, but for the seasons to come.
Gardeners’ Reminder: Tailor to Climate & Zone
No two gardens are the same. What works beautifully in a warm southern climate might flop in a cooler northern one, and vice versa. That’s why it’s always worth checking your local extension service or trusted gardeners in your area.
- In hotter regions, focus on varieties that handle heat and make sure mulch is deep to keep roots cool.
- In colder zones, select cultivars with lower chilling-hour requirements so they’ll fruit reliably.
- If you’re in a rainy climate, airflow and disease-resistant types matter more than yield.
Your blackberry patch should reflect your space, your weather, and your time. Adapt the basics to your own zone, and the rewards will come back in bowls of sweet fruit year after year.
What about you? Have you tried growing blackberries before—did you struggle more with pests, pruning, or keeping them from spreading? Share your own tips and experiences in the comments below. Your story might help another gardener!
For more practical gardening tips, seasonal care guides, and plant science insights, visit Plant Care Dairy. It’s where gardeners like you find fresh, trustworthy advice to keep every plant thriving.
Disclaimer: The information shared in this article is for general gardening guidance only. Growing conditions vary by location, so always consider your local climate and consult trusted regional resources before making planting or care decisions.