I still remember the first time my boxwoods started turning brown. It was late winter, and what had been a solid green hedge all year suddenly looked tired—patches of tan spreading from the tips inward. At first, I thought it was just the cold. Then I blamed watering, or maybe the soil. But when the colour kept spreading, I knew something deeper was going on.
If you’ve ever walked into your yard and seen your boxwood leaves fading or crisping up, you know that sinking feeling. These shrubs are supposed to be dependable, evergreen, and elegant. When they start to decline, it’s not only frustrating—it’s confusing. Is it a disease? Is it the weather? Did you do something wrong?
Over the years, I’ve learned that browning isn’t random—it’s your plant trying to tell you something. In this guide, I’ll show you how to read those signs, identify the real cause, and fix it before the damage spreads. What’s your boxwood trying to tell you?
The Symptom – “My boxwood hedge is losing its green”
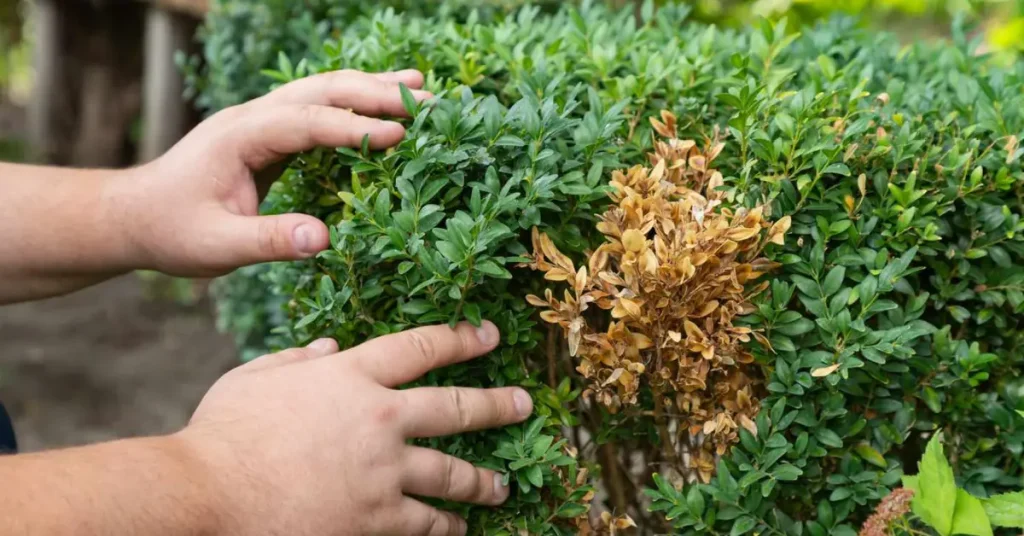
The first sign that something’s wrong with your boxwood usually isn’t dramatic. It starts with a few dull leaves, maybe a faded patch that looks slightly yellow or bronze. Before you know it, that patch spreads, and what was once a lush green hedge starts to look patchy and weak.
I’ve been there too—standing in front of my shrubs, trying to figure out if it’s the weather, the soil, or something I did wrong. The truth is, browning rarely happens overnight. It’s your plant sending small distress signals that we often miss until the damage becomes visible.
You might notice:
- Leaves turning from bright green to dull yellow or brown.
- Tips drying out faster than the inner foliage.
- Dead twigs appearing in the centre of the shrub.
- Uneven colour across the hedge—one side worse than the other.
When your boxwood loses its green, it’s not just an aesthetic issue—it’s a sign your plant is struggling to survive in its environment. The key is learning to read those early signs before they spread.
What You’re Searching vs What You’re Finding
If you’re here, you’ve probably already typed something like “Why does my boxwood turn brown?” or “How do I fix boxwood browning?”—and maybe you’ve read a dozen articles that all sound the same. Most tell you it could be “watering” or “fungus,” but they stop short of showing you how to actually fix it.
I remember feeling the same frustration. You want clarity, not a list of guesses. You want to know which problem you’re facing—and whether your shrubs can recover. That’s where most guides fall short. They explain the causes but rarely connect them to visible symptoms or real solutions.
So, in this guide, I’ll take you step-by-step through both the “why” and the “what to do now,” so you can identify your exact problem and save your boxwoods before they decline further.
Quick Answer
Before we dive deep into each cause, here’s a quick reality check I wish I’d had when I first dealt with boxwood browning.
If your boxwoods are turning brown, it’s usually one of these five things:
- Over or under watering — Roots can’t breathe when soil stays soggy, or they dry out completely if neglected.
- Winter or wind damage (desiccation) — Cold winds and frozen soil pull moisture from the leaves faster than roots can replace it.
- Salt or road spray damage — If you live near roads or driveways, salt can scorch your plants.
- Fungal disease or pests — Leafminer, psyllid, or blight can attack weak or stressed plants.
- Soil and site problems — Poor drainage, compacted soil, or over-mulching often create long-term stress.
According to the University of Maryland Extension, boxwood leaves often “turn from bronze to reddish-brown as a result of exposure to cold, dry winter winds”—a clear sign of winter desiccation and stress.
If you spot these symptoms early, don’t panic. Most boxwoods bounce back once you correct the cause—especially if you act before new growth begins.
Deep Dive Into the 7 Common Causes

1. Winter Desiccation / Wind & Sun Burn
I’ve seen many boxwoods look perfectly fine in early winter, only to turn bronze or brown by spring. That’s classic winter desiccation—when cold winds and bright winter sun pull moisture out of the leaves faster than frozen roots can replace it. The result? Dry, brittle foliage that never quite recovers.
Here’s how to fix it:
- Apply 2–3 inches of mulch around the base to keep soil temperature stable.
- Use a burlap screen or windbreak to block harsh winter gusts.
- Choose a partially shaded site instead of full afternoon sun.
- In exposed spots, spray an anti-desiccant to help leaves retain moisture.
Even experienced gardeners mistake this for disease, but it’s simple environmental stress. Once you prevent dehydration, your boxwoods will hold their green through the cold months.
2. Salt or De-Icing Spray Damage
If your boxwoods sit near driveways or sidewalks, salt is often the silent culprit. During winter, road salt and de-icing sprays can splash onto leaves or leach into the soil, burning roots and drying out foliage.
What you can do:
- Rinse the shrubs with clean water after snow melts to flush away salt.
- Create a low barrier with landscape fabric or burlap to block salt spray.
- Avoid planting boxwoods within a few feet of salted pavement.
- Choose salt-tolerant varieties for high-exposure areas.
It’s a common issue in cold regions that many guides skip, but salt injury can mimic disease—so recognizing it early can save your entire hedge.
3. Drought or Improper Watering
When I first planted boxwoods, I thought watering them weekly was enough—until I learned how sensitive they are to extremes. Too little water leaves them crispy and brown; too much suffocates roots and turns leaves dull and lifeless.
Here’s what works:
- Check moisture at root depth—not just the surface.
- Make sure your soil drains freely; boxwoods hate standing water.
- Adjust watering based on the season—less in winter, more during heatwaves. The same moisture imbalance that turns boxwood foliage dull can also affect indoor plants — here’s a complete guide on why Dracaena leaves turn brown and what simple watering tweaks can bring them back to life.
Most people assume their boxwood is diseased when it’s simply dehydrated. Getting the watering right is one of the fastest ways to bring colour back to your shrubs.
4. Soil and Planting Problems
Sometimes the problem isn’t the weather—it’s the ground beneath your feet. Compacted soil, poor drainage, or over-mulching all suffocate roots and block nutrients, leading to yellowing, dieback, and uneven growth.
Fix it with these steps:
- Loosen compacted soil around the base using a hand aerator.
- Ensure the shrub is planted at the same depth as in its nursery pot.
- Remove heavy mulch layers and replace with a thin, breathable cover.
- If water pools after rain, improve drainage with organic matter or sand.
This kind of “root stress” rarely gets mentioned, yet it’s behind many slow-declining boxwoods. A healthier soil foundation can often reverse months of browning.
5. Pests: Leafminers, Psyllids, and Mites
Tiny pests can do big damage before you even notice. The boxwood leafminer, for example, tunnels between leaf layers, leaving blistered brown spots. Psyllids curl new growth, while mites cause fine bronzing.
What you can do:
- Inspect the underside of leaves for webbing or small larvae.
- Prune and dispose of affected branches to stop spread.
- Use horticultural oil in early spring to smother eggs.
- Encourage natural predators like ladybugs to keep populations low. If you’ve ever noticed tiny holes in plant leaves across other shrubs or houseplants, that’s often the first clue of hidden pest activity — the same early warning your boxwoods might be giving you right now.
These pests thrive in stressed plants, so improving overall care reduces outbreaks naturally.
6. Diseases: Boxwood Blight, Volutella Blight, and Root Rot
Few words worry gardeners more than boxwood blight—a fast-spreading fungal disease that can strip a shrub bare in weeks. Volutella blight causes pinkish-orange spores and dieback, while root rot thrives in soggy soil.
Here’s the plan:
- Remove and dispose of infected plants; never compost diseased debris.
- Disinfect tools after every cut to prevent spread.
- Improve air circulation between shrubs by thinning dense growth.
- For persistent issues, apply a labeled fungicide or replant with resistant varieties.
According to Michigan State University Extension, early detection is critical since blight spores can survive on tools and soil long after the plant dies.
Recognizing disease early can save your landscape and stop the infection before it spreads to neighboring plants.
7. Site Issues & Variety Mismatch
Not every boxwood is suited to every spot. Sometimes the issue isn’t disease or weather—it’s simply the wrong shrub in the wrong place. Too much sun, reflected heat, or even dog urine can create patchy brown areas that mimic blight.
Here’s how to fix it:
- Choose cultivars suited to your zone and light conditions.
- Keep pets away from base areas or install small barriers.
- Replant sensitive varieties where they’ll get morning sun and afternoon shade.
- Avoid reflective surfaces like metal fences or white walls nearby.
It’s easy to blame disease when the real issue is compatibility. Matching the right plant to the right site gives your boxwoods a long, healthy life—and saves you from endless troubleshooting later.
Tools & Maintenance Checklist

Once you’ve identified what’s turning your boxwood brown, a few reliable tools can make ongoing care much easier. I’ve learned that the right gear doesn’t just solve problems—it helps you prevent them altogether.
Here are five essentials every boxwood grower should have:
- Soil Moisture Meter – Helps you avoid overwatering or underwatering by showing how damp the root zone really is.
- pH Test Kit or Soil Test – Boxwoods prefer slightly alkaline soil (around 6.5–7.5). Regular testing helps maintain balance and nutrient uptake.
- Horticultural Oil or Insecticidal Soap – Perfect for controlling leafminers, mites, and other soft-bodied pests without harsh chemicals.
- Fungicide & Protective Materials – Keep a small stock of burlap, anti-desiccant spray, and a labeled fungicide for emergencies.
- Boxwood Maintenance Calendar – A seasonal guide (spring pruning, summer watering, winter prep) keeps your care routine consistent.
These simple tools make the difference between reacting to problems and preventing them before they start. If you’re seeing similar colour changes in your indoor plants, like Peace Lily leaves turning yellow, it’s often tied to the same soil or moisture imbalances that affect boxwoods — and the same testing tools can help diagnose both.
Mistakes to Avoid (and Budget-Friendly Fixes)
Even with the best intentions, a few small missteps can make your boxwoods more vulnerable. I’ve made most of these mistakes myself—and learned they’re all preventable.
Here are the five to watch for:
- Planting too deep or in heavy clay → Roots suffocate, and the shrub turns brown from the inside out.
- Ignoring micro-site conditions → Too much wind or direct sun leads to winter burn.
- Assuming disease before checking basics → Overwatering or poor drainage can mimic blight symptoms.
- Over-pruning the interior → Reduces airflow, allowing moisture and fungi to build up.
- Using the same tools on multiple plants → Spreads fungal spores and pests quickly.
A quick soil check, thoughtful pruning, and disinfecting your shears after each use can save you costly replacements later. Small actions truly go a long way in protecting your boxwoods.
Implementation Plan – What to Do This Season

Caring for boxwoods doesn’t have to be overwhelming—it’s all about timing. A clear, seasonal plan keeps your shrubs healthy year-round and prevents surprise browning.
Spring:
- Inspect plants and prune dead or damaged wood.
- Test soil and fertilise lightly if needed.
- Watch for early pest activity and apply horticultural oil before new growth hardens.
Mid-Season (Summer):
- Monitor watering—deep soak, then let the topsoil dry slightly.
- Check for pests or diseases and act quickly at first signs.
- Add a thin mulch layer to retain moisture and regulate temperature.
Pre-Winter (Fall):
- Apply anti-desiccant spray to protect against winter burn.
- Wrap wind-exposed shrubs in burlap for insulation.
- Water thoroughly before the first hard freeze to keep roots hydrated.
According to The Spruce, consistent year-round care and pre-winter hydration dramatically improve a boxwood’s ability to stay green through harsh weather.
By following this three-phase plan, you’ll move from crisis control to confident, proactive care—keeping your boxwoods healthy, vibrant, and ready for every season.
One Final Takeaway & What to Expect
If your boxwoods are turning brown, don’t lose hope—most of the time, they can bounce back with a little care and attention. The key is spotting the problem early and responding the right way.
- Most browning is salvageable if caught early; fully brown shrubs are often irreversible.
- Prevention and proper site selection—right sunlight, drainage, and spacing—go a long way in keeping your hedge lush and green.
- When in doubt, take a small branch sample to your local extension office or consult a professional landscaper. Early diagnosis saves time, money, and your plant’s health.
A healthy boxwood isn’t just about looks—it’s about balance, timing, and understanding what your garden needs.
What about you—have you ever saved a browning boxwood or lost one to blight? Share your experience in the comments below, and if you love learning practical, nature-friendly gardening fixes, explore more guides on Plant Care Dairy to keep your garden thriving season after season.
Disclaimer: The information in this article is for general gardening guidance only. Always consult your local extension service or a certified horticulturist for region-specific advice before applying any treatments or products.