I’ve watched dozens of gardeners pour time and money into beds that still underperform — and most of the time the problem started below the surface. If your plants look tired while your neighbour’s thrive, it’s not bad luck; it’s information you don’t have yet.
In this Soil Test Guide for Gardeners I’ll show you how to take a sample that actually represents your plot, how to read pH and nutrient numbers without the confusion, and which hidden problems (like heavy metals or poor soil biology) you should not ignore. No fluff — just the practical steps that get results.
I wrote this after digging through extension guides and real lab reports so you get science-backed advice in plain language. You’ll finish this intro knowing what tests matter and why they’ll change what you do next.
Ready to stop guessing and start fixing? Let me know — are you gardening in pots, raised beds, or straight in the ground?
When & How to Collect a Soil Sample That Actually Represents Your Garden

I’ve seen gardeners scoop one handful of dirt from the corner of a bed, send it off, and then wonder why the results don’t match what’s really happening in their garden. The truth is — one scoop can’t speak for a whole plot. If you want a test that gives you reliable answers, you’ve got to treat sampling with the same care you’d give planting.
Here’s how I do it, and how you can too:
- Pick the right time – Early spring (before planting) or fall (after harvest) works best. You don’t want freshly fertilized soil, because that will throw off the numbers.
- Use the right tool – A soil probe or auger gives the cleanest core, but even a sharp shovel works fine if you’re careful.
- Go to the right depth – Six inches is the sweet spot for garden beds, since that’s where most roots are feeding.
- Take several cores – Don’t rely on just one spot. Collect 8–10 cores across the area and mix them together in a clean plastic bucket. This blend gives you a “true average” of your soil.
- Avoid contamination – Don’t use rusty tools, fertilizer bags, or dirty buckets. Even a trace of residue can distort results.
- Decide lab vs. DIY kit – A home kit is fine for a quick pH check, but if you want nutrient levels and actionable advice, a lab test will always be more accurate.
Aa misleading sample = misleading recommendations. And once you start applying lime, compost, or fertilizer based on the wrong data, it’s hard (and expensive) to correct. Oklahoma State University Extension explains this well — your results are only as good as your sample.
Understanding Test Results — From pH to Nutrient Numbers
Okay, so you’ve got your report back. Now what? At first glance, the numbers and abbreviations might look like a foreign language. But once you know what to look for, it’s not nearly as intimidating.
Here’s what usually shows up:
- Soil pH – This tells you how acidic or alkaline your soil is. Most vegetables are happiest between 6.0 and 7.0. Outside that range, nutrients can be “locked up,” even if they’re present in the soil.
- N-P-K (Nitrogen, Phosphorus, Potassium) – These are the big three macronutrients every plant needs. Your report might show them as low, medium, or high. Each level tells you whether to supplement or hold back.
- Micronutrients – Some labs include zinc, iron, manganese, and others. These aren’t needed in large amounts, but a shortage can cause yellowing leaves or poor fruit set.
One detail gardeners often overlook: nutrients don’t all move the same way in soil. For example:
- Nitrogen (N) is mobile — it leaches out quickly with rain, so even a soil test only shows a snapshot in time.
- Phosphorus (P) and Potassium (K) are less mobile — once they’re in the soil, they tend to stay put, so test results here are more stable and reliable.
Once you can read your soil test like a map, you’ll know whether to add compost, adjust pH, or leave things alone. Understanding your soil’s health is one thing, but identifying pests early can save your plants from unnecessary stress and nutrient loss. Instead of guessing, you’re making decisions based on real data — and that’s the difference between a struggling garden and one that thrives.
Heavy Metals & Safety – Soil Testing You Probably Haven’t Done (But Should)

Most gardeners I meet never think about heavy metals in their soil — until they hear a story about lead in backyard vegetables or arsenic in old orchard sites. The truth is, if you’re gardening in an urban area, near old buildings, or even close to busy roads, your soil could be carrying more than just nutrients.
Common culprits include:
- Lead – Often left behind from old paint or pipes.
- Arsenic – Linked to former pesticide use and treated wood.
- Cadmium & Mercury – Industrial byproducts that can linger in city soils.
Why does this matter? Because unlike nitrogen or potassium, these don’t just affect plant growth — they affect you. Leafy greens and root crops are especially vulnerable because they either absorb or hold onto contaminants.
If a lab test shows elevated levels, you still have options:
- Build raised beds with clean soil and a barrier underneath.
- Stick to fruiting crops (tomatoes, beans, peppers), which are less likely to accumulate metals than roots and greens.
- Always wash produce thoroughly to reduce surface contamination.
It’s not about fear — it’s about safety. A quick test can give you peace of mind and help you grow food you feel good about serving. Cornell Waste Management Institute has practical guidance on interpreting these results.
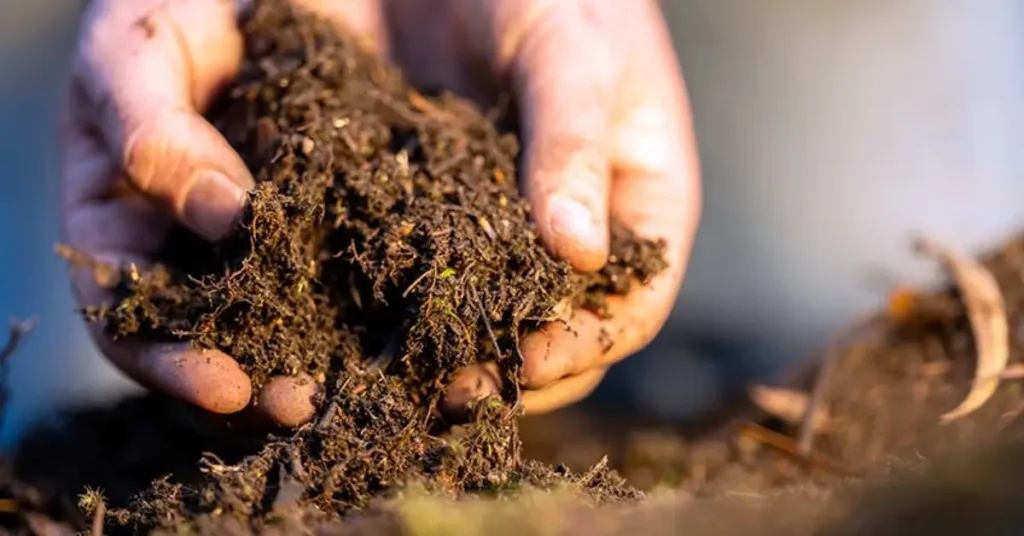
Feel Your Soil — Simple Checks for Physical & Biological Health
Lab numbers only tell half the story. The other half? You can literally feel it in your hands. Some of the best soil tests don’t cost a dime and don’t require a lab report.
Here are a few simple checks I use:
- Earthworm count – Dig a square foot and see how many you find. More worms = more organic matter and active soil life.
- Soil structure (tilth) – Grab a handful. Does it crumble easily into small clumps, or does it turn into dust or a hard lump? Healthy soil should break apart with a little pressure.
- Drainage check – Pour water into a small hole. If it sits for hours, your soil is compacted; if it disappears instantly, you may struggle with holding moisture.
Because biology drives soil health: microbes recycle nutrients, worms create air channels, and organic matter holds water in place. Healthy soil also encourages beneficial insects, like wasps, which act as natural pest control and protect your garden without chemicals. When your soil is physically alive, you spend less on fertilizers and fight fewer problems down the road.
I always remind gardeners: don’t just read numbers on paper — look, touch, and feel your soil. The best gardens are grown with both science and instinct.
Acting on the Results — Tailoring Fertilizer & Amendments Smartly

The real magic of soil testing isn’t just knowing your numbers—it’s acting on them wisely. I’ve learned (sometimes the hard way) that more fertilizer doesn’t mean better growth. Too much nitrogen, for instance, can scorch your plants, throw your pH out of whack, or even wash straight into local waterways.
Here’s how I walk you through smarter soil decisions:
- pH first, nutrients second. If your test shows acidic soil, lime can correct that balance; too alkaline, and sulfur brings things down gently. Often, tweaking pH makes the nutrients you already have more available.
- Match fertilizer precisely. No point adding potassium if your soil report says it’s already plenty. Treat nutrients like ingredients in a recipe—don’t overdo it.
- Feed the soil, not just the plants. Adding compost or humus improves moisture retention, supports microbial life, and naturally cycles nutrients back into action. While amending soil with organic matter is beneficial, not all additions suit every plant; for example, coffee grounds can harm certain species.
Think of your soil test like a doctor’s diagnosis—you don’t take every pill in the cabinet, just the one you need. In Southeast Texas, gardeners learn that humus can absorb up to five times more moisture than clay—boosting moisture retention and easing nutrient uptake at the same time. That’s the kind of efficient, smart gardening I’m talking about.
Timing & Frequency — When to Test Next for Best Results
A soil test isn’t a one-and-done deal. Your soil changes with every crop, every amendment, and every season. To stay ahead, here’s the rhythm I follow:
- Every 2–3 years is usually enough for most home gardens. It keeps you informed without overwhelming you.
- Test after big changes. Made a major compost amendment or switched your fertilizer strategy? A quick retest helps you stay calibrated.
- Leverage the seasons. Spring testing helps you prep efficiently. Fall testing gives you time to plan lime, sulfur, or cover crops before the soil rests through winter.
Testing in the fall isn’t just practical—it gives you time to plan ahead and act before the next planting season even begins. That makes all the difference between reactive gardening and confident planning.
Conclusion: Healthy Soil, Healthier Plants
Soil testing isn’t just a gardener’s chore—it’s the foundation of everything you grow. When you take the time to understand what’s happening beneath the surface, you save money on unnecessary fertilizers, protect the environment, and give your plants exactly what they need to thrive.
The real reward? Watching your garden respond with stronger growth, brighter blooms, and harvests that taste better than anything from the store.
Now it’s your turn: Have you ever tried soil testing? What surprising results did you find? Share your experience in the comments—I’d love to hear your soil stories and how you used them to transform your garden.
And if you want more practical tips, guides, and plant care wisdom, explore Plant Care Dairy—your trusted space for everything gardening.
Disclaimer: The information in this article is for educational purposes only. Always follow local guidelines and consult a professional before making major soil or fertilizer changes.