
If you’ve ever stood in the garden center wondering whether to choose pine straw or pine bark mulch, you’re not alone. The goal of this guide is simple: cut through the confusion and give you clear, actionable guidance so you can pick the right mulch for your beds, vegetables, and landscape.
By the end, you’ll know when each mulch shines, how they impact weeds and moisture, what to watch out for (like nitrogen tie-up and fire risk), and the exact steps to install and maintain them so they perform beautifully all season.
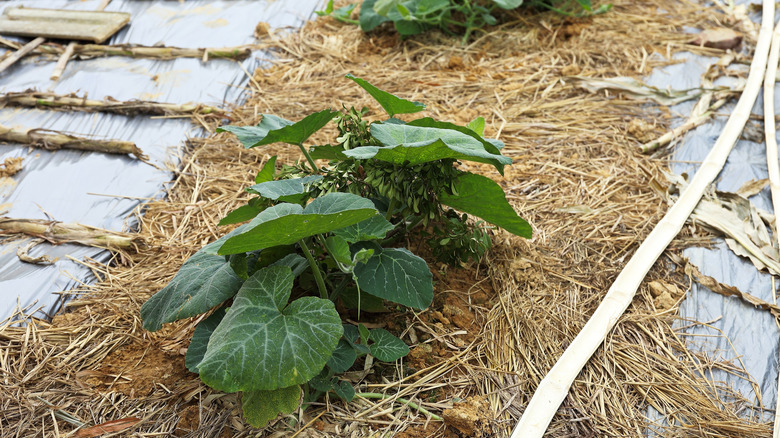
On a personal note, I once swapped bark for straw in my tomato bed after fighting soil splash and blight. The difference was immediate—cleaner leaves, fewer disease issues, and far less weeding. I still use bark in some ornamental beds, but for edibles and sloped areas, pine straw has become my go-to.
Why Mulch Choice Matters
What Mulch Actually Does
Mulch does more than make beds look tidy. It reduces evaporation, buffers soil temperatures, limits weed germination, and protects soil structure from pounding rain. The right mulch supports healthier roots and less maintenance. For a detailed comparison of mulch types and how they perform in different garden settings, check out this comprehensive guide on mulch vs. pine straw.
Different materials behave differently. Pine straw and pine bark are both organic mulches, but they vary in texture, weight, longevity, and how they interact with water and wind. Those differences matter in real gardens. For a side-by-side comparison, check hardwood vs pine mulch.
How Pine Bark and Pine Straw Differ
Pine straw (pine needles) is collected from naturally shed needles, then baled. It’s light, airy, and forms an interlocking mat that resists compaction. It’s commonly available in the southeastern U.S., and when sourced locally, it can avoid plastic packaging.
Pine bark mulch is a byproduct of the wood processing industry. After trees are debarked, bark is chipped or shredded and bagged. Its darker color can absorb heat—sometimes an advantage for heat-loving crops—but it can also increase soil temperatures in hot climates. For practical tips on deciding between pine straw and pine bark in your garden, see this guide on choosing the right mulch.
When the Difference Really Matters
- Vegetable beds: Pine straw generally wins thanks to better drainage at the surface, less compaction, and reduced splash that can spread disease.
- Windy or sloped sites: Straw’s interlocking needles tend to stay put better than bark chips, which can roll, blow, or wash away.
- Showy ornamentals: Bark’s darker hue can offer a bold aesthetic and slow breakdown, especially in low-traffic beds.
- Budget and availability: Bark is widely available and often inexpensive; straw may cost more or be harder to find outside pine-growing regions.
Pine Bark Mulch: Pros, Cons, and Best Uses

Key Advantages of Pine Bark
- Long-lasting coverage: Larger bark pieces break down slowly, offering multi-season coverage in ornamental beds.
- Budget-friendly and available: Bark is widely stocked and often cheaper per cubic yard than straw in many regions.
- Heat-absorbing color: Dark bark can warm soils earlier in spring—handy for heat-loving ornamentals and sometimes tomatoes in cooler climates.
Real Drawbacks to Consider
- Weed gaps: Chunky bark can leave spaces where weed seeds can germinate, especially if the mulch layer is too thin.
- Nitrogen tie-up in vegetable beds: As bark decomposes, soil microbes use nitrogen to break it down, temporarily reducing plant-available nitrogen. That’s why bark is not ideal for vegetable plots.
- Erosion and wind: Bark chips can wash or blow away, making them less suitable for slopes or exposed sites.
- Fire risk: Like all dry organic mulches, bark can burn; in fire-prone regions, follow defensible space guidelines and keep mulch away from structures.
Where Pine Bark Shines
- Established ornamental beds: Shrubs, trees, and perennials that don’t require frequent replanting benefit from bark’s slow breakdown and tidy look.
- Cooler climates: The darker color can be a plus for spring soil warming around cold-tolerant ornamentals.
- Paths and low-maintenance areas: Coarse bark can handle foot traffic better than delicate mulches in informal pathways.
Pine Straw (Pine Needles): Pros, Cons, and Best Uses
Why Many Gardeners Prefer Pine Straw
- Lightweight and non-compacting: Straw creates a breathable mat that resists crusting, making it easier for rain and irrigation to reach roots.
- Better disease prevention in veggies: Needles reduce soil splash, helping limit soil-borne diseases in crops like tomatoes and peppers.
- Superior weed suppression: The fluffy, interlocking mat limits light to weed seeds—and seeds on top don’t find a moist substrate to root into.
- Eco-friendly packaging: Straw is typically sold in bales, often avoiding plastic bags—a win for sustainability-minded gardeners.
Potential Downsides of Pine Straw
- Availability varies by region: It’s commonplace in the Southeast but can be harder to find—and pricier—elsewhere.
- Learning curve to spread: Some landscapers find straw trickier to distribute evenly, especially on windy days, though a light fluffing and hand-tucking helps.
- Fire risk still applies: Like bark, dry needles are combustible; maintain a nonflammable buffer around structures as local codes advise.
Best Situations for Pine Straw
- Vegetable gardens: Fewer splashes, good airflow, and reliable weed suppression make straw a top pick for edibles.
- Slopes and breezy sites: The interlocking nature of needles helps them stay put on inclines and in wind.
- Azaleas, camellias, and blueberries: These acid-tolerant ornamentals pair beautifully with pine straw for both function and natural look.
Safety, Sustainability, and Regional Fit
Fire Risk and Safe Zones
- Keep mulch away from structures: Maintain a clear perimeter (often 5 feet or as directed by local fire authorities) of nonflammable material around buildings.
- Water and refresh mindfully: Moist, well-maintained mulch is less likely to ignite than dry, neglected layers. Avoid cigarette butts and hot equipment near mulched areas.
- Check local guidance: Follow regional defensible space guidelines in fire-prone zones.
Slope, Wind, and Water Considerations
- Erosion control: Pine straw typically outperforms bark on slopes due to its interlocking fibers. Use landscape edging or jute netting on steep grades for extra security.
- Rainfall patterns: Straw sheds excess surface water while allowing infiltration; bark can sometimes float or migrate during cloudbursts.
- Irrigation efficiency: Straw’s non-compacting nature helps drip or soaker lines penetrate consistently with less surface puddling.
Sourcing and Environmental Impact
- Straw sourcing: Look for bales from sustainably managed pine forests. Baled straw often avoids single-use plastic.
- Bark sourcing: Bark is a byproduct of the timber industry; when locally sourced, it can be resource-efficient but is often sold in plastic bags.
- Transport footprint: Choose the mulch that’s available closest to you to reduce emissions from transport—and cost.
7 Smart Tips to Pick and Use Mulch Like a Pro
- Match Mulch to the Bed’s Purpose: Use pine straw for veggies and disease-sensitive plantings, and pine bark for ornamental beds where appearance and longevity matter more.
- Dial In the Right Depth: Aim for 2–3 inches of mulch after settling. Too thin invites weeds; too thick can impede water and gas exchange.
- Avoid Mulch Volcanoes: Keep mulch 3–6 inches away from stems and trunks to prevent rot and pests.
- Stop Weeds Before They Start: Weed thoroughly and water first, then mulch. For bark, consider a 2–3 sheet layer of plain cardboard beneath in stubborn weed zones.
- Mind Nitrogen With Bark: If you must use bark near edibles, offset potential nitrogen tie-up with a light top-dressing of compost or a balanced organic fertilizer applied to the soil (not just the mulch).
- Anchor On Slopes: For straw on hillsides, use jute netting or discreet pins. For bark, add edging and avoid heavy storms right after application if possible.
- Refresh On Schedule: Top up mulch annually or as it thins. Straw often needs a light refresh each season; bark may hold 1–2 years depending on size and climate. For additional eco-friendly mulch options, see how to use fallen leaves in your garden for compost and mulch.
Step-By-Step: Laying Mulch Right
- 1. Clear and prep: Pull weeds, water beds deeply, and place irrigation lines.
- 2. Edge the bed: Create a defined trench or install edging to reduce mulch migration.
- 3. Spread evenly: Fluff pine straw before spreading; for bark, blend sizes for tighter coverage and fewer gaps. Planning your spring bulbs? Learn when to plant and mulch spring bulbs to maximize bloom and soil protection.
- 4. Tuck and tidy: Hand-tuck straw around stems; for bark, rake smooth and pull back from trunks.
- 5. Water to settle: Lightly water the mulch layer to interlock fibers and reduce blow-off.
Quick Decision Guide
- For vegetables and disease-prone crops: Choose pine straw.
- For ornamental beds that need long wear: Choose pine bark (with proper depth to minimize weed gaps). For optimal results, check the best time to mulch to match seasonal conditions in your area.
- For slopes and windy sites: Choose pine straw.
- For the darkest, dramatic look: Choose pine bark.
Troubleshooting and FAQ
Will Pine Mulch Make Soil Too Acidic?
This is a classic worry, but in most garden soils, surface mulching with pine products does not significantly acidify the root zone. Any pH shift from slow decomposition is typically minor. If you grow calciphiles or have very alkaline soil, test pH annually and amend as needed.
How Do I Keep Weeds Down Long-Term?
- Start clean: Remove existing weeds and their roots before mulching.
- Use the right depth: Maintain 2–3 inches after settling; thin layers invite light penetration and weed germination.
- Consider barriers strategically: Cardboard or a breathable fabric under bark can help in tough areas, but avoid smothering soils in veggie beds where you want root expansion and soil life.
How Often Should I Refresh Mulch?
- Pine straw: Top up lightly every season or as it thins; fluff to re-mat after heavy storms.
- Pine bark: Replenish every 12–24 months depending on chip size and decomposition rate; rake to redistribute and close gaps.
Conclusion, Summary Table, and Next Steps
The Smart Gardener’s Takeaway
I’ve learned that the “best” mulch isn’t one-size-fits-all—it’s about matching the material to your garden’s goals. For vegetables and slopes, pine straw usually comes out ahead. For ornamental beds where a dark, tidy look and slow breakdown matter, pine bark performs well. Choose based on site conditions, then install and maintain it correctly for the biggest payoff.
Quick Comparison Table
| Scenario | Pine Straw (Needles) | Pine Bark Mulch |
|---|---|---|
| Vegetable Beds | Best for reducing splash and disease; breathable mat | Not recommended due to nitrogen tie-up during decomposition |
| Slopes & Wind | Stays put thanks to interlocking fibers | Can blow or wash away; use edging if chosen |
| Weed Suppression | Excellent when layered 2–3 inches and fluffed | Good if spread thickly; gaps can allow weeds |
| Water Infiltration | Allows easy penetration; resists compaction | May crust lightly; ensure adequate depth and mix sizes |
| Longevity | Moderate; refresh seasonally | High; often lasts 1–2 years |
| Aesthetic | Natural, airy woodland look | Dark, polished landscape finish |
| Availability | Best in pine-growing regions; varies elsewhere | Widely available at big-box and landscape suppliers |
| Sustainability | Often sold without plastic; naturally shed needles | Industrial byproduct; typically bagged |
| Fire Considerations | Combustible; maintain defensible space | Combustible; maintain defensible space |
| Soil Warmth | Neutral to slightly insulating | Dark color can warm soils in cool climates |
Final Checklist
- Choose wisely: Straw for edibles and slopes; bark for ornamentals and long wear.
- Prep first: Weed, water, and edge before mulching.
- Spread correctly: Maintain 2–3 inches, keep mulch off stems and trunks.
- Mind nutrients: Avoid bark in veggie beds or supplement nitrogen if necessary.
- Stay safe: Maintain nonflammable zones around structures and follow local guidance.
- Refresh on schedule: Light top-ups for straw each season; bark every 12–24 months.
If you found this helpful, I’d love to hear what’s working in your beds. Drop a comment and share your experience, and explore more practical guides at Plant Care Dairy. Your questions help shape future articles—so don’t be shy!
Disclaimer: The information in this article is for educational purposes only. Always consider your local climate, soil conditions, and municipal or fire authority guidelines. Test soil periodically and consult local extension resources for site-specific advice.