
When the heat kicks on and the windows stay shut, our homes get cozy for us but harsh for our plants. I’ve learned the hard way that dry winter air can quietly crisp leaves, stunt growth, and stress even the toughest houseplants.
In this guide, I’ll walk you through exactly how winter humidity drops, what it does to your plants, and 7 practical ways to fix it. We’ll talk about better placement, room-level tricks, DIY microclimates, and smarter winter watering so you can keep your indoor jungle thriving instead of just surviving.
If you’ve ever brought plants in for the winter only to watch them brown at the edges or droop for no obvious reason, you’re not alone. Once I connected those symptoms to low humidity and made a few simple changes, my plants stopped sulking and started looking lush again all winter long.
Why Winter Air Is So Tough On Houseplants

How Indoor Humidity Crashes In Cold Weather
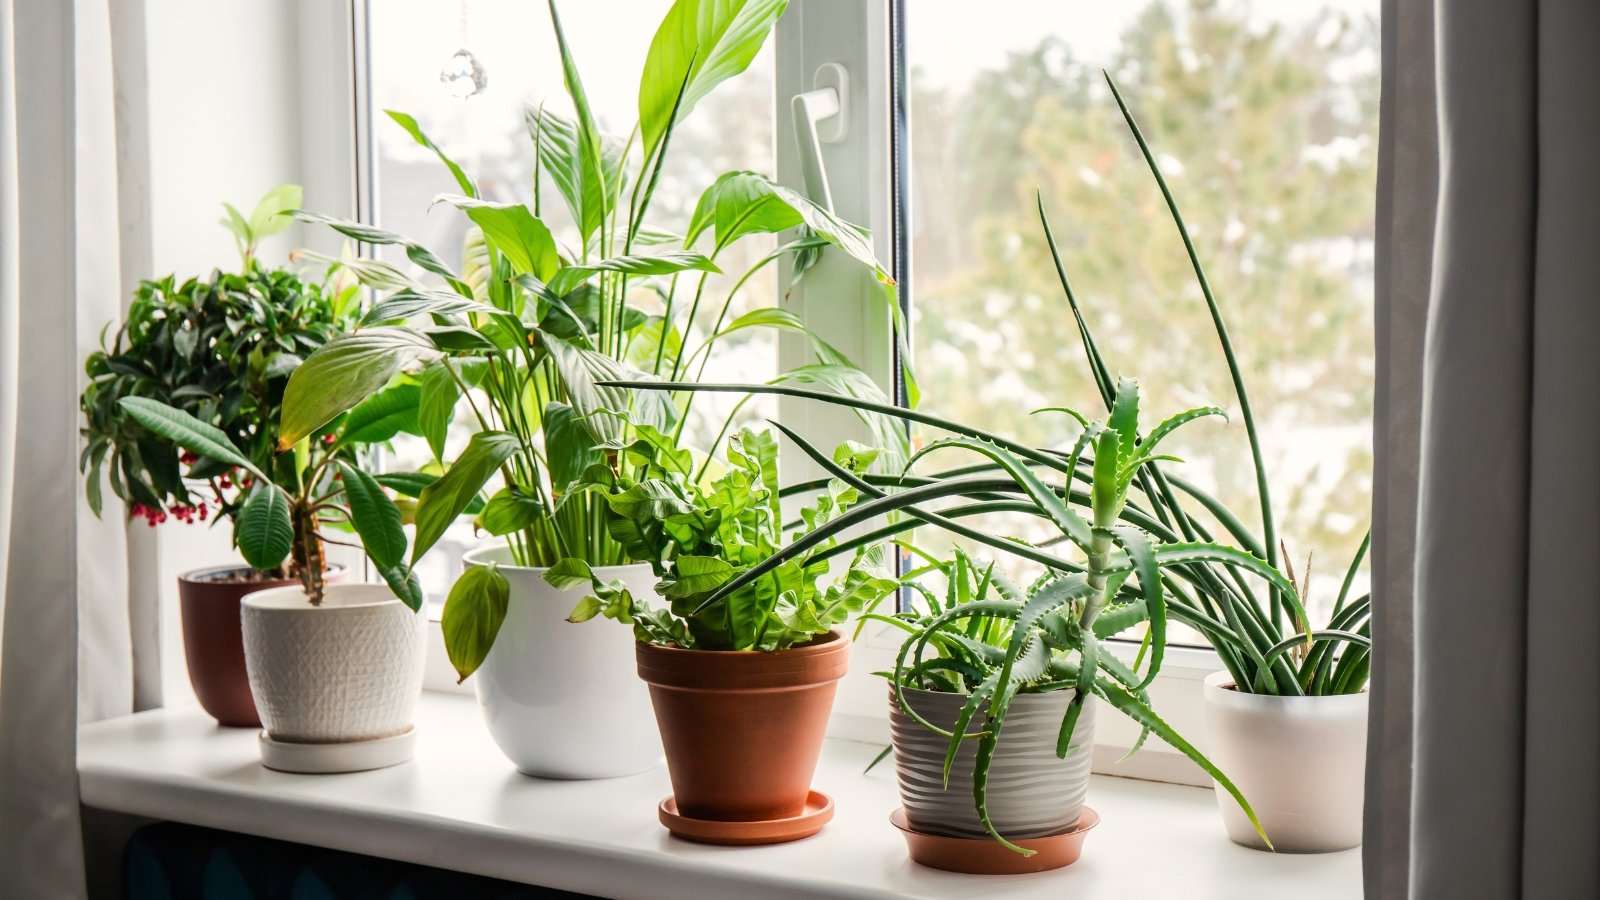
Most common houseplants are native to tropical or subtropical environments where the air is consistently moist. Indoors, they’re usually happy around 50–60% relative humidity, which is close to average in many homes during mild seasons.
In winter, cold outdoor air naturally holds less moisture. Once that cold air is warmed by heaters, fireplaces, and forced-air vents, its relative humidity plummets. The result is dry, desert-like indoor conditions that feel fine to us but are a shock to moisture-loving foliage. For a step-by-step guide on preparing your indoor plants for the colder months, check out this winter prep guide from Love That Leaf.
What Low Humidity Looks Like On Your Plants
Plants constantly move water from roots to leaves, then release it through tiny pores called stomata. When the surrounding air is dry, water evaporates faster than roots can replace it, especially in warm spots or direct sun.
- Crispy brown tips or edges: A classic sign that transpiration is outpacing water uptake.
- Thin, papery leaves: Foliage can feel less supple and lose its usual sheen.
- Wilting despite moist soil: Roots may be fine, but leaves are losing water too fast to keep up.
- Spider mites and other pests: Many sap-suckers thrive in dry, dusty conditions.
When I first noticed brown tips on my peace lily and crispy edges on a calathea, I assumed I’d underwatered. In reality, humidity was the missing piece my plants were begging me to pay attention to.
1. Avoid Drying Drafts And Heat Sources
Before you buy gadgets or try fancy tricks, the first and easiest win is placement. Dry heat and cold drafts both strip moisture from leaves.
- Keep plants away from: Radiators, fireplaces, wood stoves, and blowing furnace vents.
- Avoid cold blasts: Don’t park plants near frequently opened exterior doors or leaky windows.
- Watch for temperature swings: Sudden changes can damage foliage as much as low humidity.
Learn more about common indoor hazards that can stress your plants during winter, including heat sources and drafts, in this Eureka Farms guide. Simply sliding pots a few feet away from a vent or door can reduce stress and water loss, setting the stage for the humidity-boosting tricks you’ll add next.
Simple Room-Level Fixes For Winter Humidity
2. Run A Humidifier Near Your Plants

If you only change one thing this winter, let it be this: a small humidifier near your plants is the most reliable way to raise humidity. Unlike misting, which fades in minutes, a humidifier can run for hours and keep the surrounding air consistently moist.
- Place it close, but not blasting: Aim for gentle humidity drifting toward the plants, not a direct jet of mist on leaves.
- Use a built-in hygrometer or separate meter: I try to keep my plant corner around 45–60% humidity in winter. For more guidance on the right humidity levels and humidifier setup for indoor plants, check out this Healthline guide on humidifying plants.
- Run it on a schedule: A timer or smart plug makes it easy to give plants several hours of extra humidity each day.
In very dry homes or in arid climates, a whole-house or HVAC-installed humidifier can stabilize humidity for people and plants at the same time.
3. Move Plants To A Naturally Humid Room

Bathrooms and kitchens often have higher baseline humidity thanks to showers, baths, boiling water, and dishwashing. For some plants, relocating to these rooms in winter can be a game changer.
- Pick the right room: A bright bathroom with a window is often ideal for ferns, calatheas, and other humidity lovers. For example, some fruiting plants like pomegranate trees can thrive indoors if you provide the right light and humidity—learn more in our guide on growing a pomegranate tree indoors.
- Mind the steam: Occasional steam is great, but don’t trap plants in a room that stays constantly wet and poorly ventilated.
- Check the light: Even with better humidity, plants still need enough light to photosynthesize and grow.
I like to create a little spa corner of foliage by the tub in winter. Those plants tend to look the happiest when the rest of the house is bone dry.
Check That Light And Airflow Still Work
Whenever you shift plants for humidity’s sake, double-check that you haven’t accidentally ruined their light or airflow. A damp, stagnant corner can be just as problematic as a dry one.
- Avoid dark corners: If you move a plant farther from a window, consider adding a small grow light.
- Keep air gently moving: A low-speed fan in the room (not directly on the plants) helps prevent fungal issues.
- Watch for condensation: Constantly wet windows or walls can signal that humidity is too high for the space.
The goal is balance: enough humidity to protect foliage, plus enough light and airflow to keep plants actively, but slowly, growing through winter.
DIY Microclimates With Trays, Grouping, And Cloches
4. Group Plants So They Share Moisture
One of the simplest tricks I use is to cluster plants with similar needs together. Each plant releases moisture through leaves and soil, and in a group, that moisture builds up around the foliage. If you’re looking to build a lush indoor corner without breaking the bank, check out this guide on creating an indoor jungle on a budget.
- Create plant “neighborhoods”: Put tropicals together, succulents together, and so on, based on their humidity preferences. For tropical plants like philodendrons, container choice and placement can make a big difference—check out our guide for getting giant split-leaf philodendron leaves indoors for tips.
- Use shelves or carts: Vertical groupings concentrate humidity while still allowing light to reach each plant.
- Combine with a humidifier: Grouping makes every puff of mist from your humidifier go farther.
In smaller rooms or corners, these groupings can form a mini rainforest zone with noticeably higher humidity than the rest of the room.
5. Set Up A Pebble Tray Under Or Beside Pots

A pebble tray is a classic low-tech way to add a little moisture around your plants. As water evaporates from the tray, it gently raises humidity just above the surface.
- Choose the right tray: Use a shallow dish about 2–3 inches deep and a few inches wider than your pot.
- Keep pots above the water line: Sit the pot on top of the stones so the drainage holes never soak in standing water.
- Top up and clean regularly: Refill water as it evaporates and clean the tray every week or so to prevent mold or algae.
Pebble trays won’t replace a humidifier, but when combined with grouping, they create a helpful microclimate right around the leaves.
6. Cover Humidity Lovers With A Cloche Or Terrarium

Some plants really perk up when given their own tiny greenhouse. A glass or clear plastic cloche, terrarium, or even a repurposed clear bottle can trap and recycle moisture around a single plant.
- Choose suitable plants: Ferns, small ivies, some mosses, and humidity-loving tropicals often enjoy cloche life.
- Vent regularly: Remove the cover occasionally to let fresh air in and excess moisture out.
- Avoid soggy soil: Water lightly; trapped humidity means soil stays moist much longer.
A cloche is especially helpful if you have one special humidity-loving specimen that struggles in the dry winter air while the rest of your collection does just fine.
7. Smarter Winter Watering, Cleaning, And Feeding
Water By Soil Dryness, Not By Calendar
As temperatures cool and growth naturally slows, plants drink more slowly. At the same time, water evaporates less quickly from the soil unless your home is extremely hot or drafty.
- Use the finger test: If the top 1–2 inches of soil are dry, it’s usually time to water for most tropical houseplants.
- Empty saucers after watering: After 15–20 minutes, pour off any standing water so roots don’t sit in a puddle.
- Adjust for species: Cacti and succulents often want the soil to dry out more deeply than leafy tropicals.
Overwatering in winter can cause root rot, especially when paired with lower light and cooler temperatures. Slightly drier, but not bone dry, is usually safer for most plants.
Rinse Or Wipe Leaves For A Healthy Shine
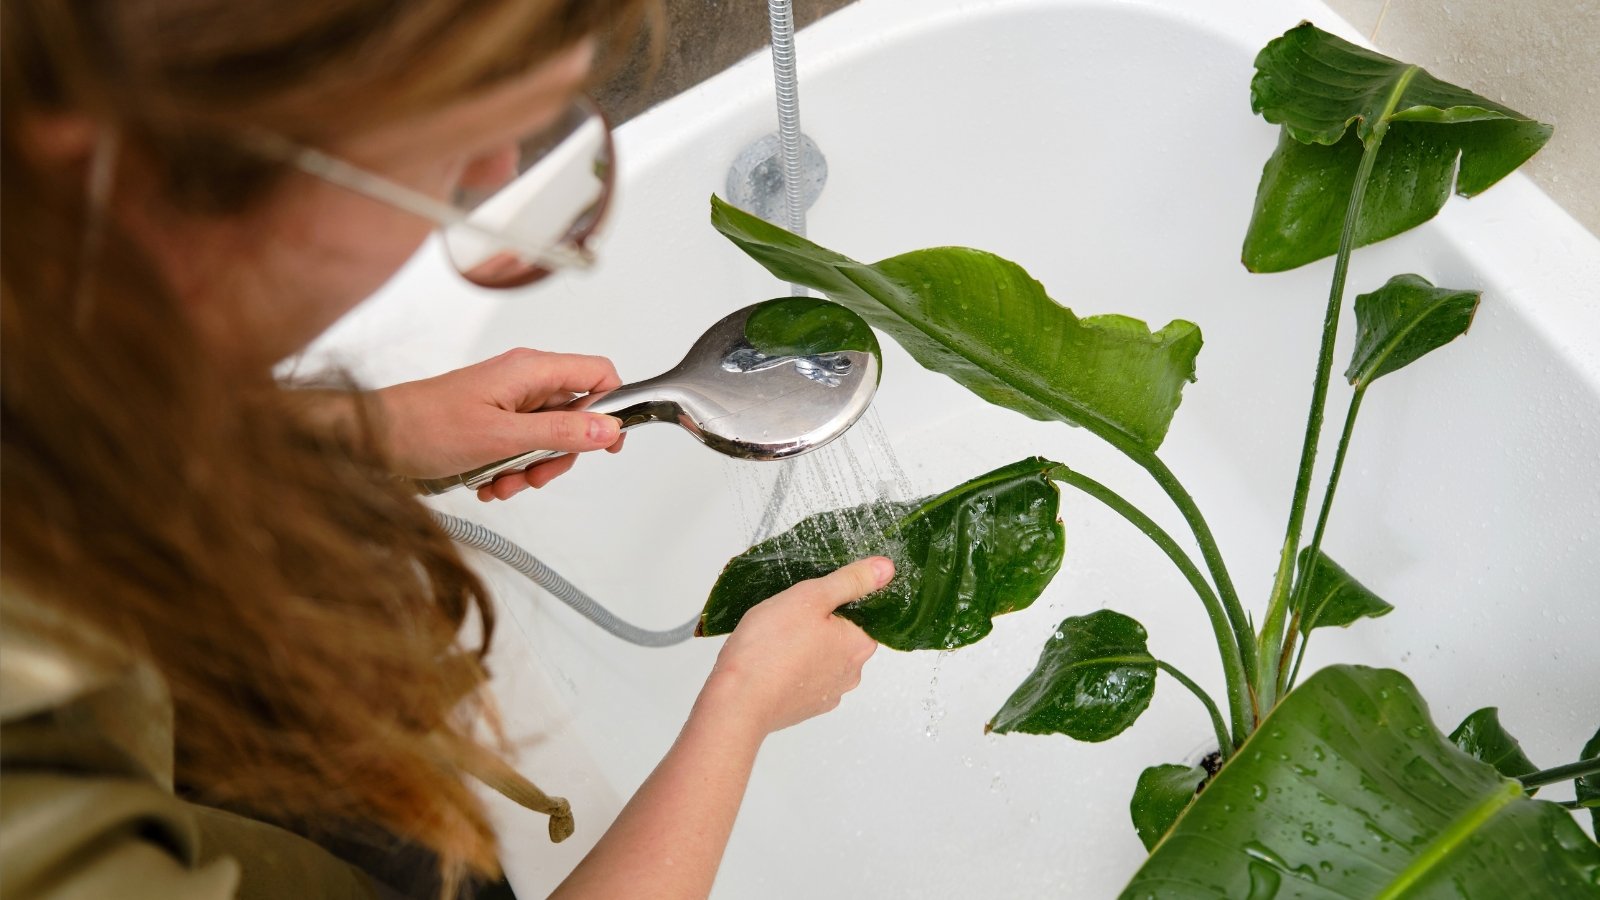
While rinsing plants doesn’t raise humidity for long, it offers other big benefits. Clean leaves capture more light and discourage pests that thrive on dusty, stressed foliage.
- Give plants a gentle shower: Place pots in a tub or shower and rinse leaves with lukewarm water to remove dust.
- Wipe larger leaves: Use a soft, damp cloth to clean both sides of big leaves like philodendrons or bird-of-paradise.
- Inspect as you clean: Look for spider mites, scale, and other pests, especially on the undersides of leaves.
I like to give my plants a bath day every so often in winter. They may only get a brief humidity boost, but they photosynthesize more efficiently and stay far less pest-prone.
Pause Fertilizer Until Growth Picks Up
Most houseplants are not in full active growth in winter. With lower light and cooler air, they simply don’t use nutrients as quickly. Continuing to fertilize as if it’s summer can do more harm than good.
- Skip or greatly reduce feeding: Save fertilizers for spring and summer when new growth is obvious.
- Avoid pushing weak growth: Excess nitrogen can cause soft, leggy leaves that are easily damaged.
- Focus on stability: In winter, your main job is keeping roots healthy and existing foliage intact.
Think of winter as the time to maintain, not push. Good humidity, careful watering, and clean leaves will support your plants far more than an extra dose of fertilizer.
Quick Winter Humidity Checklist And Summary Table
7 Smart Ways To Boost Humidity Indoors
Here’s a numbered checklist that pulls everything together. I like to keep a list like this handy and quickly run through it whenever my plants start looking a bit tired in winter.
- Move plants away from heaters and drafts: Shift pots away from radiators, vents, fireplaces, and drafty doors or windows to reduce rapid moisture loss.
- Run a humidifier near your plant collection: Use a portable or whole-home humidifier to keep humidity closer to 45–60% around your plants.
- Relocate sensitive plants to a naturally humid room: Bathrooms and kitchens with good light offer higher background humidity for tropical species.
- Group plants with similar needs together: Clustering creates a small, shared moisture bubble as leaves transpire and soil slowly evaporates.
- Use pebble trays to add localized moisture: Place pots on or beside trays of water and stones so evaporating water gently boosts humidity near foliage.
- Cover humidity lovers with a cloche or terrarium: Give ferns, ivies, and other moisture-demanding plants their own mini greenhouse environment.
- Adjust winter watering, cleaning, and feeding: Water based on soil dryness, keep leaves clean, and pause fertilizer until spring growth resumes.
At-A-Glance Winter Care Table
Use this table as a quick reference when you’re deciding what your plants need most on a cold, dry day.
| Winter Situation | Recommended Action | Extra Tip |
|---|---|---|
| Brown, crispy leaf tips | Increase humidity and check for drafts | Move plants away from vents and add a humidifier or pebble tray. |
| Wilting leaves but moist soil | Reduce heat and raise ambient humidity | Group plants together and avoid direct hot air blowing on foliage. |
| Dusty leaves and spider mites | Rinse or wipe foliage and improve humidity | Shower plants gently, then keep humidity steadier with a humidifier. |
| Slow growth in low light | Cut back watering and stop fertilizing | Let the top 1–2 inches of soil dry before watering again; resume feeding in spring. |
| One fussy plant always struggling | Create a special microclimate | Try a cloche, terrarium, or move it to a brighter, more humid bathroom. |
Keep A Smart Gardener Mindset All Winter
Winter plant care doesn’t have to be mysterious. When you pay attention to humidity, temperature, and light together, it becomes much easier to understand what your plants are trying to tell you.
Instead of guessing, you can ask yourself: Is this a watering issue, a light issue, or a humidity issue? Most winter problems trace back to one of those three, and usually a few small changes make a big difference.
If you found these tips helpful, I’d love for you to explore more plant care guides on Plant Care Dairy. Share your own winter humidity tricks and questions in the comments so we can all keep learning from each other’s plant wins (and occasional fails!).
Disclaimer: The information in this article is for general educational purposes only and is not a substitute for professional horticultural advice or local expertise. Always consider your specific plant species, indoor conditions, and any manufacturer instructions for equipment such as humidifiers when applying the guidance provided here.