The first time I tried to root a cutting, I thought it would be simple—snip a stem, stick it in some soil, and wait. Weeks later, I was left staring at a wilted piece of green that never had a chance. That’s when I discovered rooting hormone. It isn’t magic, but it does give your plants a real push by speeding up root formation and boosting the survival rate of cuttings that would otherwise fail.
If you’ve ever wondered why some gardeners always seem to get their cuttings to thrive while yours struggle, this little tool might be the missing link. In this guide, I’ll show you exactly how to use rooting hormone step by step, what type works best for different plants, and the common mistakes you’ll want to avoid.
Have you ever lost a cutting you were excited about growing? What plant was it—and did you wish you had known about rooting hormone back then?
Understanding Rooting Hormone – What, Why, When
What is Rooting Hormone & How It Works
When I first heard about rooting hormone, I thought it sounded a bit like a “cheat code” for plants. In reality, it’s just a boost that mimics what nature already does. Rooting hormones are usually made with auxins—the same natural plant hormones that trigger root growth. By adding a little extra at the base of your cutting, you’re basically telling the plant, “Focus here—grow roots now.”
Here’s why it matters:
- It helps cuttings that normally struggle to root stand a better chance.
- It speeds up the rooting process, so you see results faster.
- It reduces the risk of the cutting drying out before roots form.
According to Michigan State University Extension, using rooting hormones doesn’t just improve success rates—it also creates more uniform and healthier root systems. That’s a big deal if you’ve ever had one cutting thrive while another fizzled out under the same conditions.
Types (Powder, Liquid, Gel) – Pros & Cons

I’ve tried all three forms over the years, and the right choice really depends on what you’re working with:
- Powder
- Easy to find and store.
- Great for beginners—just dip the stem and plant.
- Downside: powder can sometimes clump or fall off too quickly.
- Liquid
- Can be used as-is or diluted for sensitive cuttings.
- Gives even coverage if you dip or soak.
- Downside: shorter shelf life once opened.
- Gel
- Sticks to the cutting really well.
- Provides consistent contact between hormone and stem.
- Downside: tends to be pricier than powder or liquid.
If you’re new, powder is the easiest entry point. Once you get comfortable, you might experiment with gel for tricky plants or liquid if you want more control over the concentration.
When to Use It – Which Plants Benefit Most / When to Skip
Here’s the truth: not every plant needs rooting hormone. Some will sprout roots in water or soil without any extra help. But others can be stubborn, and that’s where the hormone shines.
Use rooting hormone when:
- You’re working with woody cuttings like roses, hydrangeas, or fruit trees.
- You’re propagating succulents or houseplants that are slow to root.
- You want to increase your odds of success when propagating rare or expensive plants.
You can skip it when:
- The plant roots very easily on its own (coleus, pothos, mint).
- You’re propagating in water for fun, where the goal is more about observation than long-term growth.
- You’re multiplying fast-growing herbs that don’t usually need help. Some plants, like herbs and grasses, don’t need rooting hormone at all—you can see this in our detailed guide on how to grow lemongrass from seed to harvest.
Think of it like training wheels. Some plants will ride just fine without them, but others benefit from the extra support until they’re strong enough on their own.
Step-by-Step Application Process
Selecting & Preparing Cuttings
The success of propagation starts before you even touch the hormone. I always look for cuttings that are healthy, disease-free, and taken from a strong mother plant. The type of cutting matters too:
- Woody plants (roses, hydrangeas, fruit trees): Choose semi-hardwood cuttings about 4–6 inches long. Make a clean cut just below a node.
- Succulents (jade, echeveria): Let the cut end dry out for a day or two before treating—this helps prevent rot.
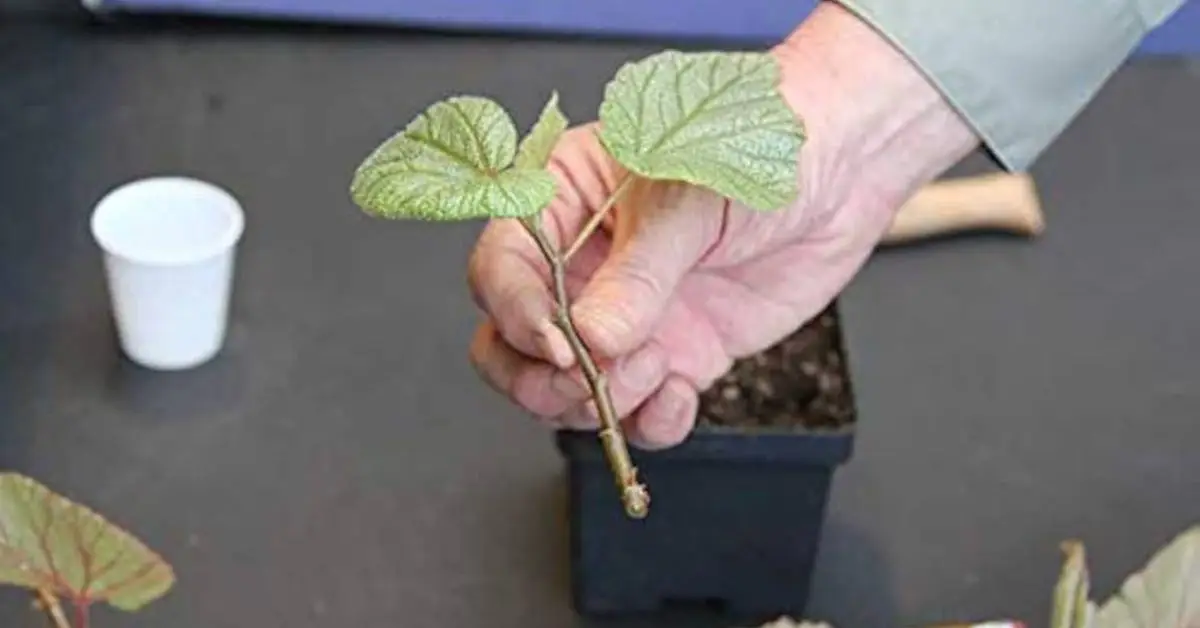
- Leafy houseplants (pothos, philodendron, coleus): Go for soft stem sections with at least two nodes, trimming off any large leaves that will sap energy.
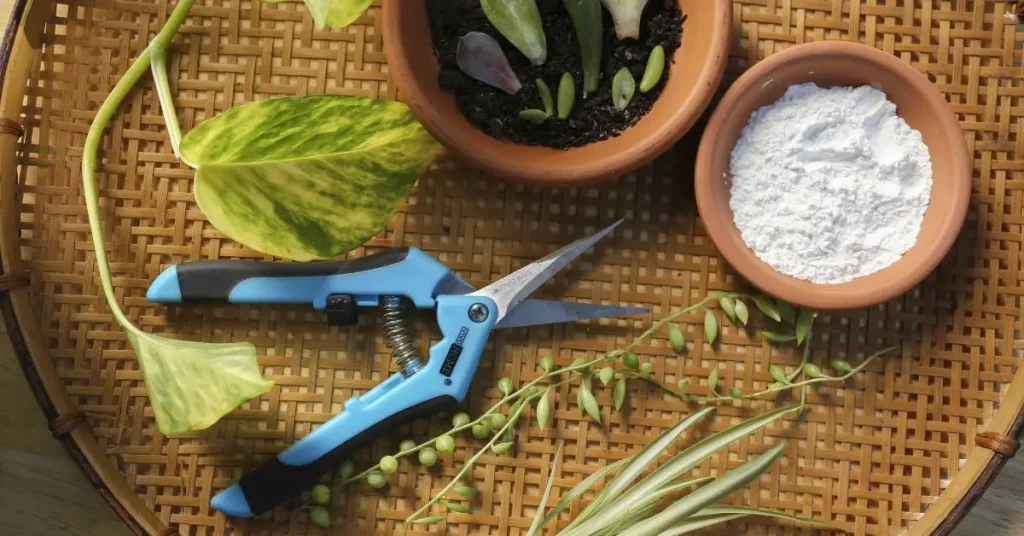
Clean tools matter here. I wipe my pruners with rubbing alcohol before making cuts—disease spreads fast through wounds. If you enjoy starting new plants from scratch, you might also love learning how to plant pumpkin seeds step by step for a harvest that rewards your effort.
Preparing the Hormone – Dilution & Handling
Different forms of rooting hormone need different handling:
- Powder: Pour a small amount into a separate dish—never dip directly into the main container, or you’ll contaminate it.
- Liquid: Some are ready to use; others require dilution. Check the label carefully and mix fresh each time.
- Gel: Usually comes pre-measured and ready; no dilution needed.
I avoid overusing hormone. More isn’t better—it can actually burn the cutting. Think of it like seasoning food: a little makes it better, too much ruins it.
Applying Hormone – Methods & Best Practices
Here’s how I apply it step by step:
- Dip or roll the cut end into the hormone (powder/gel/liquid).
- Gently tap or shake off any excess—especially with powders.
- Immediately place the treated cutting into the prepared growing medium.
Best practices I’ve learned the hard way:
- Don’t re-dip into the original container—use a small portion each time.
- Don’t slather on thick layers; a light coating works best.
- Handle gently—crushed or bruised stems root poorly.
Planting & Setup – Soil / Medium, Humidity, Light, Temperature
Once treated, the cuttings need the right environment:
- Soil / Medium: I prefer a light, well-draining mix like perlite + peat or sand + compost. Avoid heavy garden soil.
- Humidity: Covering with a clear dome or plastic bag creates a mini-greenhouse. Just air it out daily to prevent mold.
- Light: Bright, indirect light is perfect—direct sun can scorch fragile cuttings.
- Temperature: Most plants root best at 65–75°F (18–24°C). A heating mat can help with stubborn woody stems.
Aftercare – Ensuring Strong, Healthy Root Growth
Monitoring Root Development – Signs to Watch
This is where patience comes in. You won’t see roots right away, but there are clues:
- New leaf growth or swelling buds.
- Resistance when you tug gently on the cutting.
- Moisture uptake without wilting.
I check weekly, but I resist the urge to pull cuttings out of the soil—it damages new roots.
Common Problems & How to Fix Them
Even with hormone, things can go wrong. Here are a few I’ve faced:
- Rotting at the base: Usually from overwatering or poor airflow. Fix: let the soil dry slightly and improve drainage.
- Dry, shriveled cutting: Humidity too low. Fix: cover with a humidity dome or mist lightly.
- Fungal spots or mold: Air isn’t circulating. Fix: remove cover daily and prune infected cuttings.
Once your cuttings develop roots, consistent watering becomes just as important as hormone use—check out our advice on the best time to water your plants, day vs. night to keep them thriving.
Transplanting & Hardening Off
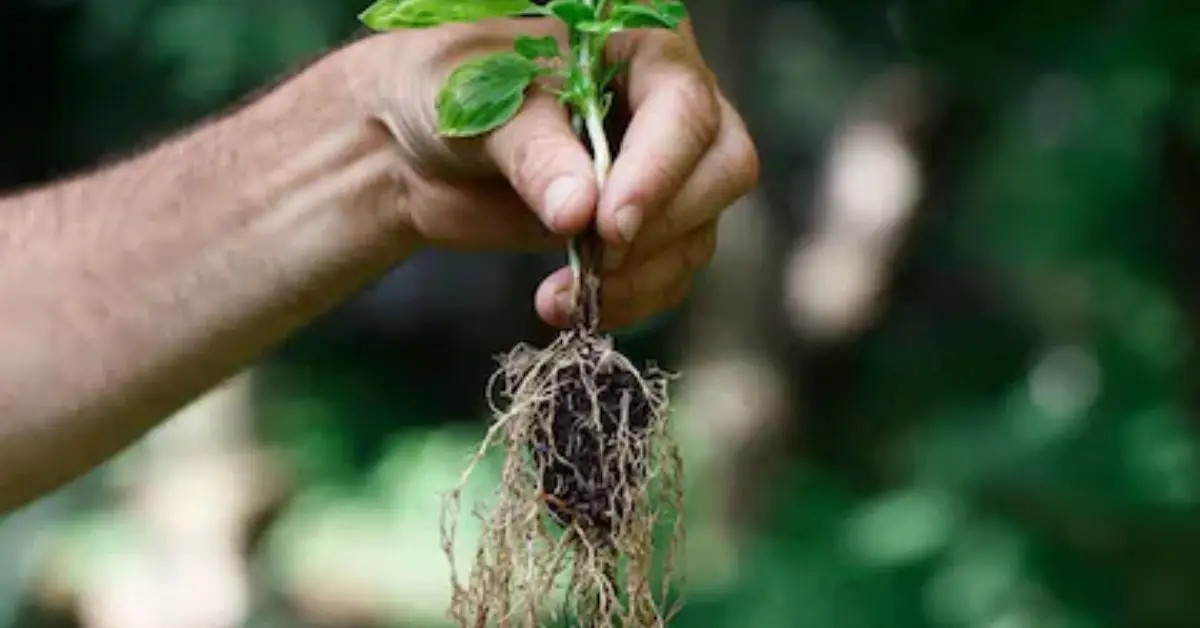
Once roots are about 1–2 inches long, it’s time to pot them up. I move cuttings into a slightly larger pot with a nutrient-rich soil mix. But here’s the key: don’t throw them straight into outdoor sun or wind.
Instead, harden them off gradually:
- Place them outside in shade for a couple of hours.
- Increase exposure each day for a week.
- Only then move them to their final spot.
For a deeper dive on transplanting timing, HowStuffWorks has a solid breakdown of how root growth determines readiness.
Choosing the Right Rooting Hormone Product & Alternatives

Key Specifications to Check (Concentration, Auxin Type, Form, Additives, Brand Reputation)
When I shop for rooting hormone, I don’t just grab the first packet I see on the shelf. A few details make all the difference:
- Concentration: Some plants root easily and need only a low dose; stubborn woody plants often do better with stronger concentrations.
- Auxin Type: Most commercial products use IBA (Indole-3-butyric acid) or NAA (Naphthaleneacetic acid). Both work, but IBA is more common and considered safer for most houseplants.
- Form: Powder is cheap and stable, gel sticks better, and liquid offers flexibility with dilution.
- Additives: Some brands add fungicides or vitamins. I’ve found those useful for sensitive cuttings but not always necessary.
- Reputation: Stick to trusted horticulture brands. Generic powders can be weak or inconsistent.
Checking the label for these factors saves time, money, and disappointment later.
Natural / DIY Alternatives – What Works & What Doesn’t
I’ve experimented with natural options, partly out of curiosity and partly to save money. Here’s what actually holds up:
- Willow Water: Contains natural salicylic acid and auxins. Works decently for many leafy cuttings, though slower than synthetic hormones.
- Seaweed Extracts: Provide micronutrients and growth regulators. They don’t always stimulate root initiation directly but can strengthen seedlings once roots appear.
- Aloe Vera Gel: Offers mild hormone-like compounds and keeps the cutting moist. Works best with succulents or soft stems.
- Cinnamon or Honey: Act more like antifungal coatings than rooting stimulants. They help cuttings stay healthy but won’t speed up root formation on their own.
Research backs some of these options. A recent study on bottlebrush cuttings showed natural extracts like moringa and willow water supported rooting, but synthetic IBA still delivered the highest success rates.
For me, DIY solutions are worth trying if I’m propagating a hardy plant I don’t mind losing. But for rare or woody cuttings, I always fall back on commercial hormone.
Safety, Risks, and Misuses
Overuse & Effects
More hormone doesn’t equal faster roots. In fact, I’ve seen cuttings burn at the base when dipped too heavily. Too much auxin can actually inhibit root growth instead of encouraging it. On the human side, powders and gels aren’t highly toxic but can cause skin or eye irritation if handled carelessly.
Environmental Considerations & Sustainable Practices
I try to use hormone only when necessary. Overreliance adds unnecessary chemicals to the soil. Wherever possible, I stick to sustainable practices—like compost-based mediums and natural alternatives—reserving synthetic hormones for harder-to-root species.
Proper Handling, Storage, Disposal
Good habits make a difference:
- Always pour out a small portion instead of dipping into the main container.
- Seal tightly after each use—humidity ruins powder fast.
- Store in a cool, dry place away from kids and pets.
- Don’t dump leftovers into drains or soil. Dispose of according to label instructions.
A little care in handling keeps your plants healthy, your workspace safe, and your rooting hormone effective for months.
Cost & Time Estimates
Budgeting – Product Costs, Material Costs
When I first started, I thought rooting hormone would be a big expense. The truth? It’s one of the cheapest “gardening hacks” you can buy.
- Rooting hormone products: usually range from $6–$15 depending on form (powder, gel, liquid). A small bottle can last dozens of cuttings.
- Growing medium: a bag of perlite, peat moss, or seed-starting mix is typically $5–$10.
- Extras: humidity domes, trays, or small pots might add another $10–$20, but these are reusable.
Altogether, you can start propagating with less than $30 in supplies—cheaper than buying new plants every time.
Timelines – What to Expect Day-by-Day / Week-by-Week
Every plant is different, but here’s a realistic timeline based on my own experience and extension data:
- Day 1: Cutting prepared, treated with hormone, planted in medium.
- Days 3–7: Cutting stays alive but no visible change—focus is on callus formation.
- Week 2–3: Root initiation begins. You may notice slight resistance if you tug gently.
- Week 4–6: Roots grow stronger, and new leaf or bud growth often appears.
- Week 6+: Most cuttings are ready for transplanting into larger pots or outdoors (depending on plant type).
Woody plants may take longer (8–12 weeks), while easy plants like coleus can root in under 10 days.
Summary
Step-by-Step Checklist
- Pick healthy cuttings from strong mother plants.
- Clean tools before making cuts.
- Dip stem into hormone (powder/gel/liquid).
- Plant into light, well-draining medium.
- Keep humidity high and light indirect.
- Monitor weekly without disturbing roots.
- Transplant once roots are 1–2 inches long.
Mistakes to Avoid
- Using too much hormone (causes burns or stunted roots).
- Dipping directly into the main container (contaminates product).
- Keeping cuttings in heavy, waterlogged soil.
- Exposing fragile cuttings to direct sun or wind too soon.
Best Practices Recap
- Less hormone is more—just a thin coat works best.
- Maintain consistent humidity and temperature.
- Choose the right form (powder, gel, liquid) for your plant type.
- Always harden off before moving outdoors.
Rooting hormone isn’t complicated—it’s just about knowing when and how to use it. With the right steps, you’ll see faster results, stronger plants, and fewer disappointments.
Have you ever tried rooting hormone, or do you stick with natural methods? Share your experiences in the comments below—I’d love to hear what’s worked for you.
For more practical, fact-based plant care guides, visit Plant Care Dairy and explore tips that help you grow with confidence.
Disclaimer: The information shared here is for general gardening purposes only. Always follow the instructions provided on your specific rooting hormone product, and handle all materials safely. Results can vary depending on plant type, environment, and care practices.