
Winter composting often feels like a lost cause. I used to think that when the temperature dropped and snow covered my garden, all my kitchen scraps and yard waste just sat there, frozen and useless. But over the years, I’ve learned that with a few smart adjustments, composting doesn’t have to stop when winter arrives. In fact, your pile can stay active, slowly breaking down material so that by spring, you’re already a step ahead with rich, ready-to-use compost.
In this guide, I’ll show you practical techniques that work for every garden—whether you have a spacious backyard, a small balcony, or just a kitchen bin. You’ll learn how to keep your compost warm, what materials work best, and how to troubleshoot common winter challenges. By the end, you’ll see that winter isn’t a pause button for composting—it’s an opportunity to plan ahead and make your spring gardening effortless.
Have you ever wondered how much difference a little insulation or the right layering can make in winter composting? Stick with me, and I’ll walk you through it step by step.
Can You Really Compost in Winter?
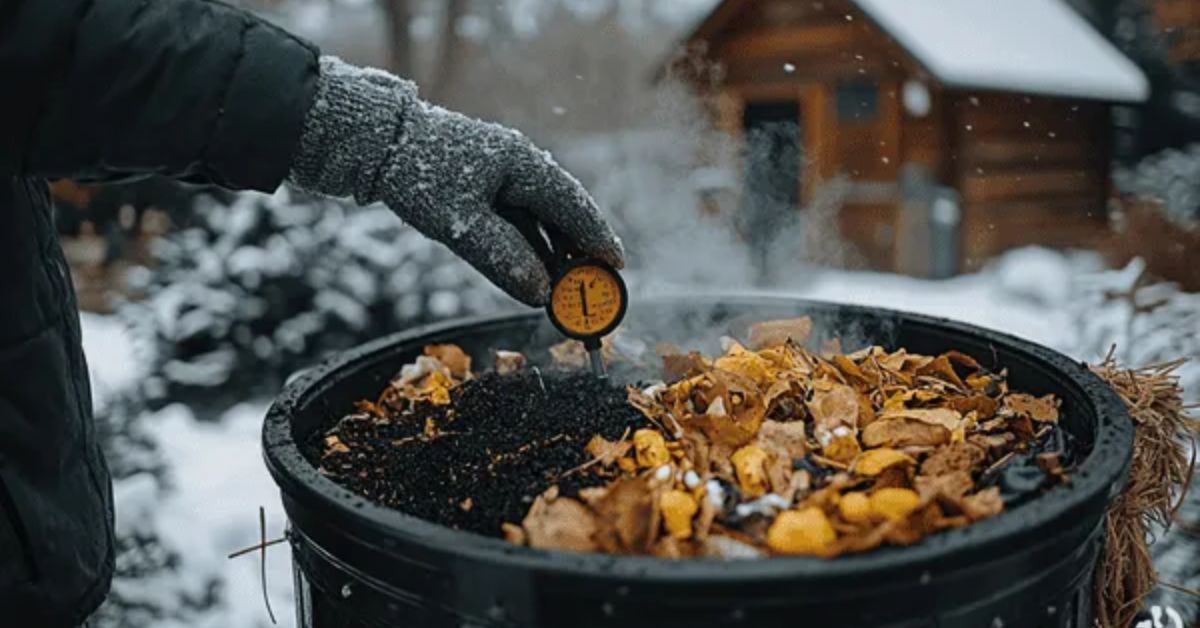
I know what you’re thinking: “Can anything actually break down in freezing temperatures?” I used to doubt it too. But here’s the thing—microbial activity doesn’t completely stop in the cold; it just slows down. The center of a well-built compost pile can stay surprisingly warm, even when the air outside is freezing. That’s because the decomposing material generates heat, and if your pile is properly insulated, it can maintain enough warmth for microbes to continue working.
Here’s what I focus on when I want my winter compost to stay active:
- Pile size matters: A larger pile traps heat better, keeping the center alive with microbial activity.
- Layering greens and browns: Alternating moist kitchen scraps with dry leaves or shredded paper helps maintain airflow and warmth.
- Insulation: Straw bales, old blankets, or even a simple tarp around the pile can make a huge difference.
For more detailed insights on how winter decomposition works, I often refer to UNH Extension’s guide on winter composting—it explains how microbes keep working even in cold months and how a smart setup ensures your pile doesn’t freeze solid.
Benefits of Winter Composting
You might be wondering if it’s really worth the effort. From my experience, winter composting isn’t just possible—it’s actually really helpful. Here’s why:
- Keeps kitchen waste under control: Without a winter plan, scraps pile up in the kitchen or trash, which can get messy and smelly.
- Prepares compost for spring planting: By the time your garden is ready, you already have partially decomposed material that will finish quickly as temperatures rise.
- Reduces pest issues: Properly managed winter piles are less likely to attract rodents or unwanted insects because the waste is buried and insulated.
Once you start seeing that even small adjustments—like a little insulation or layering—keep your pile alive, you realize winter composting is not just possible, it’s smart.
Winter Composting Methods
Now let’s get practical. Different gardeners have different spaces, so I’ll break down methods that work outdoors and indoors. I’ve found most guides skip over these hands-on setups, but these are the ones that really make a difference.
Outdoor Composting Techniques
Traditional Pile in Cold Weather
I always start with a classic pile because it’s flexible and simple. Here’s my approach:
- Layer greens and browns carefully: Kitchen scraps, coffee grounds, and grass clippings alternate with dry leaves, straw, or shredded paper.
- Shape and size for heat: A taller, tighter pile traps heat better than a wide, shallow one.
- Avoid too much wood ash: It can raise pH and slow decomposition in cold months.
- Cover your pile: Use straw, a tarp, or old blankets to maintain warmth and prevent excess moisture from snow or rain.
Compost Bins & Tumblers in Winter
If you prefer bins or tumblers, these work well even in freezing weather if you take a few precautions:
- Insulated bins: Some commercially available tumblers have insulation, which helps keep internal temperatures higher.
- Turning frequency: You can reduce turning in the cold months because the interior stays warm enough; just give it a turn now and then to keep airflow and mixing.
- Expert tip: I’ve seen gardeners tweet about insulated tumblers maintaining heat even when outside temperatures are well below freezing, which makes a huge difference in decomposition speed.
Indoor Winter Composting Options
Not everyone has backyard space, and I’ve experimented with indoor methods that keep things simple:
- Vermicomposting: Worms are surprisingly hardy indoors if the bin is kept at room temperature, and they turn kitchen scraps into rich compost quickly.
- Bokashi or fermentation-based composting: This method ferments food scraps in a sealed container, making it smell-free and efficient—perfect for small apartments or cold climates.
Best Materials for Winter Composting

Greens and Browns for Cold Weather
When it comes to winter composting, choosing the right materials makes all the difference. I’ve learned that the wrong mix can turn your pile into a soggy, smelly mess that barely decomposes.
Here’s what I focus on:
- Browns (carbon-rich materials):
- Dry leaves
- Straw
- Sawdust
- Shredded paper
These help absorb excess moisture from snow or kitchen scraps and maintain airflow.
- Greens (nitrogen-rich materials):
- Kitchen scraps like vegetable peels, fruit cores
- Coffee grounds
- Grass clippings (if you have any left from fall cleanup)
Balancing greens and browns ensures the microbes have what they need without creating odor or sogginess.
Reducing Material Size for Faster Decomposition
I always chop or shred leaves, paper, and kitchen scraps before adding them to my winter pile. Smaller pieces increase surface area for microbes, which keeps decomposition moving even when it’s cold. A tip I swear by: use a garden shredder or even a strong pair of scissors for paper and cardboard—it saves time and speeds up the process.
Materials to Avoid in Winter
Even in winter, some materials can sabotage your compost:
- Excess wood ash: It raises the pH too much, which slows down microbial activity.
- Meat, dairy, oils: These attract pests and can freeze in clumps that don’t break down.
Being mindful of what you don’t add is just as important as choosing the right greens and browns. It’s one of the fastest ways to keep your pile healthy and odor-free.
For a deeper dive on winter-safe compost materials, I like referencing Missouri Extension’s composting guide. They explain how pile composition, moisture, and material choice affect decomposition even in freezing weather.
Advanced Winter Composting Hacks
Once you’ve got the basics down, a few insider hacks can make winter composting surprisingly easy and effective. These are the tips I wish I knew when I started:
Insulation Strategies
- Use straw bales, leaf rings, or a simple tarp around your pile.
- These not only keep the center warm but also reduce moisture from snow and rain.
- Some extension guides include temperature retention charts, showing how much warmer an insulated pile can stay versus one left exposed.
Microbe-Friendly Practices
- Adding a compost starter or a bit of finished compost to your pile can give microbes a jump-start, even in the cold.
- On Reddit, gardeners report that using starters helped their piles reach composting temperatures faster in winter—proof that a little boost goes a long way.
Troubleshooting Common Issues
Winter piles can still give you headaches:
- Frozen pile: Wait for thaw or add fresh layers of greens and browns to generate heat internally.
- Smelly pile: Usually too wet or too nitrogen-heavy—just add browns and mix lightly to restore balance. When managing your compost and garden, remember that sometimes pests or mold can appear, and learning safe ways to handle them—like using rubbing alcohol on plants—can keep your winter gardening stress-free.
These hacks aren’t just tricks; they’re ways I make winter composting reliable, even in sub-zero temperatures. With a little attention, you can keep your pile alive and productive all season long.
When to Turn or Harvest in Winter
Knowing when to interact with your pile is key, especially in cold months. I’ve learned the hard way that over-turning a frozen pile can actually slow down decomposition.
Here’s what I usually do:
- Minimal turning: If the pile isn’t frozen solid, I turn it lightly every few weeks to maintain airflow.
- Wait for thaw: For heavily frozen piles, I let nature do the work—microbes are still active in the insulated core, and turning too early just disturbs the thermal balance.
Paying attention to your pile’s condition instead of following a strict schedule avoids wasted effort and keeps decomposition steady through winter.
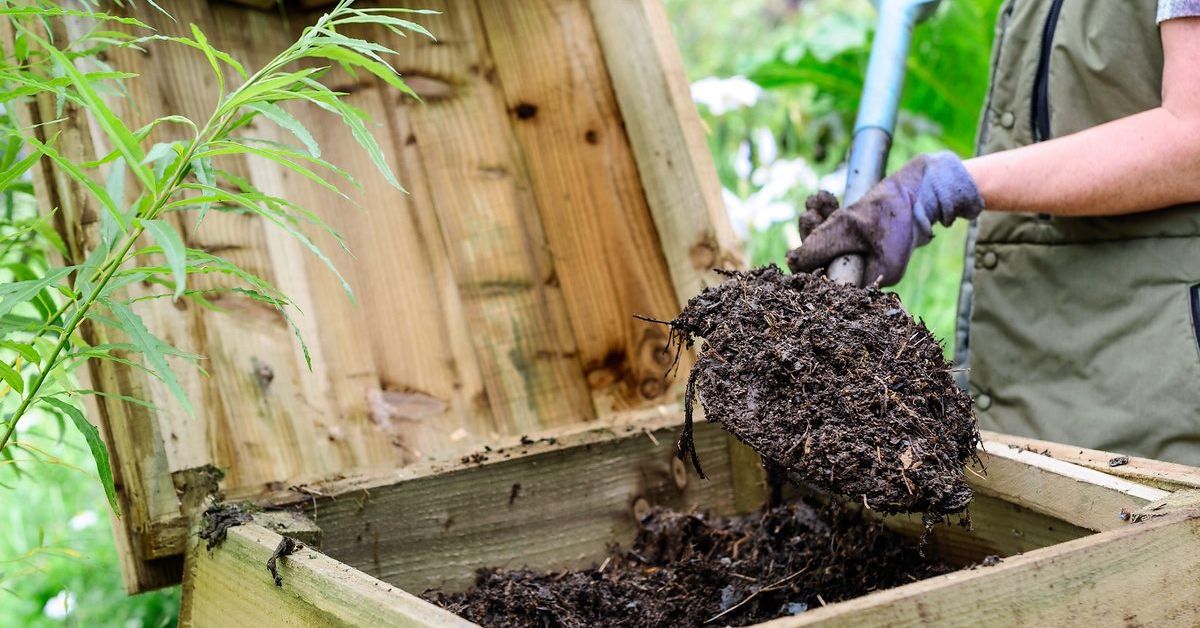
Using Finished Compost
By spring, you’ll likely have partially decomposed material ready to finish in warmer months. Here’s how I handle it:
- Storage tips: Keep it in a covered bin or tarp-covered pile to prevent leaching from winter rain or snow.
- Prep garden beds: Spread the partially finished compost over your beds in early spring. It continues to break down in place, enriching the soil just in time for planting.
A well-timed harvest means you’re not scrambling in spring—you’re already ahead of the gardening game.
Bonus Tips for Urban and Small Gardeners
Just because you live in an apartment or have a tiny backyard doesn’t mean winter composting is out of reach.
Here are a few strategies I rely on:
- Indoor composting in small bins: Vermicomposting or Bokashi bins fit easily on a countertop or balcony. They’re odor-free if maintained properly and keep your kitchen scraps working for you. If you’re composting indoors or using small bins in apartments, make sure your houseplants stay healthy too—dry winter air can affect both your plants and the microenvironment for worms or Bokashi bins.
- Community garden solutions: If you’re part of a local garden, ask about shared winter compost bins. It’s a great way to stay connected and benefit from larger piles that retain heat better.
- DIY insulated mini-bins: Even a small plastic bin can work if you wrap it in old blankets or straw. It’s amazing how much warmth a little insulation can provide for microbial activity.
No matter your space, a little creativity keeps your compost moving through winter.
Final Thoughts on Winter Composting
Here’s what I want you to take away: winter composting isn’t complicated—it’s about small adjustments and consistent attention. Here’s my simple step-by-step approach:
- Layer greens and browns thoughtfully for airflow and warmth.
- Insulate your pile with straw, blankets, or DIY covers.
- Turn only when necessary; let frozen piles rest until thawed.
- Choose winter-safe materials and avoid meat, dairy, oils, and excess ash.
- Track and experiment with indoor bins or insulated mini-piles if outdoor space is limited.
By following these steps, you can keep your compost alive through the cold months and have nutrient-rich material ready for spring. If you’re planning your garden for spring, you might also want to explore plants that thrive in challenging conditions, like salt-loving flowers, which can complement your newly enriched soil.
I’d love to hear your winter composting experiences—what works, what surprises you, or even your challenges. Share your thoughts in the comments below! And if you want more expert gardening tips, hacks, and guides, check out Plant Care Dairy for ongoing advice and inspiration.
Disclaimer: The information in this article is for educational and informational purposes only. Results may vary depending on climate, garden conditions, and materials used. Always use caution and follow local guidelines when composting.