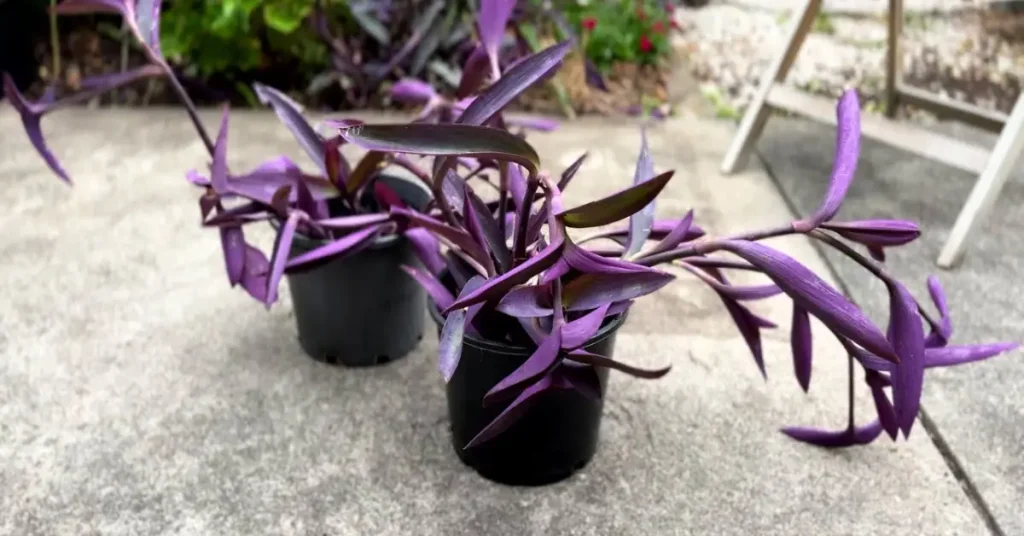
I’ve propagated more Purple Hearts than I can count, and I know exactly where it goes wrong. You cut above the node instead of below. You leave a leaf sitting in the water. You stick the jar in hot sun “for faster growth” and end up with mush. If you’re here to learn how to propagate Purple Heart the easy way, I’ll show you the simple routine that actually works at home—no guesswork.
Most guides repeat the same lines: take a cutting, put it in water, wait. Helpful, but too vague. What you really need are the specifics—how long the cutting should be, which node to expose, how bright the light should be while rooting, when to move from water to soil, and how to keep that deep purple instead of washed-out green. That’s the difference between “some roots” and a full, bushy plant in a few weeks.
Here’s the plan we’ll follow: clean 4–6 inch stems cut just below a node, lower leaves off, bright indirect light (not a sunny sill), and calm, steady moisture. In water, you’ll usually see starter roots in about 10–14 days; in soil, expect 2–3 weeks with light misting for humidity. Pot up when roots are roughly 2 inches and firm, not threadlike.
I’ll also cover the things the internet glosses over: how to avoid rot, why non-flowering tips root faster, the exact soil blend that drains but still hugs new roots, and aftercare that keeps your plant compact and richly colored—so it doesn’t go leggy two months later.
Before we dive in, tell me: what’s tripped you up so far—mushy stems, no roots, or cuttings that never stay purple?
Understanding the Propagation Basics
When people first hear “propagation,” they often picture trimming a plant and hoping for the best. But it’s not the same as pruning — it’s a deliberate way of giving a single stem the chance to start a whole new life. When you propagate a Purple Heart, you’re not just making a clone; you’re helping a part of the plant find fresh energy to grow stronger roots and richer color.
This plant makes it easy for us. Tradescantia pallida naturally sends out fast-growing stems with clear nodes — those tiny bumps where new roots and leaves emerge. That’s why it thrives in both water and soil methods. In water, you can actually watch roots form day by day (a confidence boost if you’re new to propagation). In soil, the process is slower to show, but the roots adapt better once you repot later.
The best time to do this is late spring to early summer, when the plant’s growth hormones are most active. During this season, cuttings bounce back quickly, and you’ll see roots forming in just a couple of weeks. Try not to propagate during cold or dark months — the stems often stall, rot, or lose their purple sheen. And here’s a small but crucial detail: always choose non-flowering stems. When the plant is blooming, its energy is focused on flowers, not roots, so even healthy cuttings struggle to start.
If you’re more of a visual learner, guides like The Spruce break down how this plant responds differently in soil versus water — but the key is really about timing, not just technique. Once you understand that rhythm, propagation stops feeling random and starts feeling repeatable.
Materials You’ll Need Before You Start
You don’t need fancy gear or a greenhouse — just a few clean tools and a calm space where your cuttings can settle. Here’s what works best for me:
- Sharp, clean shears or scissors: Prevents crushing the stem and reduces rot risk.
- A small jar or glass container: Perfect for water propagation. Make sure it’s clear so you can track root growth easily.
- A pot with well-draining soil mix: Aim for a light blend — about 50% potting soil, 30% perlite, and 20% coco coir. It keeps moisture steady without suffocating roots.
- Rooting hormone (optional): It’s not required, but a quick dip can speed up root development.
- A bright, indirect light spot: Think soft morning light or filtered sunlight — too much direct heat will fade the purple color fast.
Once you’ve got these ready, you’ve already solved half the battle. Propagation success mostly depends on preparation — clean cuts, the right mix, and patience. Everything else builds naturally from there.
Step-by-Step: Propagating Purple Heart in Water
If you’re someone who likes to see progress, water propagation is going to feel rewarding. You’ll watch those first white roots appear almost overnight — a little reminder that the plant’s alive and responding to you. Here’s exactly how I do it, after plenty of trial and error:
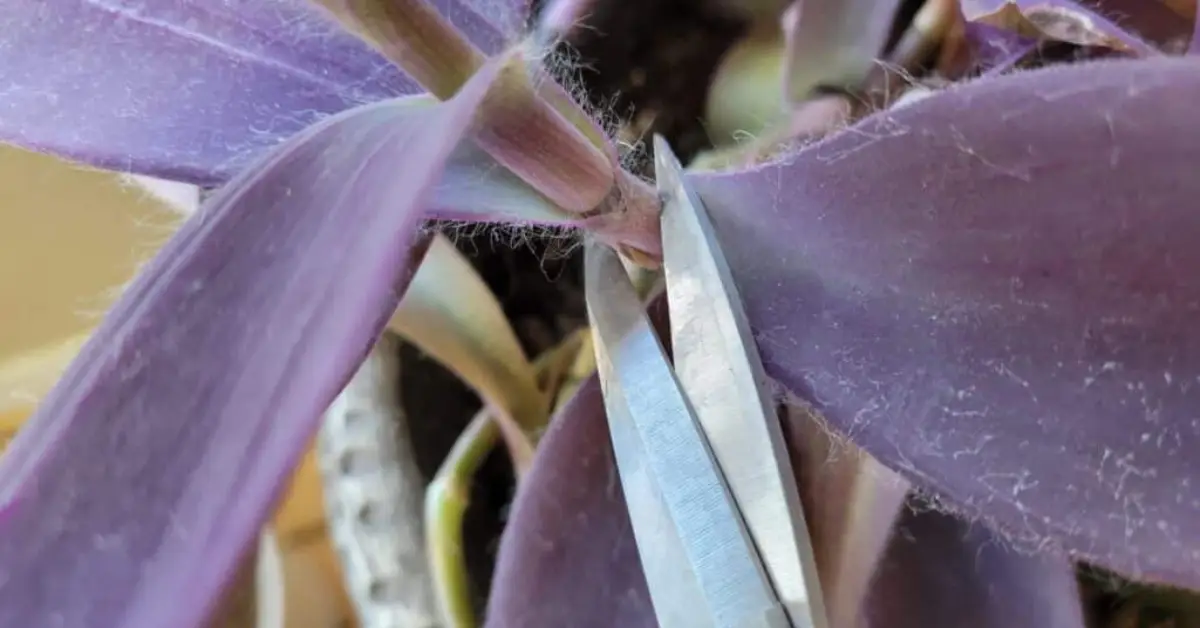
Step 1 – Cut a 4–6 Inch Healthy Stem Just Below a Node: Find a fresh, non-flowering stem and make a clean cut just below the node — that’s the small bump where roots will form. Avoid cutting too high or too low; aim for that sweet spot just under the node so the plant knows exactly where to start rooting.
Step 2 – Remove Bottom Leaves, Keep Top Two Leaves Intact: Take off any leaves that would sit underwater, but leave the top one or two. Those remaining leaves will keep photosynthesis going without drowning the stem.
Step 3 – Place in a Glass of Clean Water, Change Water Every 3–4 Days: Use room-temperature, filtered water if you can. I like using a clear jar so you can actually see the roots forming. Changing the water regularly prevents bacteria buildup — the most common reason cuttings rot before rooting.
Step 4 – Wait 10–14 Days for Roots (~2 Inches Long) Before Potting: You’ll start seeing fine white roots in about a week, and by day 10–14, they should be thick enough (around two inches) to handle potting. Don’t rush — moving them too early can shock the plant.
Step-by-Step: Propagating Purple Heart Directly in Soil
If you prefer a cleaner, no-jar method — or if you’re short on space — soil propagation is your best friend. It skips the transplant shock stage altogether and gives you sturdier, soil-ready roots from the start.
Step 1 – Dip Cutting End in Rooting Hormone
It’s optional, but dipping the stem base in a light rooting hormone helps cuttings establish faster and resist fungus. Shake off any excess powder before planting.
Step 2 – Insert 1–2 Inches Deep in Moist Soil
Use a light, airy mix — something that holds moisture but drains quickly. Make a small hole with your finger and gently press the stem in; you don’t want to crush the node.
Step 3 – Keep in Bright, Indirect Light (Avoid Harsh Sun)
Purple Heart loves light but hates heat stress while rooting. A windowsill that gets filtered morning light is perfect. If leaves start to fade or curl, shift it a bit farther from the window.
Step 4 – Mist Daily to Maintain Humidity Until Roots Form (~2–3 Weeks)
Cuttings love humidity but not soggy soil. A daily mist keeps the top layer damp without drowning the roots.
Pro tip: Cover the pot with a clear plastic dome, old food container, or zip-lock bag to lock in humidity. Just make sure there’s some airflow to prevent mould.
For more detailed insights on how soil and humidity impact propagation speed, the University of Wisconsin Horticulture Extension explains how proper airflow and moisture balance directly affect Tradescantia pallida root development.
Whether you choose water or soil, the goal is the same — give your cutting a calm, steady environment, not too wet or too dry. Once you’ve got that balance right, your Purple Heart will do the rest naturally.
Aftercare: Helping New Cuttings Thrive
Once your Purple Heart cuttings have rooted, this is where most people relax—and accidentally undo their progress. Those tiny new roots are fragile; they need time to adjust before facing full sun or dry air. Think of this stage like rehab: gentle, steady, and patient care will make the difference between a thriving plant and a fading one.
Start by gradually introducing more sunlight. Keep your new plant in bright, indirect light for a week, then slowly shift it closer to the window. Avoid sudden exposure to harsh sunlight—it can bleach or burn the leaves, especially when roots are still soft.
Next, focus on watering. Only water when the top inch of soil feels dry. Overwatering at this stage is the fastest way to rot those delicate roots. When you do water, let it soak through fully, then drain completely—no standing water.
To encourage full, bushy growth, pinch the tips of new stems regularly. This signals the plant to branch out instead of stretching upward. You’ll notice it thickening from the base within a few weeks.
Finally, feed every 4–6 weeks using a diluted houseplant fertiliser (half strength is plenty). Avoid overfeeding—this plant doesn’t need much to stay vibrant.
If you’re curious about other indoor plants that respond well to steady care and light balance, check out our Peace Lily Care Guide: How to Keep Your Indoor Plant Thriving — it follows the same principles of humidity, watering rhythm, and patience that help your Purple Heart stay healthy.
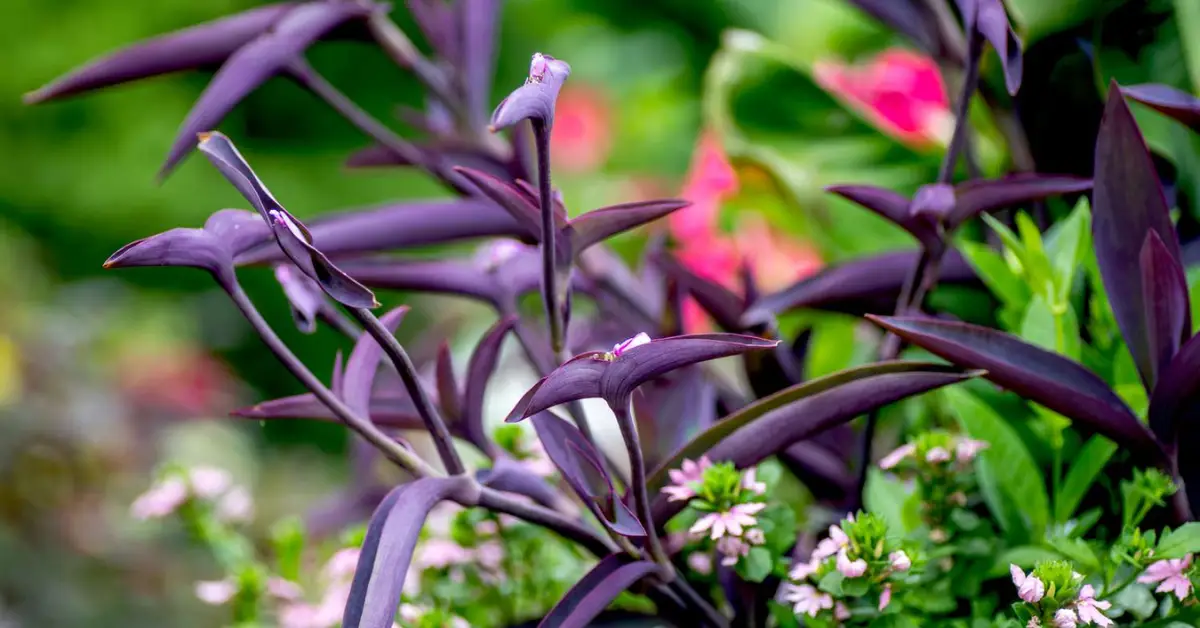
As noted by Southern Living, Purple Heart plants thrive when given moderate sunlight and evenly moist soil, rewarding consistent care with bold purple foliage that keeps its color all season long.
If you follow this rhythm—light, moisture, trim, feed—your Purple Heart will stay dense, colourful, and ready for more cuttings down the line.
Common Mistakes to Avoid During Propagation
Even experienced plant lovers mess up propagation sometimes. Most problems come down to a few avoidable habits. Here’s what to watch for:
- Using Dull Scissors (Causes Stem Rot): A blunt cut crushes the stem tissue, leaving an uneven wound where bacteria can enter. Always use sharp, clean shears and sterilise them with alcohol before each use.
- Leaving Too Many Leaves Underwater: Any leaf submerged in water breaks down quickly, releasing bacteria that cloud the water and suffocate roots. Keep only the top leaves and strip the rest cleanly.
- Overwatering or Soggy Soil: Moisture is good—saturation is not. Keep soil evenly damp, not soaked. Constant wetness creates anaerobic conditions that lead to fungal growth.
- Keeping in Direct Sunlight Too Soon: Freshly rooted cuttings can’t handle full sun. Direct exposure scorches new leaves and drains color fast. Ease them into brighter spots gradually.
How to Multiply Faster: Division and Rejuvenation
Once you’ve nailed the basics, propagation doesn’t just mean cuttings—it can also mean dividing and rejuvenating older plants. This trick keeps your Purple Heart fuller, younger, and easier to manage, especially in hanging baskets or large pots.
- When to divide mature plants: The best time is late spring, when the plant has plenty of new growth but isn’t flowering yet. Gently lift it from the pot, separate a few rooted sections by hand, and replant each in fresh soil.
- How to trim and replant leggy stems: If your plant’s stems start to stretch or fade, trim them back to just above a node. Replant those trimmings into the same pot—they’ll root in place and thicken the base.
- Using propagation to refresh hanging baskets: Over time, older stems lose color at the crown. Replace them with new rooted cuttings every few months to keep your baskets lush and vibrant year-round.
Keeping a small cycle of propagation and division going means you’ll never have to buy another Purple Heart again—you’ll simply grow your own replacements, stronger each season.
Propagation isn’t just about growth — it’s also about timing and recovery. For example, flowering plants often need the right environmental cues to bounce back. You can see how that works in our guide on How to Make Your Poinsettia Bloom Again This Holiday Season — it explains how consistent light cycles and trimming can restart blooms effectively.
Troubleshooting Root Problems
Even when you’ve followed every step carefully, sometimes the roots just refuse to cooperate — and that’s normal. Propagation is more about observation than perfection. You’ll learn more from one slow cutting than ten fast ones. Here’s what I look for when things go sideways:
Roots Not Forming? Check the Temperature (Optimum 20–24°C)
If it’s too cold, your Purple Heart goes into survival mode instead of growth. Keep your cuttings in a warm, stable environment — ideally between 20–24°C (68–75°F). Below 18°C, rooting slows dramatically. A gentle heat mat under the pot or a sunny indoor shelf usually fixes this.
Yellowing Leaves = Too Much Light or Fertiliser
This one’s easy to miss. If your cutting’s leaves start yellowing while still in water or early soil, it’s likely getting too much sun or excess nutrients. Move it back from the window and stop fertilising until new roots are visible. Once it stabilises, you can slowly reintroduce light and diluted feed.
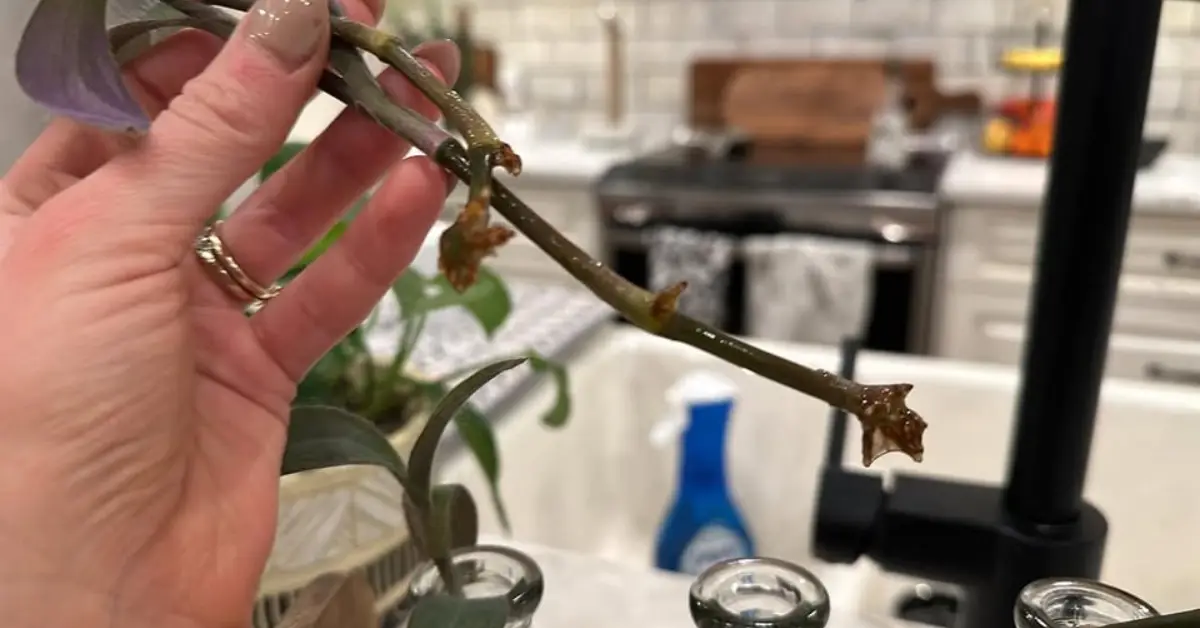
Fuzzy Mould = Overwatering or Stagnant Air
White or grey fuzz on the stem means one thing — too much moisture and not enough airflow. If it’s in water, refresh it daily and trim off any soft, slimy spots. For soil, loosen the mix, cut back watering, and add a small fan nearby for gentle air movement.
Most of these problems fix themselves once you balance light, warmth, and air. Temperature and light imbalances affect many houseplants in similar ways. If you’ve ever struggled with a plant refusing to flower despite perfect care, you’ll find practical parallels in our post on Why Your Snake Plant Isn’t Blooming — and How to Fix It. Think of propagation like teaching your plant to breathe again — not too wet, not too bright, just calm and steady.
Propagation in One Minute
If you’re the kind who likes quick takeaways, here’s your one-minute summary — everything that really matters boiled down:
- Choose a healthy 4–6 inch stem below a node
- Root in water or directly in soil
- Keep humidity high and light bright but indirect
- Repot after 2–3 weeks once roots are ~2 inches
- Pinch tips often for fuller, compact growth
Follow these five points and your Purple Heart will reward you with vibrant color, fast growth, and endless new cuttings to share.
Have you tried propagating your Purple Heart before? Tell me what’s worked (or failed) for you — I’d love to hear your results in the comments below.
For more practical plant guides and care tips, visit Plant Care Dairy — your daily space to learn, grow, and get better with every leaf.
Disclaimer: Results may vary depending on temperature, humidity, and light conditions. Always use clean tools and avoid overwatering to prevent rot. The information provided is for general plant care guidance from Plant Care Dairy.