If you’ve ever felt stuck waiting for peppers to ripen while the rest of your garden is winding down, you’re not alone. This guide cuts through the mixed advice and gives you actionable steps to start hot peppers in December without wasting time or money.
By the end, you’ll know exactly when to sow, how to balance light and heat, which inexpensive containers work best, and how to harden off seedlings so they explode with growth come spring. I’ll share what I’ve learned—from heat mats to Solo cups—so your plants hit the ground running when frost danger passes.
I’ll be honest: I used to start peppers only eight weeks before my local last frost. The plants were pretty, but harvests showed up late. The year I started in December—paired with a good light schedule and bottom-watering—I had stronger transplants and earlier, heavier yields. If you love peppers that bite back, a winter head start is the move.
Why Start Hot Pepper Seeds In December
The Pepper Timeline And Frost Math
Classic advice says to start peppers eight weeks before your last frost. That works for many sweet and mild types, but hot and super-hot peppers benefit from starting seeds in December to give them a longer growing period. December sowing gives you a longer indoor period to grow thicker stems and deeper roots before outdoor planting, as detailed in Sandiaseed’s guide on planting hot peppers.
Think about it this way:
- Frost dates vary by zone: Many regions see last frost from April to May. December seed starting lets you nurture seedlings for 16–20 weeks, not just eight.
- Indoor time is growth time: With steady light and gentle bottom heat, seedlings build momentum you’ll notice after transplant.
Why Super-Hot Varieties Need Extra Weeks
Super-hots like Carolina Reaper can take up to 150 days from transplant to peak production, and growers discuss the benefits of starting seeds early on The Hot Pepper forum. Others like habanero and ghost pepper commonly need 100+ days. If you wait until spring to sow, you risk pushing ripening into the fall—right when temperatures cool and growth slows.
Starting in December doesn’t “rush” peppers—it simply gives them time to mature naturally, so by late spring they’re robust enough to handle real sun and produce earlier.
Indoor Starts Beat Cold, Damp Spring Soil
Peppers resent cold. Early spring beds are often chilly and wet, which slows germination and invites disease. Indoors, you can offer gentle heat, steady light, and precise watering. That controlled environment sets you up for seedlings with thicker stems, healthy leaves, and strong root systems. That controlled environment sets you up for seedlings with thicker stems, healthy leaves, and strong root systems, as explained in our guide to starting seeds under grow lights in December.
In my experience, plants raised with a warm root zone and consistent lighting transition outdoors with less shock and start flowering sooner.
How To Start Pepper Seeds Indoors: 7 Smart Steps
Use this simple, budget-friendly process to get an early jump without fancy gear. If your title promised steps, here they are—exactly 7 Smart Steps you can follow today:
- Gather Your Kit: Seed-starting mix, pepper seeds, reusable labels, a heat mat (with thermostat if possible), a clear plastic cover or humidity dome, full-spectrum grow lights, and a tray or leak-proof bin for bottom-watering.
- Choose Budget Containers: Use a Solo cup inside a Solo cup. Punch 5–7 small holes in the inner cup for drainage; the outer cup acts as a reservoir. This setup keeps roots hydrated without waterlogging. Seed trays and 4-inch pots also work well.
- Fill And Sow: Moisten seed-starting mix until it’s evenly damp, not soggy. Fill containers and sow 2–4 seeds per cell/cup at about 1/4 inch deep. Lightly firm the surface.
- Warm From Below: Set the tray on a heat mat around 85°F for faster germination. Add a clear cover to trap humidity, and vent daily to discourage mold.
- Light Early And Long: The moment you see green, run lights 14–16 hours per day, keeping fixtures 4–8 inches above seedlings. Aim for full-spectrum LEDs or fluorescents.
- Water From The Bottom: Pour water into the outer cup or tray and let the mix wick it up for 15–30 minutes. Dump any leftover water so roots get oxygen and stems stay dry.
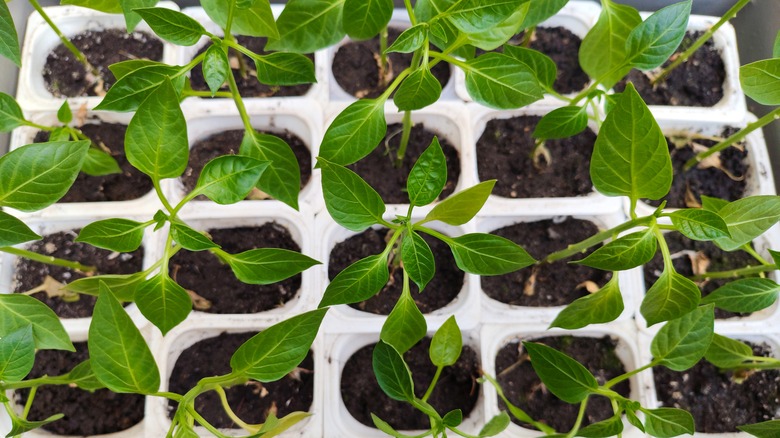
- Thin And Pot Up: When seedlings show their first true leaves, thin to one plant per cup. Once each has four leaves, move to 4-inch pots (or fresh Solo cups). Pinch early flower buds so energy goes to roots and stems.
Seed And Soil Setup On A Budget
I love the cup-within-a-cup method because it’s cheap, reusable, and clean. It’s also easy to see water levels and prevent overwatering. If you prefer trays, slip a capillary mat under cells for even moisture without soaking foliage.
- Seed-starting mix only: It’s sterile, airy, and gentle for sprouts. Potting soil is too coarse and can harbor pathogens, and Eden Brothers provides additional tips for pepper seed planting.
- Label everything: Hot varieties can look identical as seedlings—save yourself a mystery later.
Heat, Humidity, And Light That Peppers Love
Peppers germinate best warm. A heat mat set around 85°F speeds sprouting and evens out emergence. Keep the dome on until most seeds pop, then gradually increase ventilation.
- Vent daily: Pop the lid for 10–20 minutes to reduce mold risk.
- Bright, close lights: Keep LEDs a few inches above canopies; raise them as plants grow to avoid leaf burn.
- 16-hour photoperiod: In winter, peppers need long “days” indoors to stay compact and sturdy.
Thinning, Potting Up, And Early Pinching
When seedlings develop their first true leaves, gently snip extras at soil level. Don’t yank—tugging can disturb roots of the keeper plant. Pot up when roots reach container edges; fresh mix plus space accelerates growth.
- Thin to one plant: This prevents crowding and improves airflow.
- Pinch early buds: Before transplant, remove most early flowers so plants bulk up. Leave a few buds only when you’re close to planting out.
- Watch rootbound signals: If cups fill with roots before spring, pot up again to 1–2 gallon nursery pots.
Light, Heat, And Water: Getting The Indoor Environment Right
Dialing In Grow Lights
Good light makes the difference between sturdy and spindly. I aim for 14–16 hours daily with a mechanical timer so it’s consistent. Keep intensity high but safe.
- Distance: 4–8 inches above plant tops for most LEDs; check manufacturer guidance.
- Signs of too much light: Leaf curl, bleaching, crispy edges.
- Signs of too little light: Stretching (legginess), small leaves, weak stems.
Warming The Root Zone Safely
Use a thermostat with your heat mat if possible. Warm roots speed metabolism and germination, but avoid cooking the mix.
- Target germination temp: 80–85°F at the media surface.
- After sprout: Reduce to 75–80°F to prevent leggy growth.
- Air temperature: 68–75°F with light airflow is ideal.
Smarter Watering: Bottom-Up Wins
Overhead watering can collapse delicate stems and invite damping-off. Bottom-watering keeps foliage dry and encourages roots to explore.
- Fill the reservoir: Add water to the outer cup or tray; let the mix wick it up for 15–30 minutes.
- Drain the excess: Empty leftover water to protect roots from rot.
- Moist, not soggy: If the surface looks wet and cool for hours, you’re probably overdoing it.
Timing, Transplanting, And Hardening Off
Signs Your Seedlings Are Ready
Transplant success comes down to plant readiness and soil warmth. I wait until each pepper is about 6 inches tall, with branching growth and a sturdy stem.
- Soil temperature: Aim for ~60°F at 2 inches deep before planting out, which is why starting seeds in December is actually possible.
- Bud management: Pinch most early flowers while indoors; allow a few to remain just before transplant to signal the plant it’s go-time.
How To Harden Off In 14 Days
Give peppers a gradual taste of the outdoors. Rushing this step can stall growth for weeks.
- Days 1–3: 1–2 hours outside in bright shade; no wind if possible.
- Days 4–7: 3–4 hours; introduce gentle morning sun.
- Days 8–10: 4–6 hours; extend sun exposure.
- Days 11–14: Full day; one overnight if lows stay above 55°F.
The First Two Weeks Outdoors
Plant peppers in rich, well-draining soil with steady moisture. A small scoop of compost in each hole helps, but don’t overdo nitrogen or you’ll grow leaves instead of peppers.
- Spacing: 18–24 inches apart, rows 24–36 inches.
- Mulch: Add straw or shredded leaves to keep soil warm and even out moisture.
- Protection: Use row cover on cool nights or windbreaks if gusty.
Troubleshooting: Fixes For Common Pepper Seedling Problems
Slow Or No Germination
Heat and moisture are usually the culprits. Old seed can also lag. I keep a cheap probe thermometer in the mix to verify actual temperature at seed depth.
- Warm it up: 80–85°F at the medium surface speeds sprouting.
- Refresh seed: If rates are low, buy new packets and try again in a separate tray.
- Don’t bury too deep: 1/4 inch is the sweet spot for most hot peppers.
Leggy Or Pale Seedlings
Stretching signals insufficient light or excessive heat with low intensity. Correct by lowering lights and backing down heat a touch after germination.
- Raise intensity: Move lights closer; increase hours to 16/day.
- Improve airflow: A small fan on low strengthens stems.
- Check schedule: Keep a steady day/night rhythm with a timer.
Damping-Off And Mold
Fuzzy stems and sudden collapse indicate fungus. Prevention beats cure: keep the surface dry and air moving.
- Bottom-water only: Avoid wetting stems and leaves.
- Vent domes daily: Release humidity to discourage pathogens.
- Use sterile mix: Seed-starting blends reduce disease pressure.
Nutrient Questions And pH
Peppers are light feeders early on. I wait until the first or second pot-up to start a gentle feeding routine.
- Weak fertilizer: Apply a half-strength, balanced liquid feed every 10–14 days once established.
- pH target: 6.0–6.8 is a comfortable range for most peppers.
- Watch for signals: Yellowing suggests nitrogen deficiency; purple underside hints at phosphorus stress, often from cold roots.
Quick Reference And Conclusion: Checklist, Table, And Next Steps
December-To-May Checklist
- December: Order seeds; set up lights, heat mat, and containers. Start sowing super-hots.
- January: Finish sowing hot varieties; maintain 80–85°F germination temps and 16-hour light days.
- February: Thin to one plant per container; pot up to 4-inch cups; begin gentle airflow and weak feeding.
- March: Continue potting up if rootbound; manage early buds; keep lights close and strong.
- April: Start hardening off on mild days; monitor soil temps outdoors.
- May: Transplant when soil is ~60°F and nights are reliably mild; mulch and protect as needed.
Pepper Timing Table By Frost Date
| Region/Last Frost | Seed Starting (Hot/Super-Hot) | Transplant Window | Notes |
|---|---|---|---|
| Late April | December–January | Late April–Early May | Super-hots appreciate the longest indoor run. |
| Early–Mid May | December–February | Mid–Late May | Watch soil temps; hold indoors if nights dip below 55°F. |
| Late May–Early June | January–February | Late May–June | Still safe to start in December if you enjoy potting up once more. |
Final Thoughts And Next Steps
Smart gardening is about stacking small advantages: steady heat, bright light, clean watering, and patient hardening off. Starting in December doesn’t complicate your season—it simplifies the path to earlier flowers and bigger harvests.
If you’ve hesitated because winter feels “too early,” try one tray this year and compare it to a spring-sown batch. I think you’ll see thicker stems, faster rebounds after transplant, and ripe pods weeks sooner.
Have a question or a tip of your own? Drop a comment on Plant Care Dairy—I’d love to hear how your December pepper starts go and what varieties you’re trialing.
Disclaimer: The information in this article is for general educational purposes. Local climate, microclimates, and variety differences can affect results. Always verify frost dates and soil temperatures for your location, and follow product instructions for lights, mats, and fertilizers. When in doubt, consult your local extension service or a qualified horticulture professional.