
I still remember the first time I tried growing cress on my kitchen windowsill. It was just a small tray, some seeds, and a damp piece of cotton wool—and within a week, I had these tiny, peppery greens ready to eat. If you’ve ever thought indoor gardening is complicated, I can promise you, cress is one of the simplest edible plants to start with. You don’t need a garden, fancy tools, or a green thumb. All you need is a little curiosity, a consistent spot with light, and a willingness to see something small transform into fresh, flavorful greens you can harvest in days.
In this guide, I’ll walk you step by step, sharing tips and tricks that I’ve learned over years of indoor herb growing, so you can enjoy a constant supply of homegrown cress without the stress.
Why Choose Cress for Indoor Growing?
When I first started growing herbs indoors, I was amazed at how fast cress can go from seed to plate. Honestly, there’s almost nothing like it if you want quick results without much hassle. Here’s why I always recommend it for anyone starting with indoor edible plants:
Fast growth and space efficiency
- Cress seeds can germinate in just 1–2 days.
- You can harvest baby leaves in a week, or full growth in about two weeks.
- Even the smallest windowsill or kitchen counter works; you don’t need a garden.
I love how you can literally watch life sprout right before your eyes, and within days have something edible and fresh. For reference, BBC Gardeners’ World Magazine highlights how this tiny plant thrives in compact indoor spaces and grows almost anywhere you set it.
Low maintenance and beginner-friendly
- Requires minimal nutrients, especially if you’re doing the kitchen-roll or cotton-wool method.
- Easy tray methods mean you don’t have to worry about complicated pots or soil mixes.
- No need for fancy tools; just water, light, and patience.
Nutritional and flavour payoff
- Those tiny, peppery leaves pack a punch in flavour.
- Perfect as a garnish, in salads, or sprinkled over sandwiches.
- You get fresh, edible greens without stepping outside or buying packaged alternatives.
Honestly, once you see how simple and rewarding it is, you’ll understand why cress is my go-to for indoor greens. It’s fast, forgiving, and the flavour makes it worth the few minutes you spend tending it.
Choosing the Right Cress Variety for Indoor Use
Not all cress is created equal, and picking the right type can make or break your indoor growing experience. I’ve experimented with a few, and here’s what I’ve learned:
Garden cress (Lepidium sativum)
- Quick germination, perfect for trays or kitchen-roll setups.
- Delicate, peppery leaves that are ready in just a week.
- Ideal for beginners because it grows reliably indoors.
Curled vs Greek cress
- Curled cress has a frilly texture and a slightly milder flavour.
- Greek cress is a bit more robust, with a stronger peppery bite.
- Both can be grown indoors, but think about how you plan to use it in your kitchen—texture and taste matter.
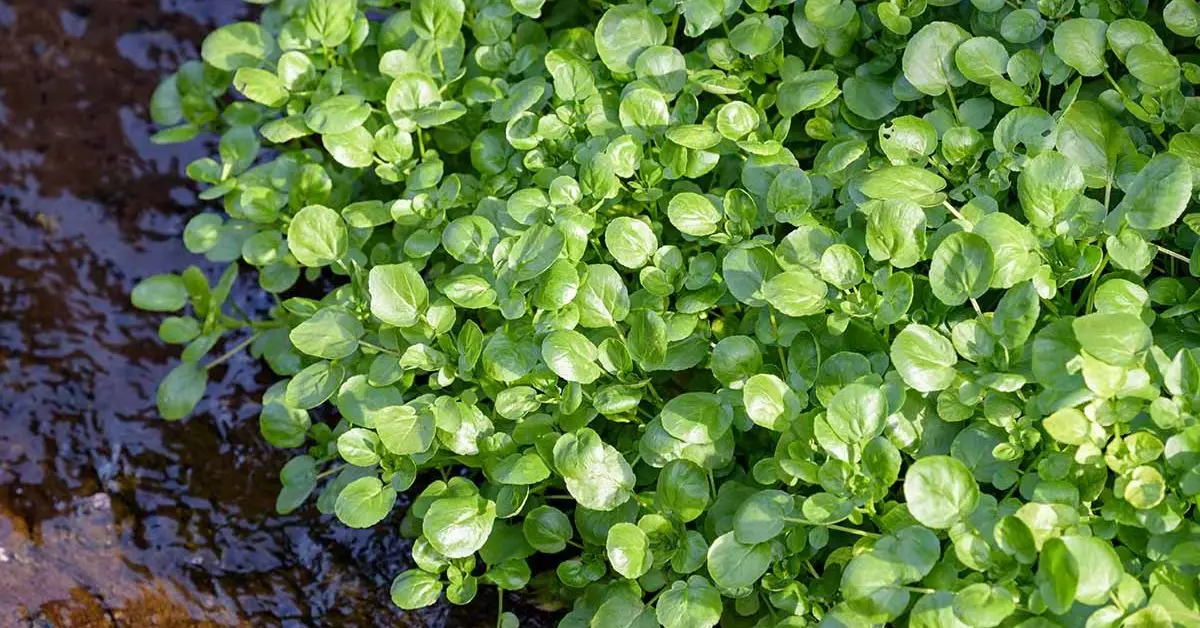
Watercress vs garden cress
- Watercress needs a wetter environment or even a hydro setup.
- Garden cress thrives on moist soil or paper/cotton without complicated watering.
- Confusing these can lead to disappointing growth if you’re not prepared for watercress’s special needs.
Choosing the right variety is crucial. I’ve seen beginners pick seeds at random, only to end up with weak, leggy plants that didn’t taste great. By starting with garden cress or the variety that matches your space and taste, you’ll get faster success and a much more satisfying harvest.
Setting Up Your Indoor Growing Space
Before you plant a single seed, it’s important to think about your setup. The right space can make indoor growing effortless and more productive.
Container choices
- Use a shallow tray, small pot, or even a recycled container.
- Ensure good drainage; small holes at the bottom prevent soggy roots.
- I often repurpose old food trays—it’s eco-friendly and works perfectly.
Growing substrates
- You can grow on cotton wool, kitchen roll, or paper towels for microgreens.
- Potting mix or soilless mix works if you want slightly longer growth.
- The key is consistent moisture without waterlogging.
Lighting indoors

- Natural light is ideal, but 4–6 hours of indirect sunlight works well.
- LED grow lights are great if your space is dim; they provide 8–12 hours of light. If you’re unsure about how much light your windowsill receives or want to optimise your LED setup, check out our detailed guide on how much sunlight indoor plants really need to make sure your cress gets just the right amount.
- Rotate trays occasionally so all seedlings get even exposure.
Temperature and humidity
- Keep the room moderately cool; avoid placing trays near radiators.
- Average indoor humidity is fine, but good airflow helps prevent mould.
For practical guidance on choosing the best indoor growing medium, I found a useful guide on GrowVeg that explains methods for paper, cotton, and soil setups. Using the right medium really makes those first few sprouts thrive.
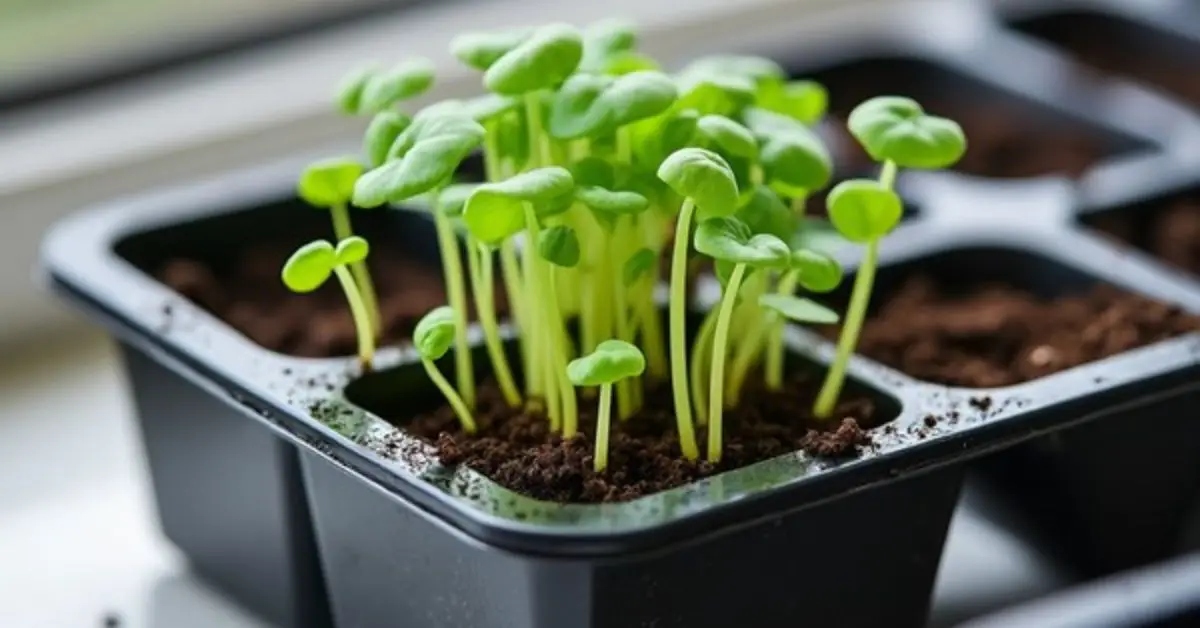
Sowing Seeds & Early Growth Steps
With your space ready, it’s time to get seeds into your tray. How you sow them makes all the difference.
When and how to sow
- Sow seeds densely; crowded seedlings actually support each other.
- Scatter seeds on the surface and lightly press them in, or leave them on top for paper/cotton setups.
- Keep the substrate damp, but not soaked.
Germination conditions
- Cover lightly if using paper or cotton to retain moisture.
- Keep them in indirect light; some growers prefer a short dark period initially.
- Check daily for dampness—spritz lightly if the surface starts drying.
Transferring vs microgreens
- For microgreens, harvest right on the tray after a week.
- For full leaves, carefully transfer seedlings to potting mix once roots establish. If you plan to move your seedlings from cotton or paper setups into soil, you can follow our step-by-step instructions on how to repot indoor plants safely to avoid disturbing the roots and ensure healthy growth.
Following these steps ensures a smooth start. I’ve seen many beginners get frustrated when seeds dry out or germinate unevenly, so giving this stage your attention pays off.
Growing On & Maintenance
Once your cress has sprouted, the goal is to keep it thriving without stress.
Watering and moisture control
- Keep the substrate consistently damp; overwatering causes root rot, while too little slows growth.
- I lightly mist trays every day if using paper/cotton, and check soil moisture if using potting mix.
Nutrients/fertiliser
- Microgreens usually don’t need fertiliser.
- For longer growth, a light feed every couple of weeks keeps leaves lush and flavorful.
Light and spacing issues
- Leggy seedlings often mean too little light; move closer to a window or use supplemental light.
- Yellow leaves may indicate overwatering or nutrient deficiencies.
- Rotate trays to ensure even growth.
Successive sowing
- Start a new batch every 7–10 days for a continuous supply.
- This keeps your kitchen stocked and avoids downtime between harvests.
Paying attention to these few details—watering, light, rotation—will help you enjoy healthy, flavorful cress that keeps coming back with minimal effort.
Harvesting & Using Your Indoor Cress
After all the care you’ve given your indoor cress, it’s finally time to enjoy the fruits of your effort. Harvesting at the right time ensures the best flavour and texture.
Harvest timing
- For microgreens, pick when the first true leaves appear or when seedlings are about 2 inches tall.
- If you prefer larger leaves, let them grow a little longer but watch out for early flowering, which can make the leaves bitter.
I found a really useful guide on Sow Right Seeds that explains exactly when to harvest microgreens for peak flavour, which helped me avoid bitter or overgrown leaves.
Harvest method
- Use scissors to snip leaves at the base; it’s quick and keeps the tray tidy.
- If grown in soil, rinse gently before use.
Use cases
- Sprinkle over salads or sandwiches for a peppery kick.
- Use as a garnish for soups, eggs, or smoothies.
- Microgreens are perfect for small dishes and snacks; harvest gradually for continual use.
Flavour tips
- Indoor cress can taste slightly milder than outdoor-grown varieties, but light exposure and freshness boost the flavour.
- Harvest early in the morning or after a misting to get the most vibrant taste.
Tasting greens you’ve nurtured yourself is such a rewarding moment—it makes all the watering, lighting, and monitoring completely worth it.
Troubleshooting Common Indoor Issues
Even though cress is forgiving, indoor growing can present unique challenges. Here’s how I handle the most common problems:
Leggy, pale plants
- Cause: insufficient light or overcrowded sowing.
- Fix: increase light exposure and space seeds evenly.
Mould or fungal issues

- Cause: excess moisture or poor airflow on paper/cotton setups.
- Fix: mist less, remove cling film early, and ensure a well-ventilated tray. I often refer to Plantura’s guide for indoor cress, which explains how to prevent mould naturally.
Root rot or soggy substrate
- Cause: overwatering in soil containers.
- Fix: ensure proper drainage, allow the surface to dry slightly between waterings.
Bitterness or premature flowering
- Cause: heat stress or letting the plant grow too long.
- Fix: keep your indoor area cooler and harvest early for the sweetest leaves.
Knowing these fixes gives you confidence. When issues arise, you can act quickly, prevent waste, and keep your indoor cress thriving. It makes the whole indoor growing experience less stressful and much more rewarding.
Next‑Level Tips & Indoor Growing Hacks
Once you’ve got the basics down, there’s a lot of room to get creative and really make your indoor cress thrive. Here’s what I’ve learned experimenting over multiple seasons:
Microgreens vs full plants
- Microgreens: quick harvest, great for garnishes, take very little space.
- Full plants: slightly longer growth, bigger leaves, more yield but need more light and space.
- I usually rotate: microgreens for weekly use, full plants for a larger salad batch.
Using unusual containers
- Try eggshells, mason jars, or window boxes—they’re perfect for indoor growing.
- Small containers can sit on your windowsill and double as décor. Just like you can optimise the growth of other indoor plants, our guide on how to make rabbit’s foot fern fuzzy and full again offers clever tips on watering, light, and positioning that can inspire similar techniques for your indoor herb setups.
Companion indoor planting
- Pair cress with other quick-growing herbs like basil or chives.
- Stagger sowing so you always have fresh greens.
- Position herbs where you cook most often; it makes harvesting effortless.
Seasonal indoor planning
- Keep cress growing year-round by adjusting light orientation.
- Use supplemental LED lighting in winter months.
- Rotate trays for even light exposure.
Health & flavour bonus
- Indoor-grown greens can be surprisingly nutritious. Fresh cress boosts vitamin C, iron, and adds peppery flavour to meals.
- Keeping your greens fresh and harvested at peak ensures the best taste and nutrients.
These next-level tips elevate your indoor gardening beyond just survival—it becomes a fun, rewarding hobby that also benefits your health and meals.
Summary & Your 10‑Day Indoor Cress Action Plan
To make this easy, here’s a simple plan to get started immediately and keep a steady supply:
Day 1–2
- Set up container with your chosen substrate.
- Sow dense seeds evenly across the tray.
Day 3–7
- Monitor light and maintain consistent moisture.
- Watch for germination; adjust environment as needed.
Day 8–10+
- Harvest microgreens or let plants grow longer for larger leaves.
- Start a new batch so you have continuous supply.
Monthly rhythm
- Sow every 7–10 days to ensure fresh cress is always available for your kitchen.
With this simple plan, anyone can turn a small windowsill into a continuous source of fresh, peppery cress.
If you try these steps, I’d love to hear how your indoor cress turns out! Leave a comment below sharing your setup, tips, or even a fun photo. For more indoor gardening advice, hacks, and guides, visit Plant Care Dairy—we’re all about making homegrown plants easy and enjoyable.
Disclaimer: The information provided in this guide is for educational purposes only. Individual growing conditions may vary, and results are not guaranteed. Always use caution when consuming plants and consult a healthcare professional if you have specific dietary or health concerns.