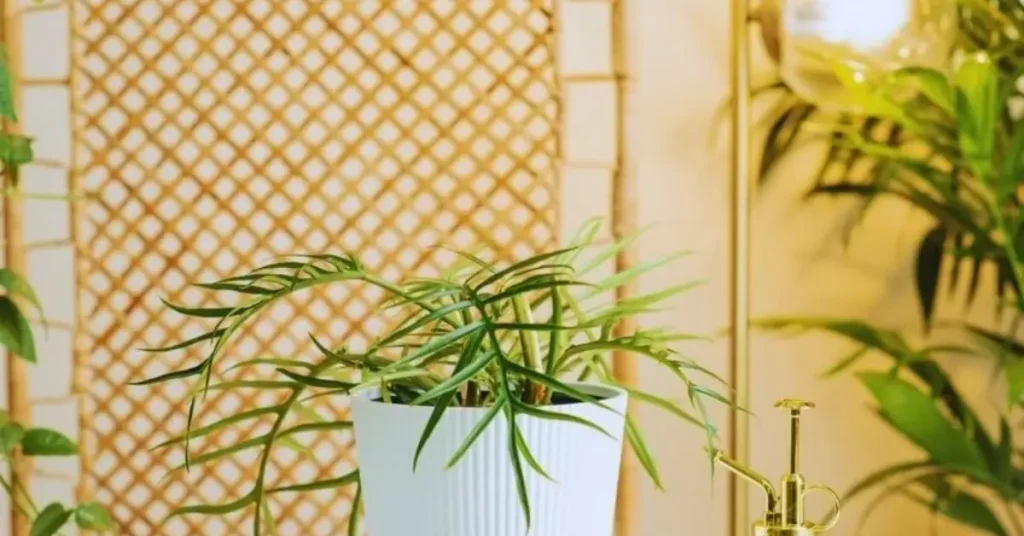
I fell for Philodendron tortum the first time I saw those narrow, ribbed leaves reaching like fireworks. Then I brought one home and watched it stretch toward the window, drop a leaf, and sulk. Turns out, tortum doesn’t need magic—just the right setup, done consistently.
If you’ve read the usual guides, you’ve seen the same loop: “bright indirect light, water when dry, chunky soil.” Helpful, but not enough. What actually changes your results is precision—how far from the window, how airy the mix (by volume), how to water by weight instead of guesswork, and when to give it a pole so it stops getting leggy and starts throwing fuller leaves.
In this guide, I’ll show you how to grow and care for Philodendron tortum like a pro with a repeatable plan: exact light placement that prevents stretch, a simple substrate recipe you can mix in five minutes, a soak-to-light schedule you won’t forget, and a no-drama way to prune, root, and re-shape a sparse plant. It’s practical, tested, and built to work in real homes—not just greenhouse photos.
Before we dive in, tell me: what’s your biggest tortum headache right now—light, watering, or leggy growth?
Why Philodendron Tortum Is Special (and Worth Growing)
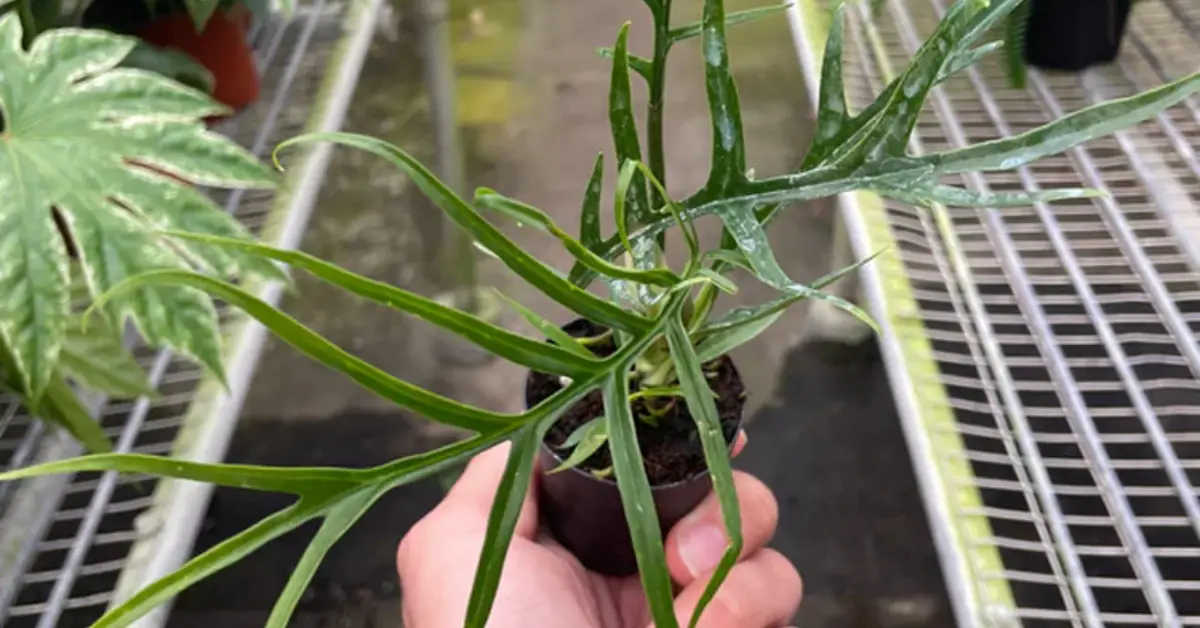
I still remember the first time I saw a Philodendron tortum up close — those thin, skeletal leaves looked more like nature’s architecture than foliage. It wasn’t just another green accent; it had presence. What makes this plant special is how alive it feels — it responds to you. Give it light, space, and something to climb, and it rewards you with perfectly split leaves that seem to twist toward the sun.
Unlike most philodendrons, Tortum doesn’t sprawl or sit still — it climbs. That’s what I love about it. It’s always reaching, reshaping, and adapting. You can guide it to grow tall on a moss pole or keep it compact with pruning. It’s forgiving enough for a beginner but detailed enough to keep experienced plant lovers engaged.
Here’s why it stands out:
- Those dramatic, deeply lobed leaves instantly draw the eye.
- It grows upward, so it’s perfect for small spaces.
- It bounces back fast after pruning or repotting.
- It’s a plant that actually teaches you how to balance light, moisture, and patience.
Native Habitat & Natural Conditions — Climate, Light, Humidity

To grow a thriving Tortum, you first have to think like the rainforest. In its native home — the humid lowlands of northern Brazil — it grows beneath tall canopies where sunlight filters softly through layers of green. The air stays warm, the ground never dries out completely, and moisture hangs in the air all day.
Indoors, the goal is to recreate that same balance of bright but gentle light and consistent humidity. As Gardening Know How explains, keeping your Tortum within about three feet of an east or west window gives it enough brightness without harsh rays. If your windows face south, a sheer curtain will protect those delicate leaves from burn marks.
Here’s what’s worked best for me and many growers I’ve talked to:
- Light: Bright, indirect light. Avoid direct afternoon sun.
- Temperature: Steady warmth — around 65°F to 85°F (18°C–29°C). No sudden chills.
- Humidity: Aim for 60–80%. You can use a small humidifier or set the pot over a pebble tray. I’ve seen collectors on Reddit keeping their Tortums at around 80% humidity in glass tanks with incredible results. If you’re unsure how to measure or control moisture levels, our detailed Humidity Level Guide for Houseplants breaks down the ideal ranges for tropical species like Philodendron tortum and shows easy ways to maintain them indoors.
- Airflow: Gentle movement of air prevents fungal issues. Even a quiet fan nearby helps.
Once you nail this setup, the difference shows quickly — new leaves open stronger, glossier, and healthier. It’s proof that when you mirror its rainforest rhythm, the plant thrives.
What Beginners Often Misunderstand About Tortum
The biggest mistake people make is treating Philodendron tortum like every other houseplant. It’s not fussy, but it is precise. Here’s where I see most beginners go wrong:
- Overwatering: It’s tropical, yes, but it doesn’t want soggy soil. Moist air matters more than constant watering.
- No climbing support: Without a moss pole or board, it grows weak and leggy. This is a climber — give it something to hold onto.
- Low light: Tortum tolerates shade, but it performs in filtered brightness. That’s when the leaves stay wide and bold.
- Ignoring humidity: It can survive in 40%, but you’ll never see its true beauty until it feels that tropical moisture.
Once you tweak these small habits, you’ll see why so many collectors swear by this plant. It’s not demanding — it’s communicative. When you get it right, it tells you with lush, sculptural growth that feels almost unreal.
Substrate, Pot & Drainage Setup
When it comes to Philodendron tortum, the real secret lies below the surface — in the roots. I’ve learned that this plant thrives not because of how often you water or fertilize, but because of how well you prepare the foundation it grows in. A strong, breathable root zone gives you thicker stems, cleaner leaves, and faster recovery after pruning or repotting.
Ideal Soil Mix Recipe
Forget the heavy, compact “houseplant” mixes — Tortum needs air. In the wild, its roots grip bark and moss, not soil. So the goal is to create a mix that drains fast but still holds light moisture. The blend I’ve seen work best (and the one also mentioned by House Plant Journal ) combines texture with oxygen.
Here’s the mix I recommend:
- 40% premium potting soil (base structure)
- 25% orchid bark or pine bark chips (aeration + root grip)
- 20% coco coir (even moisture retention without heaviness)
- 10% perlite or pumice (drainage & airflow)
- 5% activated charcoal (controls odor and bacteria buildup)
This mix mimics the natural forest floor — airy, slightly damp, and full of organic texture. When you water, it should flow through quickly, leaving the roots damp but never soggy.
Pot Choice (Material, Size & Drainage)
If you’ve ever pulled a plant out of a glossy ceramic pot only to find mushy roots, you know how important drainage is. Tortum’s roots breathe like lungs — trap them in a sealed pot and they suffocate.
Here’s what works best:
- Material: Terracotta pots allow natural airflow and prevent waterlogging. Plastic pots are fine if you’re consistent with watering, but make sure they have large drainage holes.
- Size: Choose a pot that’s only 1–2 inches larger than the root ball. Too big, and moisture stays trapped; too small, and the roots circle too fast.
- Drainage: Always check that water flows freely from the bottom within a few seconds of watering. If not, you need a looser mix or more perlite.
When & How to Repot
You’ll know it’s time when:
- Roots start poking out from the bottom drainage holes.
- Water runs straight through too quickly (meaning the roots have displaced most of the soil).
- The plant seems top-heavy or dries out within a day after watering.
To repot:
- Gently slide the plant out — never yank it by the stem.
- Shake off excess soil and inspect the roots.
- Move to a pot that’s slightly larger, not oversized.
- Refill with fresh mix and water lightly to settle the roots.
Root Care During Repotting
Think of this step as a health check-up.
- Trim any black, mushy, or foul-smelling roots — those are signs of rot.
- Keep only the firm, white, or tan roots; they’re healthy and active.
- If you’ve had drainage issues before, add a layer of bark or perlite at the bottom to keep water moving.
After repotting, let it rest in indirect light for a few days before watering again. That pause gives micro-tears in the roots time to heal naturally.
Watering & Fertilizing Strategy
I used to think watering was simple — you just water when it looks dry. But Tortum taught me otherwise. It’s a plant that thrives on rhythm. Too much water, and the roots drown; too little, and the leaves crisp. The key is to water deeply but less often, allowing the top layer to breathe in between.
Watering Schedule Principles
The simplest way to get this right? Touch and lift. If the top 1–2 inches feel dry and the pot feels lighter than usual, it’s time. According to Greg App, an average Tortum in a 5-inch pot needs about 0.8 cups of water every 9 days — but that varies with your environment.
Golden rules to follow:
- Always water until it flows freely from the bottom.
- Empty any saucers after watering — don’t let roots sit in runoff.
- Use room-temperature water; cold water shocks the roots.
- In summer, monitor every few days; in winter, every 10–12 days is often enough.
Seasonal Adjustments
Tortum slows down in winter, so you should too. During the cold months:
- Reduce watering frequency — soil stays wet longer.
- Skip fertilizing entirely; the plant isn’t actively growing.
- Move it slightly closer to your light source if the days are short.
As winter slows your plant’s metabolism, it’s worth adjusting your entire routine — from light placement to humidity and watering. You can follow our full Houseplant Winter Care Guide to keep your Tortum and other indoor plants healthy through the colder months.
In spring and summer, resume regular care and watch for new growth points — they’ll tell you it’s ready to drink more again.
Fertilizer Type, Concentration & Frequency
Once your Tortum starts pushing out new leaves, it’s time to feed. I like using a balanced liquid fertilizer (around 20-20-20) diluted to half strength every 2–3 weeks during active growth.
Tips:
- Overfeeding does more harm than skipping a dose — salts build up fast.
- Flush the soil with clean water every few months to clear residue.
- You can alternate between organic liquid feed (like fish emulsion) and slow-release pellets for steady nutrition.
Mist, Foliar Feeding & Micronutrients
Misting isn’t just about humidity — it’s a way to clean the leaves and boost gas exchange. But do it lightly and in the morning, so the leaves dry by nightfall.
You can also use a diluted foliar spray every 3–4 weeks for micronutrients like magnesium and iron. If your Tortum’s leaves start yellowing between veins or lose their shine, that’s often a sign it’s time to supplement.
Once you establish this rhythm — airy soil, well-timed watering, and balanced feeding — your Philodendron Tortum will start behaving like it’s back in its native rainforest: steady, glossy, and full of new growth every few weeks.
Propagation & Cloning Techniques
There’s something deeply satisfying about growing a new Philodendron tortum from a single cutting. It’s not just about saving money — it’s about watching life restart from a single node. Whether you’re reviving a leggy plant or just want to multiply your collection, propagation is simple once you understand the basics.
Stem Cuttings (Water or Soil Method)
If you’ve never tried it before, stem cuttings are the easiest and most reliable way to propagate Tortum. I’ve done this dozens of times, and it never stops being rewarding.
Here’s how I do it:
- Pick a healthy stem with at least one visible node and a leaf above it.
- Use sterilized scissors or a sharp blade to cut just below the node.
- Remove the lowest leaf to expose the node — that’s where new roots will emerge.
- You can root it in water, moss, or directly in soil.
- In water: change it every few days and keep it slightly warm.
- In moss: keep humidity high (a clear plastic cover or jar works great).
- In soil: use a light, airy mix and keep it evenly moist.
- Once roots are about 2–3 inches long, transplant it into a small pot with your regular Tortum mix.
The higher the humidity, the faster you’ll see roots form — especially if you’re propagating during active growth months like spring or early summer.
Air Layering, Node Activation & Keiki Paste
If you’re dealing with a mature Tortum that’s too tall or leggy, air layering is your best bet. Instead of cutting the stem completely, you encourage roots to form while it’s still attached.
Here’s a quick way to do it:
- Pick a healthy section of stem with a visible node.
- Gently remove the outer layer of bark around the node.
- Wrap that section with moist sphagnum moss, then cover it with plastic wrap.
- Secure it with string or clips and keep it damp.
In a few weeks, roots begin to form under the wrap. Once they’re about two inches long, you can safely cut below and pot it as a new plant.
For stubborn nodes that won’t activate, applying a small amount of keiki paste can help stimulate growth hormones and trigger new shoots. It’s an optional trick but often works wonders on slow-growing stems.
Timing, Environment & Success Rates
Timing matters. Spring and early summer are the best seasons for propagation — warmth and longer daylight give the plant the energy it needs to root quickly.
- Average rooting time: 2–4 weeks in ideal humidity.
- Success rate: Around 80–90% if humidity stays above 60%.
- Temperature: Keep between 70°F and 80°F for steady growth.
Avoid propagating in winter unless you have a warm, bright space. Cold, dark conditions slow root development dramatically.
Troubleshooting Failed Root Attempts
If your cutting turns black or soft, it’s usually because of:
- Too much water: Roots rot before forming. Try semi-moist moss or chunky soil instead.
- Too little oxygen: Overly compact mix suffocates the stem.
- Low humidity: Roots can’t initiate without consistent moisture in the air.
When this happens, simply cut back to a healthy node and start again — most Tortums bounce back easily.
Training, Support & Growth Form Management
As your Tortum matures, it stops behaving like a tabletop plant and starts climbing. That’s when structure becomes essential. Without it, you’ll notice leaves getting smaller and the stem growing unevenly.
Moss Poles, Boards & Trellises
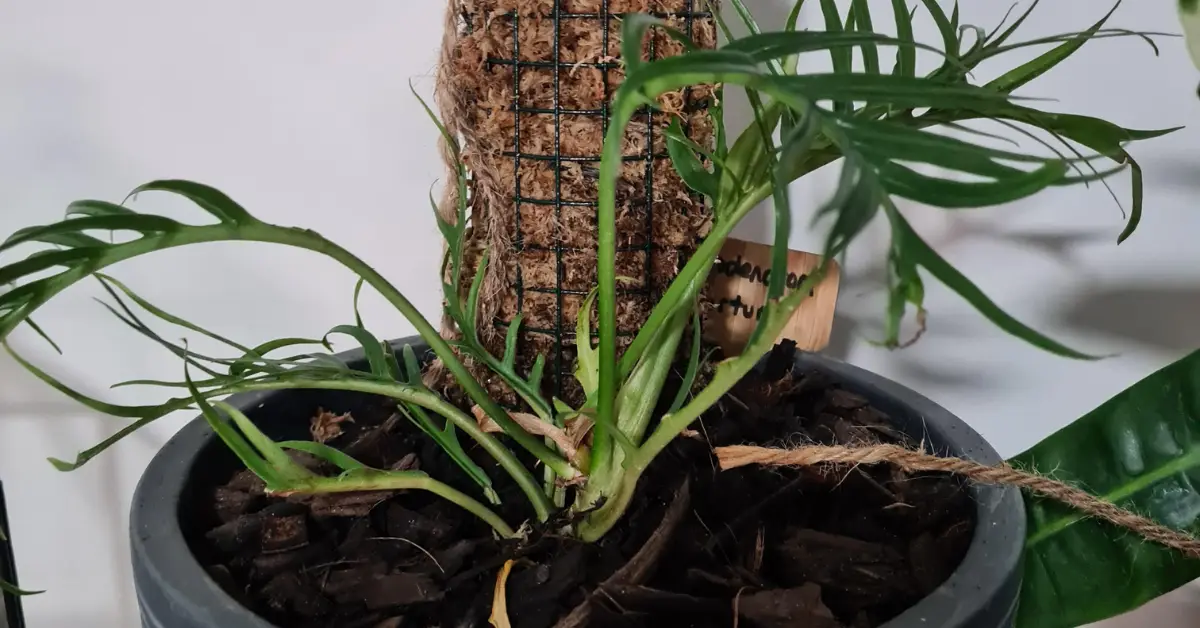
Think of support as part of your plant’s anatomy. Tortum isn’t meant to sprawl; it’s designed to reach upward. A moss pole or wooden board helps mimic its natural growth on tree trunks.
Tips for support setup:
- Insert the pole deep into the pot before the plant grows too tall.
- Gently tie the stem with soft plant ties every few inches.
- Keep the moss on the pole slightly damp — it encourages aerial roots to grab on.
- Rotate the pot occasionally so the plant grows evenly toward the light.
Once it starts climbing, you’ll notice thicker stems, wider leaves, and stronger color — signs it’s truly thriving.
Pruning for Fullness & Height Control
If your Tortum looks stretched or uneven, a light pruning session can completely change its form. Cutting just above a node helps break apical dominance, which encourages side shoots and denser growth.
Here’s how I handle it:
- Always use sterilized tools.
- Cut above a healthy node with visible aerial roots.
- Don’t remove more than one-third of the plant at once.
In a few weeks, you’ll see new growth emerging from the sides — fuller, stronger, and more compact.
Node Activation & Mid-Stem Growth
Sometimes, lower nodes stay dormant for months. If you want to wake them up, try gently scraping the surface near the node to expose fresh tissue. Keep humidity high, and light consistent. You can even mist that area lightly every few days — small signals like this often trigger new life.
When to Let It Climb Freely vs. Restrain for Aesthetics
There’s no single right way.
- Let it climb if you want natural, elongated growth with big, mature leaves.
- Trim and restrain if you’re after a bushier, table-style look.
I usually let mine climb until it outgrows its pole, then prune and re-root the top. It keeps the plant youthful and prevents leggy lower stems.
Common Problems, Pests & Recovery
Even with great care, things can go wrong. The good news? Tortum is resilient. Once you understand the warning signs, most issues are easy to reverse.
Yellowing Leaves
The classic sign of overwatering or nutrient imbalance. If it’s just one older leaf, it’s normal aging. But if it’s spreading upward:
- Check for soggy soil — lighten your mix or increase airflow.
- Ensure it’s not getting direct afternoon sun.
- If the yellowing starts between veins, consider feeding a balanced fertilizer.
Brown Tips & Leaf Edge Damage

This usually points to low humidity or poor water quality. Tap water heavy in salts can cause edges to crisp.
- Use filtered or distilled water.
- Increase humidity slightly.
- Wipe leaves gently once a week to remove residue.
Root Rot Symptoms & Recovery
Root rot smells bad — literally. If you catch a sour or earthy odor while watering, check immediately.
- Remove the plant from its pot.
- Trim away all black or mushy roots.
- Repot into fresh, airy mix and let it rest before watering again.
Tortum can recover quickly if even 30% of healthy roots remain.
Pests: Spider Mites, Mealybugs & Fungus Gnats
You’ll usually spot fine webs, sticky residue, or tiny white dots before major damage appears. Isolate the plant immediately.
- Wipe leaves with a mix of mild soap and water.
- Spray with neem or horticultural oil every few days.
- Keep airflow steady to prevent re-infestation.
Consistency is key — one clean won’t fix it; two weeks of attention will.
When Growth Stalls (Leggy or Sparse)
If your Tortum stops producing new leaves or the stems start stretching, something’s off.
- Light too low: Move closer to a bright window.
- No support: Add a pole to activate dormant nodes.
- Crowded roots: Repot or trim the top and propagate it again.
Sometimes, chopping the top and re-rooting it gives your plant a complete reboot — fuller and healthier than before.
Growth Timeline & Performance Benchmarks
It helps to know what’s “normal” so you can gauge progress.
Here’s a rough timeline you can track:
- First 6 months: The plant establishes roots and adjusts to its environment. Expect 3–5 new leaves.
- 1 year: Growth speeds up — leaves get longer and more defined.
- 2–3 years: Mature climbing phase. Leaves may reach 18–24 inches long with proper support.
You’ll also notice tighter node spacing, thicker stems, and more consistent growth once it starts maturing.
Regional & Seasonal Adjustments (Local Care Tips)
Every home is its own ecosystem. What works in a tropical apartment won’t work in a dry, air-conditioned one — but Tortum can adapt easily.
If you live in a dry climate:
- Group plants together or run a humidifier nearby.
- Water early in the morning to reduce evaporation.
If you’re in a humid or monsoon region:
- Use extra perlite or bark in your soil mix for better drainage.
- Keep an eye out for fungus gnats or mold growth.
For rooms with limited natural light, you can also explore Low-Light Bedroom Plants That Thrive Anywhere — several of them grow well alongside your Tortum and can brighten darker corners effortlessly.
In cooler zones or winter months:
- Pull back on watering — the plant drinks less.
- Keep it away from heaters and cold drafts.
- Wipe leaves occasionally to clear dust and allow better light absorption.
Once you understand how to read your plant’s signals — drooping leaves, curling edges, or slow growth — you’ll never have to guess again. Tortum doesn’t hide what it needs; it just whispers until you learn to listen.
What to Do Next
By now, you’ve got everything you need to make your Philodendron tortum thrive — but don’t let the details overwhelm you. Great plant care isn’t about perfection; it’s about consistency. Let’s wrap this up with a simple, one-page plan you can follow starting today.
Quick 1-Page Checklist
Environment
- Bright, filtered light (avoid harsh afternoon sun)
- Warm temperature: 65°F–85°F (18°C–29°C)
- Humidity around 60–80%
- Gentle airflow — no stagnant corners
Substrate
- Airy mix: potting soil + bark + coco coir + perlite + charcoal
- Pot with wide drainage holes (avoid standing water)
Watering
- Let top 1–2 inches dry before watering again
- Deep soak, then drain completely
- Reduce watering in winter
Support & Pruning
- Give it a moss pole or wooden board for climbing
- Prune above nodes for fuller growth
- Rotate every few weeks for even lighting
3 Action Steps to Do Right Away
- Assess your light setup: Move your Tortum closer to a bright window or add a sheer curtain if it’s in direct sun.
- Prep your soil mix: Combine airy ingredients so your next repot gives roots the breathing space they deserve.
- Order or make a moss pole: Once it starts climbing, the transformation is instant — stronger leaves, better posture, and more confidence (for both of you).
These small adjustments are the difference between a struggling plant and one that looks like it belongs in a tropical greenhouse.
Don’t rush it. Every Tortum grows at its own pace, and that’s part of its charm. You’ll have weeks when nothing seems to change, and then one morning — a new leaf unfurls like a quiet reward for your patience.
You’ve already done the hardest part: paying attention. Everything else from here is just refinement. So keep watching, keep learning, and let your plant teach you what works best in your space.
Now it’s your turn: What’s been your biggest win or struggle growing Philodendron tortum so far? Share your story in the comments — your experience might just help another grower.
For more real-world plant care guides and home-grown advice, visit Plant Care Dairy — where every leaf has a story worth sharing.
Disclaimer: All plant care recommendations shared here are based on personal experience and trusted horticultural sources. Growing conditions can vary by environment, so always adjust watering, lighting, and humidity to suit your specific space. Plant Care Dairy is not responsible for individual results — always observe your plant’s response and adapt accordingly.