Every time I step into my little kitchen garden, thyme is the herb that grabs my attention. It smells fresh, looks vibrant, and somehow makes even the simplest dish taste better. But here’s the truth: buying new thyme plants every season feels wasteful, and letting one plant grow woody until it gives up isn’t much fun either. That’s when I realised there’s a better way—propagation.
If you’ve ever clipped a healthy sprig and wondered, “Can I make more plants from this?” the answer is yes, and it’s easier than you think. Propagating thyme at home doesn’t just save money; it gives you stronger, healthier plants that adapt to your space. I’ve seen people struggle because they use woody stems, water the wrong way, or transplant too early—but once you know the right method, it becomes second nature.
In this guide, I’ll show you step by step how to multiply your thyme plants without fancy tools or garden experience. Think of it as turning one pot into a whole patch, whether on your windowsill, balcony, or backyard. By the end, you’ll know how to grow a lush, steady supply of thyme—without running to the nursery every few months.
Tell me, have you ever tried rooting a herb cutting in water before?
Understanding Thyme & Its Growth Habits
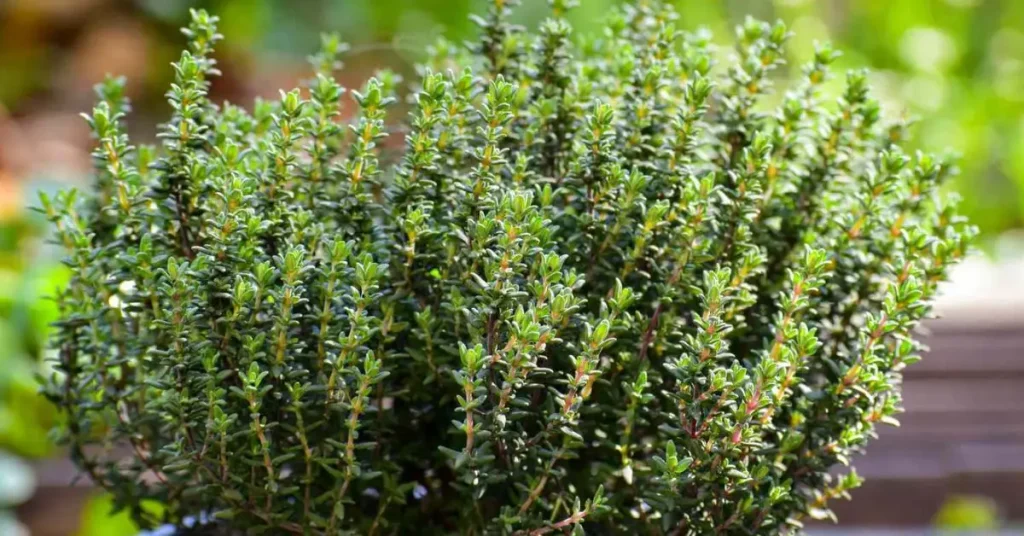
When I first started growing thyme, I thought it was just one simple herb. But once you dive in, you realise there are so many types—common thyme (the one you’ll see in most kitchens), creeping thyme that spreads beautifully as ground cover, and even lemon thyme with a citrus kick. Each variety has its own look and flavour, but more importantly, its own growth habit.
Here’s where most people go wrong: thyme is a semi-woody perennial. That means as it ages, the lower stems turn woody and tough, while the fresh green growth at the tips stays soft. If you’ve ever tried to root a cutting from an older, woody stem, you know how frustrating it can be—it almost never takes. On the other hand, young, non-woody shoots in spring or early summer root far more easily.
Thyme also loves a sunny spot with well-draining soil. If the roots sit in water, the plant sulks and often dies back. That’s why Mediterranean-like conditions—full light, slightly sandy soil, and not too much fuss—are perfect for keeping it healthy. According to Gardening Know How, understanding these natural preferences is the foundation for successful propagation.
)nce you know your thyme’s variety and how it grows, you’ll pick the right method at the right time. That simple step alone saves you from a lot of unnecessary failure.
Propagation Methods Overview

When it comes to multiplying thyme, you don’t have to stick to just one technique. Different situations call for different approaches, and once you know the pros and cons, you can choose what works best for you.
Here are the main methods I’ve used and seen work:
- Cuttings in water
• Simple, beginner-friendly
• Fun because you can actually watch roots grow
• Slightly higher risk of transplant shock later - Cuttings in soil or medium
• Faster transition to a long-term home
• Needs the right mix (perlite, sand, or vermiculite)
• Slightly trickier for first-timers - Layering
• Great for older, established plants
• Bend a stem to the soil, let it root while still attached
• Lower effort, higher success rate - Division
• Works when you have a big, woody thyme clump
• Quick way to turn one plant into many
• Can be tough on the plant if not done gently - From seeds
• Cheapest way to get lots of plants
• But slow to germinate and often not true to type
• Best if you’re patient and enjoy the process
If you want fast results, go for cuttings; if you want reliability, layering or division is safer; and if you’re playing the long game, seeds can work. The trick is matching your method to your situation.
Step-by-Step: Propagating Thyme by Cuttings in Water
If you’re just starting out, water propagation is hands-down the easiest way to multiply thyme. I like it because you can literally watch the roots form—it’s almost like a science experiment on your windowsill.
When to take cuttings:
- Aim for late spring or early summer when the plant is actively growing.
- Choose young, green, non-woody stems—they root far better than older woody ones.
- Make sure the donor plant looks healthy and is free of pests or disease.
How to cut correctly:
- Snip a stem that’s about 4–6 inches long.
- Cut at a slight angle just below a leaf node (that’s where roots form fastest).
- Strip off the lower leaves so you don’t have them rotting in water.
- Keep only a few leaves at the top so the cutting puts its energy into roots, not foliage.
Setting up in water:
- Place your cuttings in a clean glass or jar filled with non-chlorinated water.
- Change the water every few days to keep it fresh.
- Put the jar in bright, indirect sunlight—not direct sun, or the cuttings may wilt.
When to transplant:
- After about 2–3 weeks, you’ll notice fine white roots starting to grow.
- Wait until they’re at least an inch long before transplanting.
- Gently move the cutting into a pot with well-draining soil and keep it slightly moist while it adjusts.
Water propagation is quick, visual, and beginner-friendly. If you follow these steps carefully, you’ll almost always succeed.
Propagating Thyme via Soil/Medium & Rooting Hormones

Sometimes, you might prefer to skip the water stage and root your thyme directly in soil. It feels a little more advanced, but it gives the plant a stronger start once roots establish.
Choosing the right medium:
- Use a light, airy mix like perlite, sand, or vermiculite to prevent waterlogging.
- Standard potting soil is often too heavy for delicate cuttings.
- According to Plantura, this kind of drainage-friendly mix makes all the difference in rooting success.
Planting the cutting:
- Dip the base of your stem in rooting hormone (optional, but it can speed things up). If you’ve never used it before, here’s a step-by-step breakdown of how to use rooting hormone for faster plant growth so you know exactly how to apply it to your thyme cuttings.
- Make a small hole in the soil, insert the cutting about an inch deep, and gently firm the soil around it.
- Water lightly so the soil is damp but never soggy.
Creating the right environment:
- Keep the cuttings in a warm place (65–75°F works best).
- Covering the pot with a clear plastic bag creates a mini greenhouse that locks in humidity.
- Give them indirect light, not harsh sun, until roots have set.
If water rooting isn’t an option—or you want plants that are stronger right out of the gate—soil propagation is your best bet. Using rooting hormone makes success even more likely, especially for beginners.
Layering & Division Methods
Once your thyme plant is mature, cuttings aren’t the only way to create new plants. Layering and division are low-effort options that work with bigger, established thyme.
Layering method:
- Pick a healthy stem near the base.
- Bend it gently down so part of it touches the soil.
- Pin it in place with a small stone or wire, and cover that section with soil.
- Over a few weeks, roots will form where the stem touches the soil.
- Once strong, snip the new rooted section from the mother plant and pot it up.
Division method:
- Ideal for older, woody thyme plants that are thinning in the centre.
- Dig up the entire rootball carefully.
- Split it into sections with both roots and shoots attached.
- Replant each piece into fresh soil, spacing them well apart so they can spread.
Layering and division are perfect if you already have a big thyme plant. They take less effort, give you bigger plants faster, and refresh old clumps that might be declining.
Propagation from Seed — Is It Worth It?
I’ll be real with you—growing thyme from seed isn’t for the impatient. The seeds are tiny, slow to sprout, and sometimes you won’t get plants identical to the parent. But there are upsides too: it’s cheap, you can start dozens in one go, and for people who enjoy the full process, it’s rewarding.
Best practices for starting seeds:
- Use shallow trays filled with a light, well-draining mix.
- Sow them indoors 6–8 weeks before the last frost.
- Scatter on the surface—thyme seeds need light to germinate.
- Mist gently, cover lightly with plastic, and keep the tray warm.
- Place in bright indirect light or under a small grow light.
Caring for seedlings:
- Germination takes about 2–3 weeks—be patient.
- Thin seedlings once they sprout so they have space to grow.
- Transplant when seedlings are sturdy, about 2 inches tall.
If you’re starting thyme or any herb from seed, it helps to know the pitfalls—check out our guide on how to start seeds indoors and avoid common beginner mistakes to save yourself time and frustration.
If you don’t mind the wait, seed propagation is a good way to bulk up your thyme collection without spending much.
Aftercare: What Helps Rooting & Healthy Growth
Even after your thyme cutting roots, the job isn’t finished. Without proper care, the young plants can fail just as quickly.
What to focus on:
- Light & warmth: Bright light for at least 6 hours a day.
- Humidity & airflow: Keep the air moving so mould doesn’t settle.
- Moisture: Keep soil slightly damp but not waterlogged—thyme hates soggy roots.
- Feeding: A light organic feed now and then is enough. Overfeeding reduces the herb’s flavour.
- Pruning: Regular pinching encourages bushiness and delays woodiness.
According to Thrive UK, small adjustments in light and watering routines make a big difference to how strong your thyme plants become.
Aftercare is the stage where most beginners lose plants. Get this right, and your thyme will thrive for years.
Troubleshooting Common Problems & Mistakes
Everyone slips up at some point. What matters is spotting problems early and knowing what to do.
Common mistakes I’ve seen:
- Using woody stems for cuttings
- Overwatering or poor drainage
- Taking cuttings at the wrong season
- Too little sunlight
- Moving cuttings to soil too soon
Warning signs:
- Yellowing leaves
- Wilting or drooping stems
- Soft rot at the base
- No root growth after weeks
Quick fixes:
- Improve drainage with sand or perlite
- Trim back excess leaves so energy goes to rooting
- Increase airflow if mould appears
- Use rooting hormone if you’re struggling with stubborn stems
When & Where to Propagate Based on Your Conditions

Your setup plays a huge role in how well propagation works.
- Climate & timing: In cooler areas, aim for spring or early summer. Protect cuttings from frost.
- Containers vs garden beds: Containers give more control over soil and drainage. Garden beds allow thyme to spread naturally.
- Indoor options: If space is limited, a sunny windowsill or a small grow light setup works perfectly.
Matching your method to your climate and space ensures your effort pays off, no matter where you’re gardening.
Harvesting & Using Your New Thyme Plants + Maintenance for a Lush Herb Garden
The most exciting part of propagation is finally getting to snip your own fresh thyme. But timing is everything. For the first harvest, wait until your new plant is well established—usually when it’s at least 6–8 inches tall. Cut just above a leaf node and never take more than one-third of the plant at once. The best flavour comes right before flowering, when the essential oils are at their peak.
Once you’ve got healthy plants, you can even use them to propagate further—taking fresh cuttings from your new growth ensures a steady cycle of thyme for your garden. Over time, that single plant you started with can turn into a whole bed or a row of pots brimming with green.
Maintenance tips for long-term success:
- Pruning: Regular snips encourage bushiness and keep the plant from going woody too soon.
- Pest control: Thyme is fairly resistant, but watch for aphids and spider mites; a quick rinse or neem spray usually keeps them in check.
- General care: Keep soil well-drained, avoid heavy fertilisers, and remove any dead stems to promote fresh growth.
The goal isn’t just one plant—it’s a thriving herb garden. Harvesting smartly and maintaining consistently keeps thyme productive year after year. And if you’re expanding your herb garden, why stop at thyme? You can also try growing edible flowers in small spaces to add both beauty and flavour to your dishes.
A Final Word to Keep You Growing
You’ve now seen the different ways to multiply thyme—from easy water cuttings to soil rooting, layering, division, and even seeds if you’re patient. Each method has its place: water is best for beginners, soil is great for stronger plants, layering works with established clumps, and seeds are for long-term growers.
Don’t get discouraged if a few attempts fail. That’s part of the process. Even experienced gardeners lose a cutting here and there. With a little patience and practice, you’ll soon find what works best in your space and climate.
So why not start this week? Try one method, see how it goes, and share your progress—I’d love to hear how your thyme plants turn out.
What about you—have you ever tried propagating thyme before? Drop your experience in the comments below. And for more practical plant care tips, guides, and inspiration, visit Plant Care Dairy today.
Disclaimer: The information shared here is for general gardening guidance only. Growing conditions can vary based on climate, soil, and plant variety, so results may differ. Always use clean tools and healthy plants to reduce the risk of pests or disease.