I still remember the first time I tried growing chillies on my apartment balcony. I had this small terracotta pot, a handful of seeds from a store-bought pepper, and way too much confidence. At first, it felt exciting — watching those tiny green shoots break through the soil. But a few weeks in, the leaves started curling, and the stems looked weak. I didn’t realise it then, but I’d made nearly every mistake a new container gardener could make — wrong soil, too much water, not enough sunlight.
That little experiment taught me more about patience than any book ever could. Over the years, I’ve grown chillies in everything from recycled buckets to hanging pots by the window, and I can tell you this: they’re tougher, more forgiving plants than most people think. You just need to know how to give them what they want — warmth, light, and a pot that drains like a dream.
If you’ve ever wanted to turn your balcony or kitchen corner into a small spice garden, this guide is for you. I’ll walk you through the simple steps, smart soil mixes, and little tricks that helped me turn failed seedlings into fiery, thriving plants.
What’s your space like — sunny balcony or a window that catches morning light? Tell me below; I’d love to hear where your chillies will grow.
Why Growing Chillies in Pots is Perfect for Small Spaces
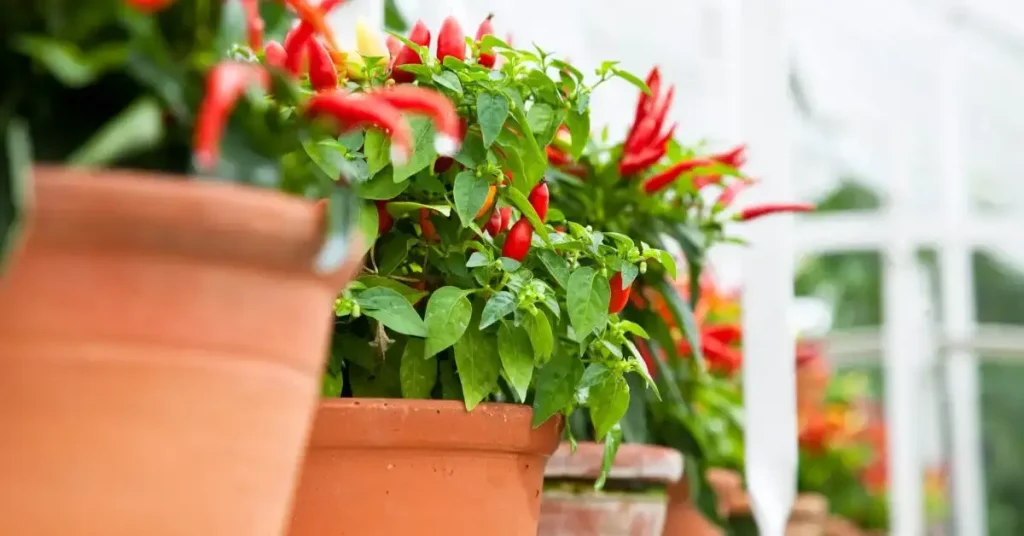
When I first started container gardening, I didn’t believe I could grow anything more ambitious than a few herbs. But chillies proved me wrong. They’re compact, adaptable, and thrive just as happily in a small pot as they do in a big garden bed. Whether you live in a high-rise apartment or a house with a sunny porch, you can raise a chilli plant that rewards you with colour, fragrance, and a steady supply of heat for your kitchen.
The biggest advantage of pot-grown chillies is control — you decide the soil quality, the watering schedule, and where the plant gets its sunlight. You can shift the pot when the weather changes or move it to catch better morning light. If you’ve ever lost plants to pests or poor drainage, you’ll find this flexibility a real gift.
Here’s what makes container chillies so beginner-friendly:
- Space-efficient: Even a single 12-inch pot can yield dozens of pods.
- Mobile: You can move pots indoors when it’s too cold or windy.
- Pest control: Easier to isolate an infected plant and treat it early.
- Aesthetic: Bright fruits add colour and life to small balconies or windowsills.
Chillies love 6–8 hours of sunlight each day, temperatures between 20–30°C, and a gentle breeze that keeps the leaves dry. With the right setup, even a small balcony can turn into a productive mini spice garden.
According to the Royal Horticultural Society (RHS), They grow well in containers and take up little space, with compact varieties reaching only 20–30cm (8–12in) tall.
So, if you’ve ever thought “I don’t have space for gardening,” chillies might just change your mind. They’re the perfect starter crop to prove that even a single pot can bring a little farm-to-table magic right to your window.
Choosing the Right Chilli Variety for Pots

I learned the hard way that not every chilli is happy in a pot. Some grow tall and sprawling, demanding more space than an average balcony allows. Choosing the right variety can make the difference between a healthy harvest and a plant that never quite takes off.
Best Small-Space Varieties
If you’re short on space but big on flavour, start with compact or dwarf varieties that thrive in containers. These chillies stay manageable, produce well, and don’t require heavy staking or pruning. Some of my go-to choices include:
- Bird’s Eye: Small, fiery, and fast-growing — great for beginners.
- Cayenne: Long, thin pods with moderate heat; perfect for drying.
- Thai Hot: Compact and decorative, ideal for sunny kitchen windows.
- Jalapeño: Mild spice, thick walls, and reliable yields.
- Apache: A dwarf hybrid that performs beautifully in small pots.
Tip: Check the plant label or seed packet for its maturity days (usually 70–100) and height. Anything under 60 cm tall usually fits perfectly in a 12–14 inch pot.
You can even create a small “chilli forest” by planting two different compact varieties in one large container. It looks stunning and gives you a range of heat levels to play with in your recipes.
Seeds vs. Seedlings
If you love the full experience, growing chillies from seeds feels deeply rewarding. You watch them sprout, develop true leaves, and finally harden off into sturdy young plants. But it takes time, patience, and consistent warmth.
Buying nursery seedlings, on the other hand, saves you those early weeks of care — perfect if you’re starting late in the season or just want faster results.
Here’s how I usually decide:
- Go with seeds if you enjoy nurturing plants from scratch, have 8–10 weeks before summer, and want more variety options.
- Choose seedlings if you prefer instant progress or live in a cooler climate where germination can be tricky.
Whichever route you take, always check the packet or nursery tag for two things:
- The number of days to maturity
- Whether it’s suitable for pot or ground planting
That small detail can save you a lot of frustration later.
Selecting the Ideal Pot and Soil Mix
When I first started growing chillies in pots, I thought any container and regular garden soil would do. But after watching several plants struggle — weak stems, stunted roots, and hardly any fruits — I realised that the pot and soil mix are everything. They decide how well your chillies breathe, drink, and feed.
Pot Requirements
A chilli plant needs room to stretch below the surface. Always choose a minimum 12-inch-deep pot with good drainage holes. Anything smaller limits root growth and reduces fruit yield.
Here’s what I’ve found works best for different homes and climates:
- Clay or terracotta pots: Great breathability; perfect for humid regions but need frequent watering.
- Plastic pots: Light, moisture-retentive, and easy to move when weather shifts.
- Fabric grow bags: My personal go-to. They prevent root rot, promote airflow, and fold up easily when not in use.
Place a thin layer of pebbles or coarse sand at the bottom of the pot to help with drainage — chillies dislike standing water as much as they dislike drought.
Soil Composition
Your soil should feel light in your hand, crumble easily, and never clump like mud. The ideal blend that has consistently worked for me looks like this:
- 40% garden soil for minerals and structure
- 40% compost for nutrients and organic richness
- 20% cocopeat or perlite for moisture retention and airflow
Before planting, mix in a handful of slow-release organic fertiliser like vermicompost or bone meal. It feeds the plant gradually over several weeks, encouraging stronger roots and fuller foliage.
For more detailed soil preparation steps, check out Harvest to Table’s practical chilli-growing guide.
This reference offers a great breakdown of temperature, watering, and soil balance that complements what I’ve learned through years of trial and error. If you’re interested in expanding your edible garden beyond chillies, you might enjoy our full guide on how to grow dragon fruit at home, step by step — the planting rhythm and soil balance are surprisingly similar.
The Step-by-Step Planting Process
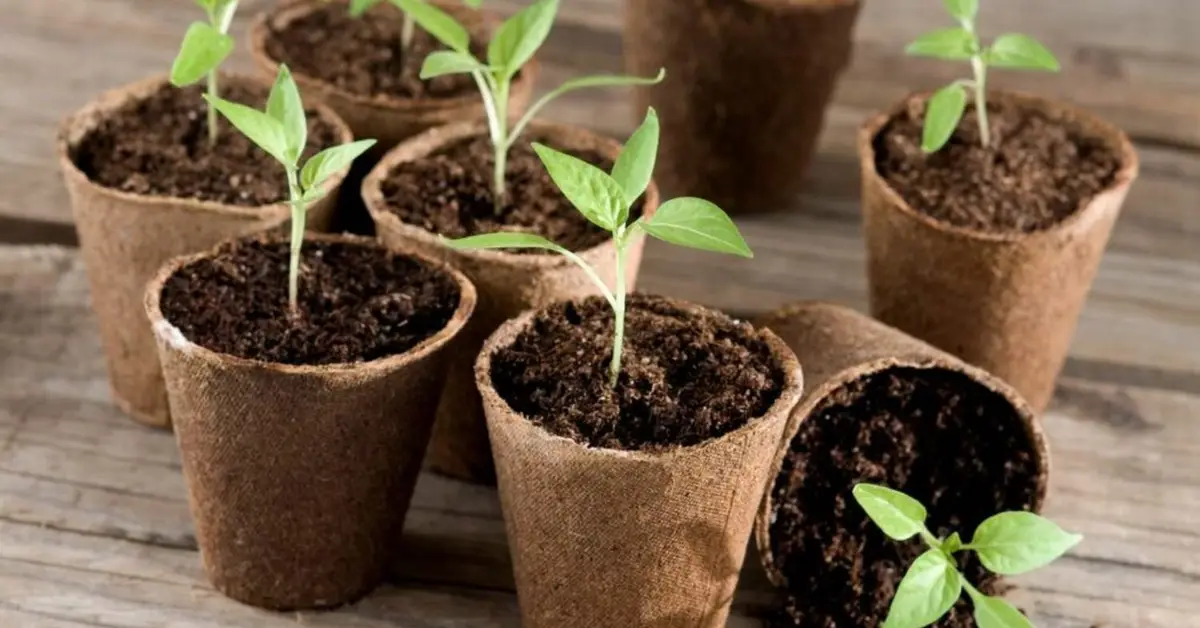
Watching the first chilli seedlings emerge is one of the most satisfying moments for any gardener — it feels like a small miracle every time. Getting there, though, is about following a rhythm more than a strict rulebook.
Here’s the simple process that’s never failed me:
- Fill your pot with the prepared soil mix, leaving an inch of space at the top.
- Sow seeds about ¼ inch deep and lightly cover them with soil.
- Water gently so the surface is moist but never muddy.
- Keep the pot in a warm spot between 25–30°C — warmth triggers germination.
- Once the seedlings appear, thin them out so only the strongest remain.
Within 7–10 days, you’ll see your first sprouts. Give them time — they grow slowly at first, building the root system that will later support dozens of fiery pods.
If you’re planning visuals for your blog, an infographic showing a “Seed-to-Harvest Timeline (70–100 days)” adds clarity and keeps readers motivated.
Daily Care Routine – Watering, Sunlight, and Pruning
Most gardeners don’t lose chillies during planting — they lose them during maintenance. The secret is to stay consistent without overdoing it. Chillies thrive on balance: steady light, light watering, and a bit of pruning when needed.
Watering Rules
I’ve learned to water chillies only in the morning, giving the soil time to dry through the day. That single change cut my pest problems in half.
Here’s my personal watering checklist:
- Touch the top inch of soil — if it feels dry, it’s time to water.
- Keep the soil moist, not soaked; soggy roots lead to rot.
- Use mulch or dried leaves to retain moisture during hot days.
Even when it’s tempting, never water at night. Damp soil and cool air are an open invitation for fungal growth.
Sunlight Needs
Chillies are sun-hungry plants. They need 6–8 hours of direct sunlight daily to stay strong and productive. If you’re growing indoors, place them near a bright window or invest in a small grow light.
Rotate your pots weekly so every side of the plant gets equal exposure — it keeps the stems upright and even.
And if your leaves droop a little in the afternoon heat, don’t panic; they usually bounce back once the temperature cools.
Pruning & Support
When the plant starts to bloom, pinch off the first few buds. It might feel wrong to remove those early flowers, but it allows the plant to focus on growing a solid structure before fruiting.
As the plant grows taller, gently tie it to a bamboo stick or small trellis for support. Once the pods start forming, the branches can get heavy — a little support now prevents a lot of breakage later.
Getting these three steps right — pot, soil, and care — is half the journey to your first chilli harvest. The rest is observation and patience. Every plant teaches you something new, and by your second or third try, you’ll be the one giving advice to other balcony gardeners.
Feeding & Fertilising for Maximum Yield

When my chilli plants started producing flowers but no fruits, I knew I had to change how I was feeding them. Chillies are heavy feeders — not in quantity, but in consistency. They don’t want random doses of nutrients; they want a rhythm.
Once your plants are a few weeks old, start giving them a liquid organic fertiliser every 10–14 days. It keeps them growing steadily without overwhelming their roots. Seaweed extracts, compost tea, or vermiwash are all great organic options — gentle, natural, and effective.
When you see buds forming, it’s time to shift gears. Add potassium-rich feeds (like banana peel compost or liquid potash) to boost fruit production and heat intensity. Potassium helps chillies ripen evenly and strengthens cell walls, giving you firmer, spicier pods.
For a more detailed breakdown of feeding routines, I highly recommend this guide from Love The Garden. It offers clear advice on how to balance fertilising, watering, and light to get the most out of your chilli plants.
Just remember — feeding is like seasoning food: a little often works better than too much at once. For gardeners planning ahead for cooler weather, don’t miss our guide on top plants to fertilize in fall for a healthier garden — it helps you fine-tune nutrient schedules and keep your balcony garden thriving through the seasons.
Managing Pests & Common Problems
Every chilli grower has that moment of panic — tiny insects on the leaves, a powdery layer forming overnight, or yellow spots that spread like wildfire. The truth is, these problems are normal, and you can handle them easily with a few natural fixes.
Common Issues
Here are the most common problems I’ve seen in potted chilli plants:
- Aphids: Small green or black bugs that cluster on young shoots.
- Whiteflies: Tiny flying insects that suck sap and weaken plants.
- Spider mites: Cause fine webbing and speckled yellow leaves.
- Powdery mildew: White dust on leaves that spreads in humid, shady areas.
These pests thrive when the air is stagnant or the soil stays damp too long — so improving air circulation is your first line of defence.
Organic Treatments
Over the years, I’ve learned that simple, homemade remedies are often the most reliable:
- Neem oil spray: Mix 5 ml of neem oil in a litre of water and mist your plants weekly.
- Garlic-chilli-water mix: Blend garlic and green chilli with water, strain, and spray as a natural repellent.
- Invite beneficial insects: Ladybugs and lacewings love eating aphids and whiteflies.
Keep an eye on your plants daily. Most pest outbreaks start small, and catching them early saves you a lot of effort later.
Harvesting and Extending Fruit Production
There’s something deeply rewarding about cutting your first homegrown chilli. They’re bright, fragrant, and filled with flavour that store-bought ones just can’t match. Typically, you can start harvesting 70–100 days after planting, depending on the variety and temperature.
Here are a few lessons I’ve learned from my balcony harvests:
- Cut, don’t pull: Always use scissors or a small pruner — pulling can tear the stem.
- Pick regularly: Frequent harvesting encourages the plant to produce more flowers.
- Leave a few fruits on the plant: It helps maintain the natural fruiting cycle.
Once your main harvest is done, you can overwinter your chilli plants indoors. Trim them back to half their height, place them near a sunny window, and water sparingly through winter. Come spring, they’ll reward you with a head start on next year’s crop. And if you ever find yourself with unripe pods late in the season, try the techniques from our post on how to ripen green tomatoes using five easy and fast methods — several of them work brilliantly for partially ripened chillies too.
Pro Tips from Balcony Gardeners
One of my favourite things about the gardening community is how generous people are with sharing what works. Over the years, I’ve collected small but powerful tips from balcony gardeners who’ve turned limited space into lush chilli corners.
Here are a few worth trying:
- Recycled pots: Reddit growers often use paint buckets or old containers as creative planters.
- Self-watering systems: A simple wick setup from a bottle keeps soil evenly moist.
- Reflective walls: Hanging light-coloured boards or foil behind your plants helps bounce extra sunlight.
At the end of the day, balcony gardening isn’t about perfection; it’s about progress. Every leaf, every sprout, and every pod tells a story of patience and care — and that’s what makes it worth it.
Mistakes to Avoid

Green Genius
If I had to sum up my early chilli-growing days in one word, it would be overconfident. I thought more water meant faster growth and that moving the pot around to “find better light” would help. Instead, I learned that chillies prefer stability — a consistent routine and environment.
Here are a few classic mistakes that can quietly ruin a healthy plant:
- Overwatering: This is the number one killer. Chillies prefer slightly dry conditions over soggy roots. Always check the soil before watering — if it’s still damp an inch down, wait another day.
- Using poor drainage: Without proper drainage holes or a layer of pebbles, water collects at the bottom, suffocating the roots. Even the healthiest soil mix can’t save a plant trapped in standing water.
- Ignoring pest prevention: A weekly neem oil or garlic spray keeps common pests like aphids and mites away. Prevention is easier than cure.
- Moving plants suddenly between light and shade: Sudden light changes shock the plant. If you need to shift them, do it gradually over a few days.
Remember — growing chillies is about rhythm, not rush. Once you learn their pattern, the process becomes almost effortless.
Closing Takeaways – Your Balcony, Your Spice Garden
Growing chillies in pots isn’t just about saving space — it’s about creating something alive, bright, and full of flavour right where you live. The formula is simple: the right pot, the right light, and a bit of organic care.
Start small. Try two or three varieties — maybe a mild Jalapeño, a fiery Bird’s Eye, and a colourful Apache. You’ll not only learn how each behaves differently, but you’ll also find what grows best in your space. Before long, your balcony will feel more like a mini farm than a corner of your home.
And the best part? Every harvest is a reminder that even the smallest patch of sunlight can produce something extraordinary.
What about you — have you tried growing chillies yet? Share your experience or your favourite variety in the comments below!
For more simple, honest, and experience-based plant care guides, visit Plant Care Dairy — your go-to place for real gardening stories and practical advice that actually works.
Disclaimer: The information in this article is based on personal gardening experience and publicly available resources. Results may vary depending on your local climate, soil quality, and care routine. Always test natural sprays or fertilisers on a small area before applying them fully.