A few years ago, I never imagined I’d be snipping fresh basil from my windowsill before making pasta. Now, it’s part of my routine — and honestly, it’s one of the most satisfying shifts I’ve made at home.
More and more people are turning to indoor herb gardening — not because it’s trendy, but because it just makes sense. It saves you trips to the store, gives you fresh flavor at your fingertips, and honestly? It feels good to grow something real in a world that’s increasingly digital.
Whether you live in a high-rise apartment or just don’t have the luxury of a backyard, growing herbs indoors is an accessible first step into gardening. And you don’t need fancy tools or a green thumb to get started.
In this guide, I’ll walk you through five solid, practical tips I wish I knew when I began. No fluff, no Pinterest-perfect setups — just real advice that works in everyday homes.
Tell me — have you tried growing anything indoors yet? What’s stopping you from starting today?
Indoor Herb Garden Starter Kit (Without Breaking the Bank)
Let’s keep this real: you don’t need a high-end hydroponic system or an Instagram-worthy vertical wall to start growing herbs indoors. What you do need is a few essentials — and a little bit of know-how. This section breaks down exactly what matters, what doesn’t, and how to start without overspending.
Light: Natural vs. Grow Lights (And What Actually Works)
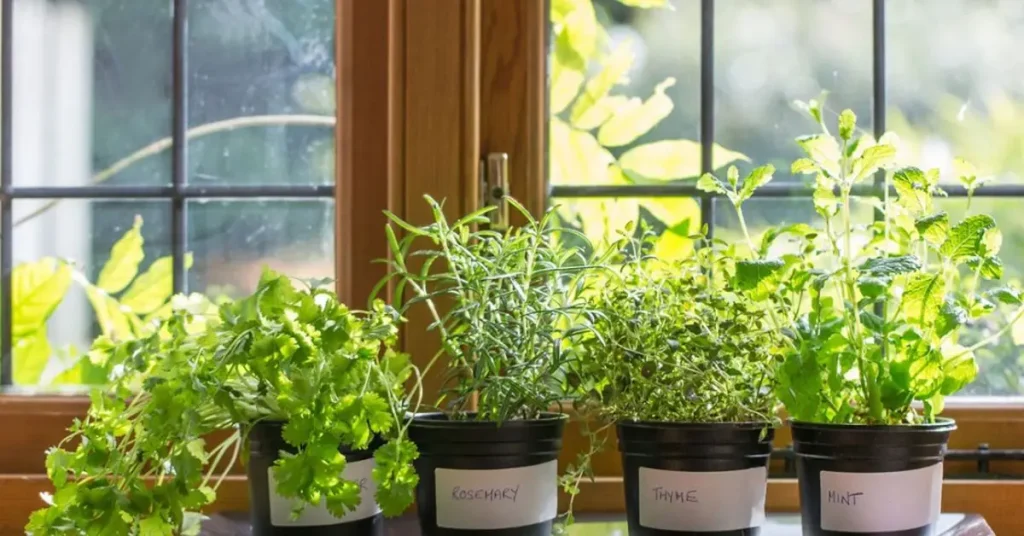
Most herbs are sun-lovers. Ideally, you want a south-facing window that gets around 6 to 8 hours of direct sunlight. That’s what experts, including the University of Illinois Extension, recommend for indoor herbs to thrive.
But if your windows face north or get limited light — like in most city apartments — your herbs are going to struggle.
That’s where grow lights come in. And no, you don’t need anything fancy. A simple full-spectrum LED light (5000–6500K range) on a timer (about 12–14 hours a day) is more than enough. I use a clip-on lamp I found on Amazon for under $25, and it keeps my basil, mint, and oregano happy through winter.
If your herbs are looking “leggy” — tall, stretched out, and floppy — they’re not getting enough light. Move them closer to the source or boost the light duration.
Containers: Drainage > Design
Sure, those ceramic planters from Target or Etsy are cute — but if they don’t have a drainage hole, skip ’em.
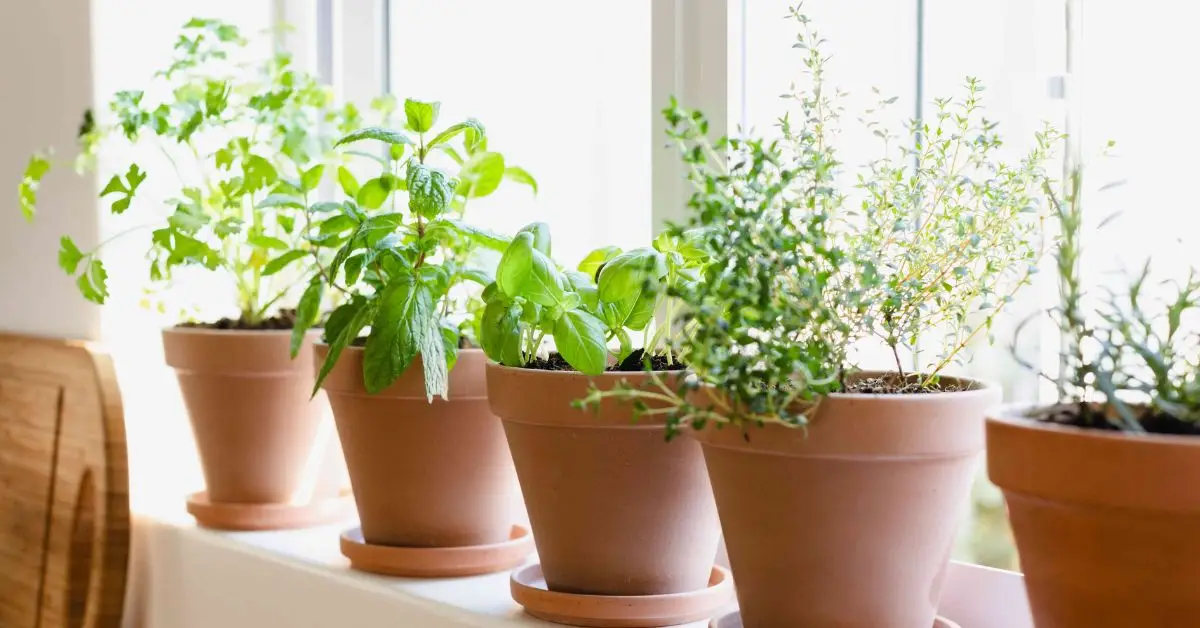
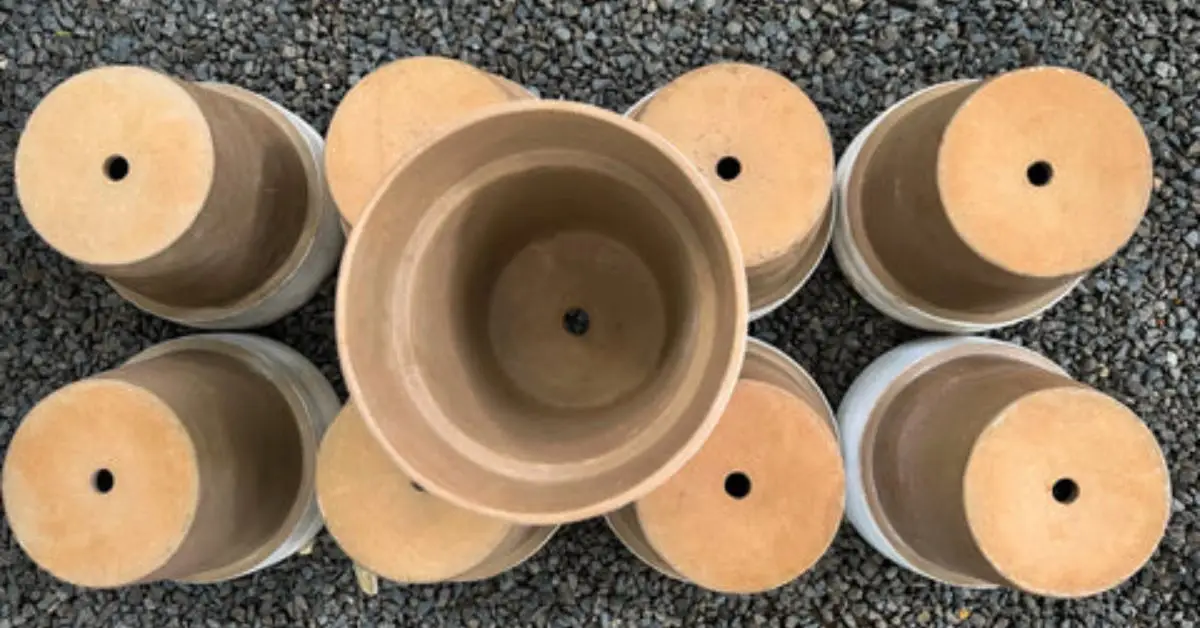
Herbs hate sitting in soggy soil. It leads to root rot, fungus, and just sad-looking plants. Use terracotta pots, repurposed yogurt containers, or even old coffee tins — just make sure they have drainage and a catch tray underneath.
Don’t fall for “herb-specific” containers unless you’re going for aesthetics. Function beats form when you’re just starting out.
Soil: Potting Mix, Not Garden Dirt
This part’s critical: don’t use soil from your backyard. It’s too dense for containers, drains poorly, and often brings pests inside.
Instead, grab a high-quality organic potting mix. Look for ones made for herbs or vegetables — they’re light, well-aerated, and hold just enough moisture.
If you’re into DIY, here’s a cheap mix that works great:
- 2 parts coco coir or peat moss
- 1 part compost
- 1 part perlite or coarse sand
Your herbs will grow stronger roots and resist mold better with the right base.
Watering: Less Is More (But Be Consistent)
If you’ve ever killed a basil plant… it was probably from overwatering. You’re not alone — it’s one of the most common beginner mistakes.
Use the finger test: stick your finger about an inch into the soil. If it feels dry, water gently. If it still feels moist, wait a day or two.
Use a narrow-spout watering can or squeeze bottle to avoid flooding the soil. Always make sure excess water can drain. Sitting water = rotting roots.
Seeds vs. Starts: Choose What Fits You
Both are valid options — it just depends on your style.
- Seeds are cheaper and give you the full “watch it grow” experience, but they take time and a bit more patience.
- Starts (pre-grown seedlings) are quicker and perfect if you want fresh herbs within a couple weeks.
If you’re new to this, I’d suggest grabbing a couple of starter plants from a local nursery or farmers market and trying seeds on the side. That way, you get both quick wins and the satisfaction of starting something from scratch.
Keep it simple. Focus on getting the light, soil, drainage, and watering right. You can always expand later — but a small, successful start beats an expensive setup collecting dust.
Look around your kitchen. What could you turn into a planter today? A soup can? A mason jar? You probably already have what you need to start.
Best Indoor Herbs for Beginners
When you’re just starting out, choosing the right herbs makes all the difference. Some herbs are picky, bolt too fast, or just don’t do well indoors — looking at you, coriander and dill. (Seriously — they grow tall, flower early, and then they’re done. Even Reddit’s indoor gardeners agree: skip them.)
So instead of setting yourself up for frustration, here are five herbs that are beginner-friendly, forgiving, and full of flavor — perfect for growing in any indoor setup.
1. Basil
Light Needs: 6–8 hours of bright, direct sunlight or full-spectrum grow light. Loves warmth. South-facing windows are ideal.
Watering Tips: Water when the top inch of soil feels dry. Keep the soil evenly moist — not soggy.
Harvesting Guide: Pinch off the top leaves regularly to encourage bushy growth. Always cut above a leaf node (where leaves split).
Troubleshooting:
- Leggy stems? Not enough light
- Yellow leaves? Overwatering or poor drainage
- Wilting despite watering? Could be root rot — check for standing water
Why it works for beginners: Grows fast, smells great, and shows clear signs when it’s unhappy — which makes learning easier.
2. Mint
Light Needs: Partial to bright indirect light. Can tolerate lower light than basil. East or west-facing windows work well.
Watering Tips: Keep soil consistently moist. Mint likes humidity and can handle a bit more water than most herbs.
Harvesting Guide: Snip stems just above a leaf pair. Trim regularly to prevent legginess and keep it from getting wild.
Troubleshooting:
- Leaves losing flavor? Too little light
- Pale, limp leaves? Overwatering or poor soil
- Spindly stems? Needs a haircut — harvest more often
Why it works for beginners: Super hardy, grows fast, and can even be propagated easily in water. Just don’t let it take over your container.
3. Parsley
Light Needs: 6+ hours of bright light. Prefers cooler spots with indirect sunlight.
Watering Tips: Water when the top inch is dry. Avoid letting it dry out completely, but don’t overwater.
Harvesting Guide: Always cut outer stems first, close to the base. This encourages new growth from the center.
Troubleshooting:
- Leaves turning yellow? Usually overwatering or poor drainage
- Slow growth? May need more light or a nutrient boost
Why it works for beginners: Takes up little space, grows well from both seeds and starts, and gives frequent harvests once it’s going.
4. Chives
Light Needs: Needs at least 6 hours of sun. Tolerates partial shade, but grows slower. Great on a bright windowsill.
Watering Tips: Let the top half-inch of soil dry out before watering. Doesn’t like soggy roots.
Harvesting Guide: Use scissors to cut leaves down to about 1–2 inches from soil. Always leave some green behind.
Troubleshooting:
- Yellow tips? Could be overwatering or mineral buildup
- Not regrowing? May need to divide and replant — chives benefit from occasional thinning
Why it works for beginners: Cold-tolerant, grows back quickly after cutting, and doesn’t need much fuss. Adds that mild onion kick to almost any dish.
5. Thyme
Light Needs: Loves sun — needs 6+ hours of strong light. Does best near bright windows or under a grow light.
Watering Tips: Water sparingly. Thyme prefers to stay on the drier side. Let soil dry out almost completely between waterings.
Harvesting Guide: Snip small sprigs as needed. Regular trimming keeps it compact and encourages fresh growth.
Troubleshooting:
- Leaves turning gray or mushy? Likely overwatering
- Leggy stems? Needs more sunlight or pruning
Why it works for beginners: Low maintenance, drought-tolerant, and hard to kill. Grows well in small pots and adds big flavor in small amounts.
These five herbs give you everything you need to build confidence as a beginner: quick feedback, fresh harvests, and a low risk of failure — as long as you stick to the basics of light, drainage, and regular care.
Have you already tried growing any of these? Which one do you think you’ll start with first?
Pro Tip #1 – Light Like a Pro (Natural + Artificial Hacks)
Let’s get one thing clear: if your herbs aren’t getting enough light, they will struggle — no matter how great your soil or watering routine is. In fact, poor lighting is the #1 reason herbs grow leggy, pale, or stop producing flavor.
But don’t worry — you don’t need a full greenhouse setup. With a few smart tweaks, you can absolutely grow herbs in low-light apartments or during darker seasons.
Window Positioning: Start with What You Have
If you’re using natural light, a south-facing window is your best friend. It gives the longest and most consistent sunlight exposure throughout the day. East- or west-facing windows can work too, but your herbs may grow slower or become spindly if the light is too weak or short.
How to check: Are your herbs stretching tall with lots of space between leaves? That’s called getting leggy — a classic sign they’re reaching for more light. You’ll also notice pale color and fewer new leaves.
If that’s happening, it’s time to bring in a grow light.
Grow Lights 101 (Without the Jargon)
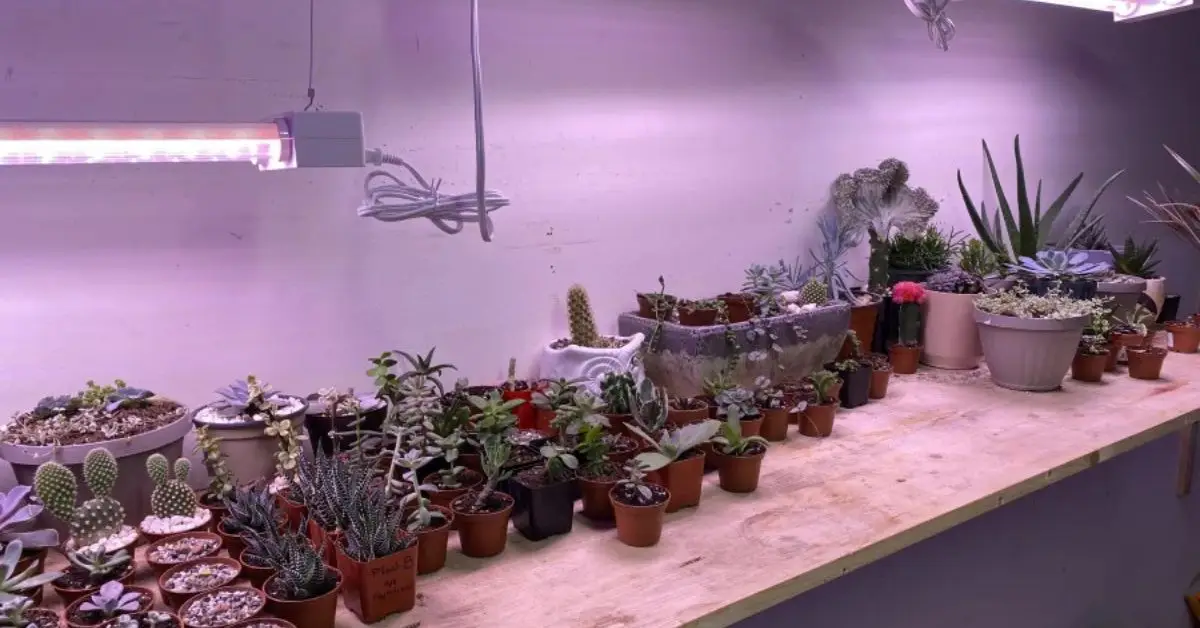
All you really need is a full-spectrum LED grow light. These mimic sunlight and provide the wavelengths herbs need for photosynthesis. Look for something that covers both blue and red light spectrums (most modern LED grow lights do this by default).
Set it up about 6–12 inches above the herbs, and run it for 12–14 hours a day — especially during winter or if your windows are shaded.
Pro tip: Put it on a timer so you don’t have to remember to turn it on/off daily.
For reference, Epic Gardening has a solid beginner’s guide to indoor grow lights — no hype, just real advice.
Budget Grow Light Recommendations
You don’t need to spend a lot. Here are some options that actually work:
- Clamp-style LED grow light with timer — great for single pots or a small herb shelf
- LED light strip (stick under shelves or cabinets)
- Bulb-style grow light — screw it into any desk lamp with an adjustable neck
Aim for 20–40 watts per light if you’re covering a small herb garden. Avoid those purple/pink lights — they work, but they make your space look like a science experiment.
If your space lacks sun, grow lights aren’t optional — they’re essential. But the good news? Once you dial in the lighting, herbs grow stronger, taste better, and bounce back faster after harvesting.
Have you tried using grow lights yet? Or are your windows pulling double duty for sunlight?
Pro Tip #2 – Water the Right Way (and Avoid Killing Your Basil)
Most indoor herb gardens don’t fail from neglect — they fail from too much love. If you’re like most beginners (me included), your instinct is to water regularly. But with indoor setups, that can backfire fast.
How Much & How Often to Water Indoor Herbs
Let’s start with the golden rule: never water on a schedule. Instead, use the finger test. Stick your finger about an inch into the soil:
- If it feels dry? Water.
- Still moist? Wait.
Self-watering pots are great if you travel or forget often. Just make sure the reservoir doesn’t stay swampy — herbs hate soggy roots.
Common Mistakes to Avoid
- Overwatering — Most herbs prefer to dry out slightly between waterings.
- Poor drainage — If water pools at the bottom, roots suffocate. Use pots with holes + trays.
- Top watering only — Occasionally bottom water (let the pot sit in water for 15–20 min), especially for basil or mint.
Humidity Hacks (Especially in AC Rooms)
If you’re growing in a dry climate or air-conditioned room, humidity can drop too low for tender herbs like basil and parsley.
Try:
- Grouping plants together (they create a microclimate)
- Placing a small tray of water nearby
- Using a humidity pebble tray under pots
- Misting (lightly, and not every day)
For more details, the University of Minnesota Extension gives a simple breakdown of indoor plant watering that’s 100% beginner-friendly.
Pro Tip #3 – Harvesting Without Harming
You’ve done the work — now it’s time to actually enjoy your herbs. But here’s where a lot of new gardeners mess up: they snip the wrong way, at the wrong time, and end up stunting the plant.
Let’s avoid that.
How to Cut Herbs So They Keep Growing
Don’t just snip random leaves. You need to harvest strategically to keep the plant healthy and productive.
Pinch vs Cut (And When to Do Which)
- Pinching is best for herbs like basil and mint — use your fingers to gently remove the top leaves right above a leaf node (where two small leaves branch out).
- Cutting works better for woodier herbs like thyme or rosemary — use clean scissors and always cut above new growth.
Where to Snip & How Often
- Always harvest from the top — it encourages bushier growth.
- Never take more than 1/3 of the plant at once.
- Wait until your herb has at least 4–6 inches of growth before the first harvest.
Harvesting regularly (every 1–2 weeks) actually helps herbs thrive.
Tools You Need (And What to Avoid)
Use:
- Small, sharp scissors or herb shears
- Clean hands for pinching soft stems
- A disinfected blade to avoid disease
Avoid:
- Tearing leaves by hand
- Using dull kitchen scissors
- Harvesting wet plants — always cut when dry
What’s the first herb you want to taste from your own garden? Trust me — that first harvest hits different when it’s something you grew yourself.
Pro Tip #4 – DIY Container Ideas & Space-Saving Setups
You don’t need a giant kitchen, fancy tools, or even new planters to grow herbs indoors. If you’ve got a window, a few old containers, and a little creativity — you’ve already got what you need.
Creative Planters from Your Kitchen
Here are some ideas that have worked for me (and thousands of other small-space growers):
Mason Jars
Perfect for herbs like chives or parsley — but they must have a drainage solution. Add a layer of small pebbles or clay balls at the bottom to keep roots from rotting. You can also use activated charcoal to prevent odors if you’re placing them on a kitchen shelf.
Tin Cans (Yes, Really)
Rinse out your old soup or coffee cans. Punch a few holes in the bottom, and they’re good to go. You can even wrap them in jute or fabric for a more aesthetic vibe. These are great for basil and mint.
Window Shelves + Vertical Setups
No counter space? No problem. A simple tension rod + hanging baskets can create a vertical herb garden in any window. Look into over-the-sink racks or window-mounted acrylic shelves — super helpful for herbs that crave light.
IKEA Hacks & Small-Space Genius
Turn a basic IKEA cart (like the RÅSKOG) into a movable herb station. Or use spice racks as wall planters. The Apartment Therapy team has some creative small-space herb garden setups if you want visual inspo that doesn’t feel over-designed.
Indoor gardening isn’t about space — it’s about setup.
Pro Tip #5 – Common Mistakes to Avoid (Learned the Hard Way)
If you’ve tried growing herbs indoors and failed, it’s not just you. We’ve all made these classic mistakes — and most SERP articles don’t even mention them.
Rookie Errors That Kill Indoor Gardens
Using Garden Soil Indoors
Seems cheap, but it’s a trap. Outdoor soil clumps, drains poorly, and brings pests. Always use a lightweight potting mix made for containers.
No Drainage Holes = Rot City
Doesn’t matter how beautiful your pot is — if it doesn’t drain, your herbs will slowly die from root rot. Always check the bottom. No hole? Drill one or don’t use it.
Placing Near AC Vents or Heaters
Direct airflow = dry, crispy plants. Keep herbs away from vents, radiators, or constantly breezy windows.
Combining the Wrong Herbs
Not all herbs play well together. Mint, for example, is a fast-growing bully and should be in its own pot. Grouping herbs with different water/light needs? That’s a recipe for failure.
No Regular Pest Checks
Even indoors, bugs happen. Check under leaves weekly for aphids, spider mites, or fungus gnats. A yellow sticky trap can help spot infestations early.
Which of these mistakes have you made before (be honest)? I’ve ticked off at least three. But once you learn the “why” behind them, indoor gardening becomes way easier — and way more fun.
Quick Start Calendar: What to Plant When
One of the smartest ways to keep your indoor herb garden thriving (without overwhelm)? Stagger your planting. You don’t need to sow everything at once — and honestly, you shouldn’t.
Here’s a quick, no-fuss indoor planting calendar you can use all year round. It’s not about strict seasons — just smart timing based on light, temperature, and herb growth cycles indoors.
Month-by-Month Indoor Herb Guide
Jan–Mar (Winter Indoors)
- Best for: Mint, Parsley, Thyme (tolerant of cooler temps and limited light)
- Easy indoor veggies: Green onions, Microgreens
- Tip: Use grow lights for consistent growth this season.
Apr–Jun (Spring Boost)
- Best for: Basil, Cilantro, Dill (they love the returning sunlight)
- Indoor veggies: Lettuce, Radish
- Tip: Great time to start fresh trays from seeds.
Jul–Sep (Peak Sunlight)
- Best for: Oregano, Chives, Rosemary
- Indoor veggies: Cherry tomatoes, Spinach
- Tip: Rotate pots if sunlight hits unevenly.
Oct–Dec (Holiday Calm)
- Best for: Sage, Mint (again), Chervil
- Indoor veggies: Lettuce (fast and forgiving), Garlic greens
- Tip: Try hydro or water propagation for quick wins near windows.
This kind of simple rotation gives your kitchen garden rhythm — and keeps the harvest going all year long. It also brings your article title full-circle by including easy veggies, not just herbs.
Grow Small, Win Big — Why Your Kitchen Garden Is Worth It
If you’ve made it this far, you already get it: this isn’t just about basil in a pot.
Starting an indoor herb garden changes how you eat, how you spend your evenings, and how you feel in your own space. It:
- Saves money over time
- Makes your meals better — because nothing beats fresh-picked flavor
- Greens your space with life, scent, and character
- Gives you a low-effort, high-reward hobby that genuinely calms your mind
You don’t need to be a plant expert. You just need the right start, a little light, and a willingness to learn as you grow.
What’s the first herb you’re planning to try? Let me know — and I’ll help you troubleshoot if it flops.
Want more real-life gardening tips that actually work? Visit Plant Care Dairy for hands-on guides, plant fixes, and easy DIYs — no fluff, just results.
Disclaimer: This article is for informational purposes only. Results may vary based on your environment and plant care. Always follow trusted sources for specific guidance.