
Every year, as the air turns crisp and the days get shorter, I start craving a bit of life inside the house — something green, something fragrant, something that quietly says Christmas is coming. That’s when I pull out my stash of paperwhite bulbs. There’s nothing quite like watching them come alive on a cold December morning, their delicate white blooms brightening up a windowsill while the world outside is still half-asleep.
If you’ve ever admired those elegant white flowers in a friend’s home and wondered how they managed to time the blooms perfectly for the holidays, you’re in the right place. The truth is, it’s not complicated — it’s about when you plant and how you guide the bulbs through a few simple stages. With just a little planning, you can have your own paperwhites in full bloom right as you’re hanging the stockings or setting the holiday table.
In this guide, I’ll walk you through exactly how I time my plantings, what kind of setup works best, and a few tricks that even seasoned gardeners swear by. By the end, you’ll know how to fill your home with these luminous winter flowers — and maybe even surprise someone with a pot of blooms as a handmade Christmas gift.
So tell me — have you ever tried growing paperwhites before, or will this be your first holiday experiment?
Why Choose Paperwhite Bulbs for Christmas Blooms
There’s something timeless about a pot of paperwhites sitting by the window in December. They don’t shout for attention — they quietly glow. I love them because they bring the fresh, clean scent of spring right into the middle of winter, when everything else feels still and gray.
If you want instant elegance without weeks of gardening prep, paperwhites are your best friend. Here’s why they’ve become a holiday favorite for so many of us:
- They bloom fast. Unlike most bulbs that take months, paperwhites flower in about 4–6 weeks, which makes them perfect for timing around Christmas.
- They’re compact and easy to grow indoors. You don’t need a garden or fancy equipment — just a sunny window and a bowl of pebbles or potting mix.
- They look luxurious without effort. Even one cluster can light up a room or dining table, and that delicate fragrance? Pure holiday magic.
The Appeal of Paperwhites
If you’ve ever walked into a home filled with their soft floral scent, you know exactly why people plant them every winter. They’re effortless but feel special — like a small luxury you can grow yourself. You can tuck a few bulbs into glass jars, line them on a windowsill, or place them as a centerpiece surrounded by pine or fairy lights.
For me, the charm is in the ritual — planting them while sipping coffee on a cool November morning and then watching them grow a little taller each day. It’s that sense of anticipation that makes them feel part of the season.
Botanical Background & What Makes Them Unique
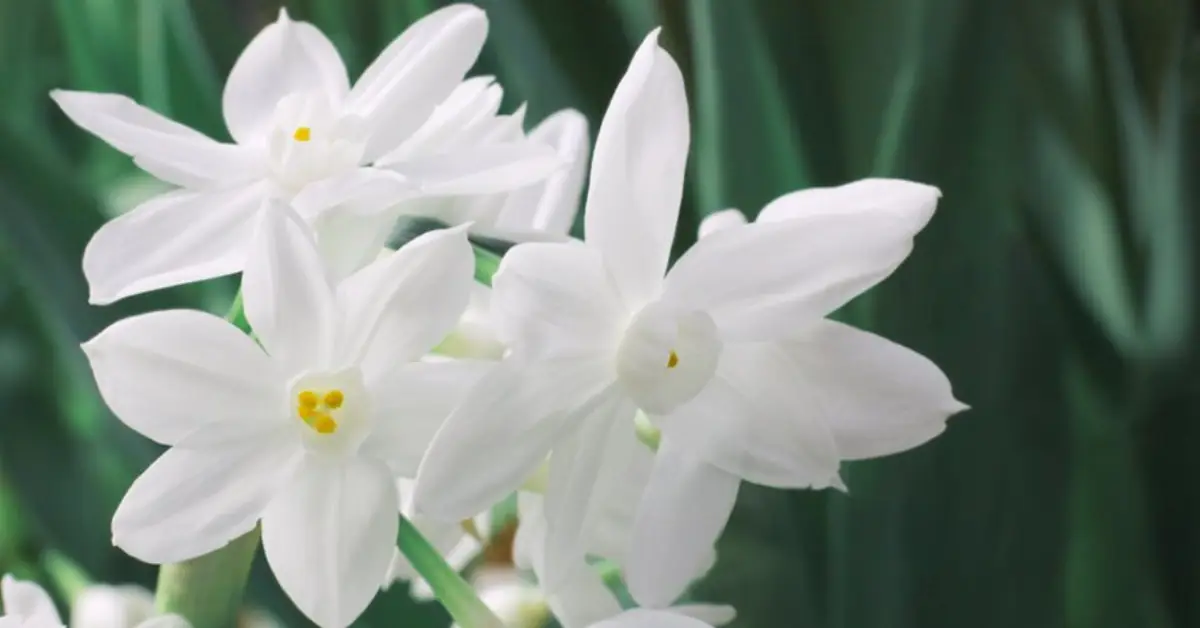
Paperwhites (botanically known as Narcissus papyraceus) belong to the daffodil family. Unlike many other bulbs, they don’t need a chilling period to bloom — that’s what makes them so easy for indoor forcing. You can simply pot them, give them light, and they’ll do the rest.
According to Wikipedia, these bulbs are native to the Mediterranean and are naturally adapted to bloom in mild winter conditions. That’s why they thrive indoors during the US winter — our cozy, heated homes mimic their native climate perfectly.
Indoor vs. Outdoor Relevance for Climates
If you live in a colder region — say, anywhere north of Zone 8 — paperwhites are strictly an indoor project. Frost and freezing soil will kill them outdoors. But for warmer parts of the US (Zones 8–11), you can actually plant them outside in fall and enjoy natural blooms.
Still, even in the South, I prefer growing them indoors. Indoors, you control the temperature, light, and timing — meaning you can predict your Christmas bloom date without worrying about the weather.
Quick tips for indoor growing:
- Choose shallow containers with good drainage.
- Keep bulbs close together for a fuller look.
- Place them in a bright spot, but avoid direct hot sun.
Common Misconceptions
One myth that keeps floating around is that you need to chill paperwhite bulbs before planting, like tulips or hyacinths. You don’t. In fact, chilling them can delay or even prevent blooming. Another common mistake is overwatering — they like moisture, not soggy soil.
Think of paperwhites as the “plug-and-play” bulbs of the flower world. You don’t have to fuss, just plant, place, and enjoy.
Timing: When to Plant for Christmas Blooms
When it comes to paperwhites, timing is everything. The key is to work backward from the date you want them in full bloom. If you’d love flowers opening around December 20, count about five weeks back — that puts you in mid-November for planting.
Target Bloom Window: Aim for Early to Mid-December
Most paperwhites bloom 4–6 weeks after planting, depending on room temperature.
- Cooler rooms (55–60°F) slow the process — closer to 6 weeks.
- Warmer rooms (65–70°F) speed things up — sometimes blooming in just 4 weeks.
So, if you want blooms by Christmas, plant no later than the second week of November.
Typical Indoor Forcing Schedule
I usually plant my first batch around mid-November, following the same timing suggested by experienced growers at Two Sisters Flower Farm. Their rule of thumb: plant 4–6 weeks before the desired bloom date. It works every single time.
To keep the holiday feel going, I stagger a few more pots every two weeks through December. That way, there’s always something fresh blooming even after New Year’s.
Outdoor Planting Timing (for Warm Climates)
If you’re in a frost-free zone, you can plant paperwhites outdoors anytime from late October through December. Outdoors, they’ll take a little longer since soil temperatures are cooler, so expect blooms in 6–8 weeks.
US Climate Zone Considerations
- Zones 8–11: You can plant outdoors or indoors. Outdoors, choose well-drained spots that get winter sun.
- Zones 3–7: Strictly indoor forcing only — your bulbs won’t survive a hard frost.
- Everywhere else: Indoor forcing gives predictable results and control over timing.
Calendar Checklist by Region
- Northern / Cold States: Plant indoors by early to mid-November for Christmas blooms.
- Southern / Mild States: You can plant indoors or outdoors from late October to December.
- Desert or coastal climates: Slightly later plantings (mid-to-late November) still bloom in time.
Staggering Plantings for Continuous Bloom
If you love having flowers through the whole winter (and honestly, who doesn’t?), start multiple batches.
Try this rhythm:
- Batch 1: Mid-November → Blooms Christmas week
- Batch 2: Early December → Blooms mid-January
- Batch 3: Late December → Blooms early February
It keeps your home feeling alive long after the tree comes down.
So — have you decided when you’ll plant your first batch? I promise, once you see those first buds pushing through, you’ll never spend another December without them.
Choosing the Right Bulbs & Varieties

The secret to beautiful Christmas paperwhites starts with the bulbs you choose. Even the best planting technique can’t fix weak or low-quality bulbs, so I always start here — with the feel, look, and source.
What to Look for in a Bulb
When you’re picking paperwhite bulbs, treat it like choosing produce. You want firm, plump bulbs with no soft spots or mold. If you spot shriveled or lightweight ones, skip them — they’re likely old or dried out.
Here’s what to check:
- Firmness: Should feel solid when gently squeezed.
- Color: A clean, tan or golden hue — no dark patches or mold.
- Size: Bigger bulbs (around 1.5–2 inches across) usually produce stronger stems and more blooms.
- Scent: Fresh, earthy smell — not musty.
Buy from a reliable supplier that stores bulbs properly and rotates stock. If you enjoy growing easy, rewarding plants from cuttings, you might also love propagating Purple Heart (Tradescantia pallida) — another fast grower that adds a rich pop of color to indoor spaces.
Recommended Varieties for Holiday Bloom
Not all paperwhites smell or look the same. If you’ve ever thought they were too fragrant, you’re not alone — some varieties have a lighter scent.
Here are a few worth trying:
- ‘Ziva’: Classic, pure white, and the fastest bloomer (4–5 weeks). Very fragrant.
- ‘Inbal’: A softer, less intense scent, perfect for smaller spaces.
- ‘Nir’: Larger flowers with strong stems; slightly slower to bloom but showy.
I like mixing ‘Ziva’ and ‘Inbal’ in different rooms — one for the living area, one for the dining table. It keeps the fragrance balanced and visually fresh.
Quantity per Container & Grouping Effect
Paperwhites look best in clusters. One bulb alone can look awkward, but a bunch of five or more creates that lush, designer-style display.
Quick grouping guide:
- Small bowl (5–6 inches): 3–5 bulbs
- Medium pot (8 inches): 7–9 bulbs
- Large centerpiece bowl: 10–12 bulbs
Plant them close enough that they almost touch — the crowding helps them support each other naturally, reducing the need for stakes later.
Storage Tips Before Planting
If you buy bulbs early in the season, store them in a cool, dark, and dry place (around 50–60°F). Avoid refrigerators if possible — humidity and ethylene from fruits can damage them. I usually tuck mine in a paper bag inside a closet or garage cabinet.
Planting Methods: Soil vs. Water or Outdoor Ground
How you plant your paperwhites depends on your space, tools, and style. I’ve tried them every way — in soil, in pebbles, and even outdoors — and each method has its charm.
Indoor Planting in Soil
- Container & Potting Mix Requirements: Pick a shallow container (around 4–6 inches deep) with drainage holes. Paperwhites don’t like soggy soil, so use a loose, well-draining mix — something like potting soil blended with sand or perlite works great.
- Depth & Placement of Bulbs: Place the bulbs so the tips sit just above the soil line. Press them in gently, leaving about half an inch between each one. According to American Meadows, this shallow positioning helps the stems grow straight and strong while keeping the bulbs dry at the top.
- Watering & Aftercare Tips: Water lightly after planting until the soil feels damp but not soaked. Then, keep the soil just moist — too much water early on can cause rot before roots form.
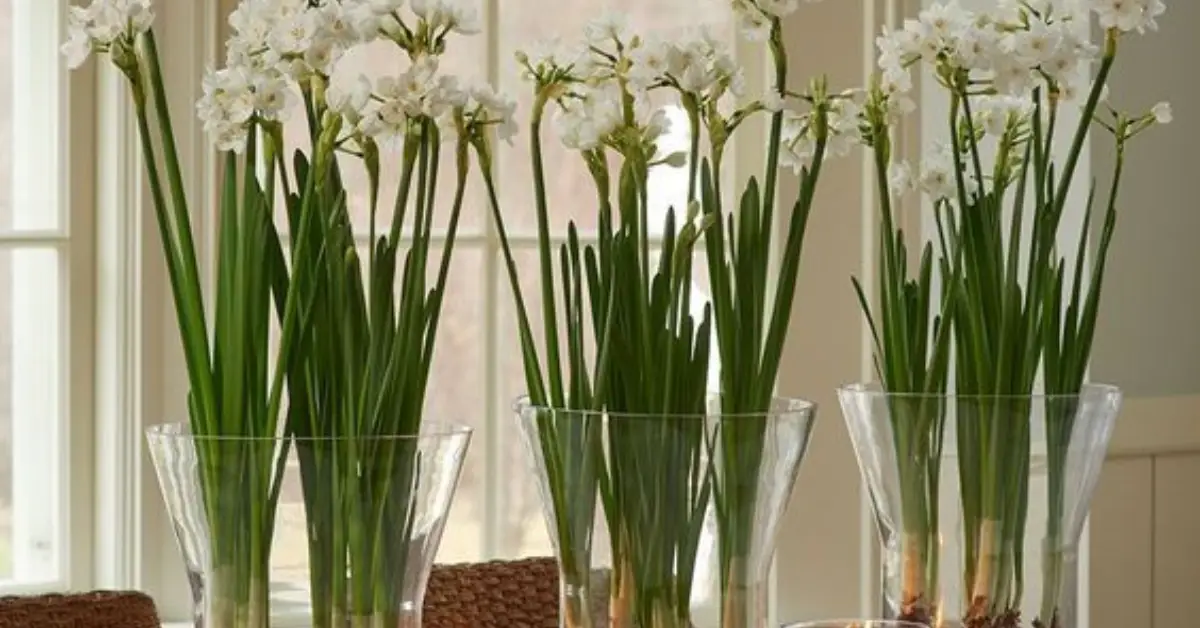
Indoor Planting in Water/Pebbles
Container Choice, Stones, and Water Level: Use a clear glass vase or bowl — it makes watching the roots half the fun. Fill the base with clean pebbles or decorative stones, then nestle the bulbs so only the lower third touches water. Keeping the water just below the base prevents rot while allowing roots to reach down.
Advantages vs. Soil
- Easier cleanup and no mess.
- You can see root growth.
- Perfect for decorative displays.
Disadvantages:
- Needs more frequent water checks.
- No nutrients for long-term bloom extension.
Outdoor Planting in the Garden (Warm Zones)
If you’re lucky enough to live in a mild climate (USDA Zones 8–11), you can grow paperwhites outdoors.
- Site Selection: Choose a sunny or lightly shaded spot with well-drained soil.Soggy ground leads to bulb rot.
- Depth & Spacing: Plant bulbs about 3 inches deep and 4 inches apart. Crowding is fine — they bloom beautifully when grouped.
- Why This Isn’t Ideal in Colder Zones: In regions with freezing winters, outdoor bulbs usually rot or fail to bloom. It’s better to force them indoors where you can control the environment.
Care & Maintenance for Best Results

Once your bulbs are planted, care makes all the difference. Just like paperwhites, other indoor bloomers such as the Christmas cactus (Schlumbergera) can bring color and joy to winter — learning how to time their blooms perfectly makes holiday decorating effortless. Most paperwhite problems — floppy stems, no blooms, rot — come down to light, temperature, or water mistakes.
Light & Temperature Requirements
- Indoor Forcing: Start the bulbs in a cool, dim place (55–60°F) for about a week to encourage root growth. Once roots appear, move them to bright, indirect light. Keep the room cool after they bloom to extend their display.
- Outdoor Growing: Outdoors, choose a sunny or part-shade area. Avoid low spots that collect water — paperwhites prefer soil that drains fast.
Watering (and Avoiding Rot)
- Soil Method: Keep the soil evenly moist, not soggy. A quick finger test works best — if the top inch feels dry, water lightly.
- Water/Pebbles Method: Make sure water only touches the base of the bulb — never submerge it. Too much water means instant rot.
Supporting Tall Stems / Preventing Flopping
Paperwhites tend to stretch toward light, especially in warm rooms. To keep them upright:
- Rotate containers every few days.
- Grow in a cooler space once stems reach 4–5 inches.
- Add a thin bamboo stake or decorative twine for support.
- Or try the “pickling” method — mixing a little alcohol (gin or vodka) in the water to stunt stem growth naturally.
What About Fertilizer?
For indoor forcing, you actually don’t need any fertilizer. The bulb already contains everything it needs for one blooming cycle. For outdoor bulbs, a gentle bulb fertilizer can help for next year’s growth, but only after flowers fade.
If you’ve ever had paperwhites flop, fail, or bloom unevenly, tweaking these small care steps makes all the difference. Once you see those snowy blooms standing tall, you’ll understand why they’ve become a winter tradition for so many of us.
Troubleshooting & Common Mistakes
Even the easiest bulbs can throw you a curveball sometimes. If your paperwhites aren’t cooperating — not blooming, getting floppy, or rotting before they sprout — you’re not alone. Most issues come down to timing, water, or temperature. Here’s how to fix them before they spoil your holiday display.
Bulbs Not Blooming — The Real Reasons
If your bulbs send up green leaves but never bloom, one of three things is usually to blame:
- Planted too late: Paperwhites need 4–6 weeks from planting to bloom. If you planted them in early December hoping for Christmas flowers, they simply didn’t have enough time.
- Too warm too soon: Warm rooms make the leaves grow fast but delay or suppress flowers. Start them in a cool area until roots develop.
- Low light: Insufficient sunlight or weak indoor lighting prevents bulbs from building energy for blooms. Move them to a brighter window or use a grow light if needed.
If you’re starting late, try staggering batches so at least one round hits your ideal bloom week.
Leggy or Floppy Stems — How to Keep Them Standing Tall
Long, floppy stems are the most common complaint. The good news: they’re easy to prevent.
Try these quick fixes:
- Keep your bulbs in a cooler spot (around 60°F) once growth starts.
- Rotate containers every couple of days so stems grow straight instead of leaning toward light.
- Use compact varieties like ‘Inbal’ or ‘Nir,’ which naturally stay shorter.
- If all else fails, support them gently with thin bamboo stakes or decorative twine.
A little chill and balanced light go a long way toward creating sturdy, photo-ready blooms.
Root or Bulb Rot — What’s Causing It
Rot is the silent killer of paperwhites. You’ll usually notice it when bulbs turn mushy or start smelling off.
The usual culprits:
- Overwatering: The top of the bulb should stay dry. In water-forcing setups, keep the water level just touching the bulb base.
- Poor drainage: Containers without holes trap moisture and suffocate roots.
- Planting too deep: Paperwhites should sit shallow — with their tips just above the surface. Deep planting encourages decay.
If you catch rot early, pull out any bad bulbs immediately to save the rest.
Indoor Bulbs Not Reblooming Next Year
It’s tempting to try saving indoor-forced bulbs for next Christmas, but the truth is, they rarely rebloom. According to
What you can do instead:
- Compost the old bulbs after blooming and start fresh each year.
- Or, if you live in a mild climate (Zones 8–11), you can plant the spent bulbs outdoors in spring — some may naturalize over time.
Think of it like enjoying a seasonal treat — short-lived, but worth it every year.
Toxicity & Pet Safety
Paperwhites may look delicate, but they’re toxic to pets and people if eaten. According to ASPCA’s plant safety list, all parts of the plant contain lycorine, a compound that can cause nausea or vomiting in cats, dogs, and humans.
Keep pots out of reach of curious pets or small children, and wash your hands after handling bulbs. If you’re gifting them, include a small “pet safety” note on the card — it shows care and awareness.
Creative Uses & Décor Ideas for Holiday Display
Once your paperwhites start blooming, they deserve a spot that makes them shine. With a little styling, they can become the centerpiece of your entire holiday décor.
Container Styling Ideas
The container sets the tone. Think of it as part of the design:
- Clear glass vases: Let you show off the roots and pebbles — perfect for a modern, minimalist look.
- Rustic bowls or baskets: Add warmth to farmhouse-style décor.
- Mixed heights: Group tall and short containers for visual interest on a console or table.
- Layered bases: Try adding moss, pinecones, or decorative stones on top of the soil.
Little details make these blooms feel intentional rather than “just planted.”
Placement Suggestions
Where you display paperwhites changes the mood entirely:
- Entryway: A welcoming touch for guests walking in from the cold.
- Living room: Cluster several pots near a window or fireplace for cozy ambience.
- Buffet or dining table: A low, wide arrangement won’t block conversation but still adds a natural centerpiece. For a year-round accent that pairs beautifully with winter bulbs, try adding a Peace Lily nearby — its deep green leaves and graceful white blooms balance perfectly with the brightness of paperwhites.
- Bedroom: One small pot on a nightstand can bring calm to winter mornings.
Integrating with Holiday Décor
Paperwhites blend beautifully with seasonal accents. Surround them with:
- Fresh pine or cedar branches
- Red berries for contrast
- Gold or silver ornaments nestled in the moss
- Tiny string lights for a gentle holiday glow
Keep it simple — the white blooms already bring elegance. You’re just framing their beauty.
Gifting Paperwhite Bulbs and Arrangements
Paperwhites make thoughtful, personal gifts because they feel handmade and meaningful. You can pot them a few weeks early, wrap the container in burlap or ribbon, and gift them as “living décor.”
Gifting tips:
- Start bulbs 2–3 weeks before gifting so buds are just emerging.
- Attach a handwritten card with care instructions.
- For friends who love DIY, gift a “grow kit” — a bowl, bulbs, and pebbles ready to assemble.
They’re the kind of gift that grows right into someone’s home — simple, fragrant, and full of cheer.
So, where will you place your first pot this year — by the window, on the dining table, or maybe as a surprise on someone’s doorstep?
After the Bloom: What Next?
When your paperwhites have finished their dazzling show, it’s easy to wonder what’s next. Should you toss them, save them, or plant them outside? This is the stage most people skip — but handling it right keeps your holiday tradition simple and rewarding year after year.
Indoor Forced Bulbs — Keep or Compost?
If you’ve forced your paperwhites indoors, the honest truth is: they’re a one-season wonder. According to The Spruce, once a bulb blooms indoors, it spends nearly all its stored energy. That means it’s very unlikely to flower again in another season.
You can:
- Compost the spent bulbs once the leaves yellow and dry out. It’s the most practical approach for most indoor growers.
- Or, plant them outdoors (in Zones 8–11) after frost danger passes. They may produce leaves next year and occasionally rebloom after a few seasons of rest — but don’t count on it.
Think of indoor paperwhites as your annual burst of holiday joy — low effort, high reward, and gone before you get tired of them.
Outdoor Planting — Let Nature Take Its Course
If you’re lucky enough to live in a mild region, you can let your bulbs continue their cycle outdoors. Here’s how to give them the best chance to come back stronger:
- Leave the foliage until it dies back naturally — that’s how bulbs recharge.
- Water lightly until leaves yellow, then stop.
- Lift and divide bulbs every couple of years if they crowd together.
- Store them in a cool, dry place over summer if you prefer to control replanting.
Outdoor paperwhites can surprise you — sometimes they naturalize beautifully, giving you clusters of blooms in late winter or early spring.
Planning Next Year’s Display
The best time to plan next Christmas’s blooms is right after this one ends. Take a few notes now while everything’s fresh in your mind.
Try this for smoother success next season:
- Stagger your plantings (every 10–14 days) from early November onward for a rolling display through December and January.
- Note which varieties performed best — maybe ‘Ziva’ was too fragrant, but ‘Inbal’ had the perfect balance.
- Order early from trusted suppliers when bulbs are fresh (usually late summer).
This habit turns a simple winter hobby into a yearly ritual — one that brings life and scent into your home when the rest of the garden sleeps.
When your last bloom fades, don’t see it as the end — it’s the perfect moment to prepare for next year’s glow.
I’d love to know how your paperwhites turned out this season. Did you manage to time them for Christmas morning? Drop your experience or questions below in the comments — your tip might just help another reader.
And if you’d like more seasonal growing guides, visit Plant Care Dairy — your go-to place for practical, real-world plant care advice that actually works.
Disclaimer: The information in this article is for general gardening guidance only. Always check your local climate conditions and plant-safety guidelines before following any advice. Paperwhite bulbs are toxic if ingested — keep them out of reach of pets and children. Plant Care Dairy is not responsible for outcomes resulting from improper handling or care.