
When the first big storm hits, shoveling can turn into an exhausting, slow, and slippery mess. My goal here is to cut through the confusion and give you clear, actionable guidance so you can move snow faster, protect your body, and prevent damage to your property.
In this guide, you’ll learn how to match the right tools to your conditions, time your efforts with the weather and the plow, and plan a smart flow so you don’t move the same snow twice. I’ll also share a simple checklist and summary table you can save for the season.
Quick personal note: the winter I moved to a corner lot, I figured, “How hard can it be?” I was late to work twice in one week, strained my back, and ended up re-shoveling the end of the driveway after the plow barreled through. Once I sharpened my shovel, staged my piles, and coordinated with the plow schedule, my clear-outs were twice as fast—without the aches.
For more expert strategies to save time and effort in snow removal, check out this comprehensive guide.
Preparation Essentials: Tools, Fit, And Timing
Mistake 1: Failing To Plan For Snow Removal

Snow is inevitable in cold climates, and scrambling the morning of a storm only slows you down. Without a plan, you risk dull or broken tools, empty ice-melt buckets, late starts, and poorly placed snow piles that you’ll have to move again.
I recommend prepping before the first flurries and before each major storm so you never have to shop on slick roads or fight for the last shovel at the store.
- Check tools now: Inspect shovels for cracks, bent blades, and loose handles. Replace weak tools before you’re knee-deep. You can also explore additional tips and techniques for efficient snow removal to complement your pre-storm prep, here.
- Stock your supplies: Keep ice melt, a broadcast spreader, and traction materials (pet-safe options or sand) where you can reach them quickly.
- Map your snow flow: Decide where each path’s snow will go so you don’t block vents, downspouts, doors, mailboxes, or sightlines. While preparing your property for snow, don’t forget to adjust plant care routines; check out our winter watering guide for plants.
- Watch the forecast: Plan a start time and consider two passes for big storms to prevent depth and compaction.
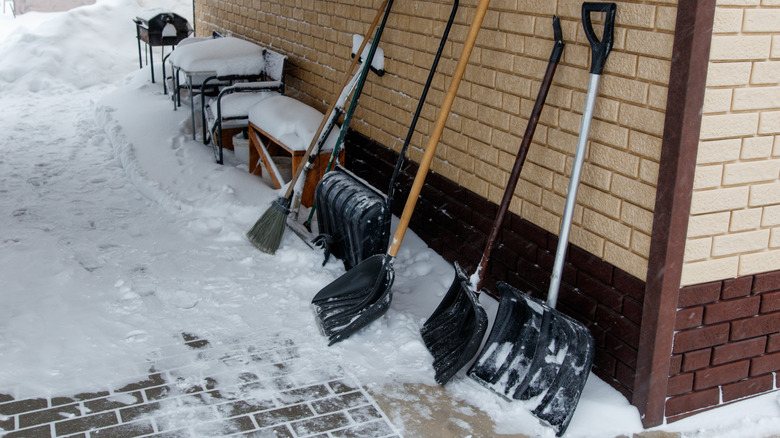
Mistake 2: Thinking All Shovels Will Work For Every Situation

Grabbing the first shovel in the aisle sounds efficient—but the wrong size, shape, or handle can slow you down and tire you out. Different conditions call for different tools, and the most efficient setup often includes more than one shovel.
- Push vs. scoop: A wide push shovel plows lighter snow quickly; a scoop shovel lifts and tosses drifts and the packed, heavy stuff.
- Blade material: Plastic blades are light and quick on smooth surfaces; metal blades (steel or aluminum) cut into ice and compacted snow better.
- Handle design: Curved shafts and auxiliary grips reduce strain and improve control. Choose a length that lets you keep your back straight.
- Have options: I keep a wide pusher, a smaller scoop, and an ice chipper. Switching tools saves time and effort as conditions change.
Mistake 3: Using A Dull Shovel Blade
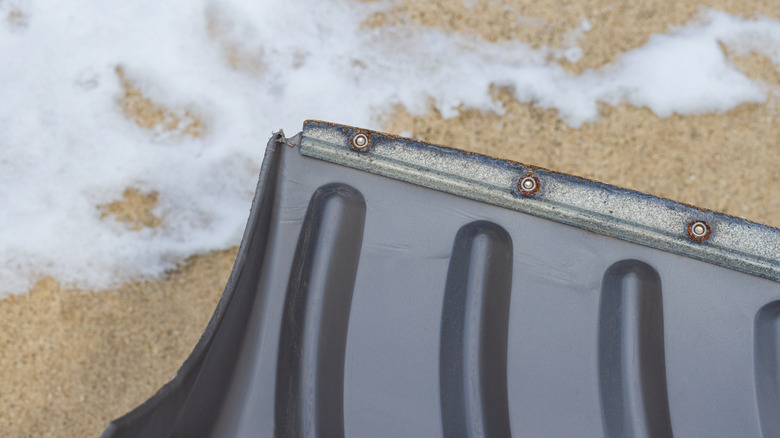
A dull edge rides up over compacted snow and ice, forcing you to push harder and make extra passes. If your metal blade looks rounded or chewed up, you’re overdue for a tune-up.
- Sharpen metal blades: Maintain about a 20–30° edge with a flat mill file or a bench grinder. Always secure the shovel and wear safety gear.
- Replace worn plastics: Plastic blades can’t be sharpened effectively. If the edge is rounded or warped, it’s time for a new one.
- Store indoors: Keeping shovels out of the weather reduces corrosion and edge wear.
Mistake 4: Choosing A Shovel That’s Too Heavy
Snow adds up quickly—light powder can be roughly 7 pounds per cubic foot, while wet slush can weigh several times more. Add a heavy shovel to the mix, and you’ll fatigue fast and risk injury.
- Pick lighter builds: Aluminum blades weigh less than steel, and fiberglass handles trim ounces without sacrificing strength.
- Match width to strength: Wider blades move more snow, but also weigh more with every scoop. If you’re tiring quickly, downsize.
- Try before you buy: In-store, “air shovel” a few times to test balance and comfort.
Technique And Load Management
Mistake 5: Overloading Or Underloading Your Shovel

Maxing out a big scoop seems efficient until your shoulders start burning and your pace slows to a crawl. Tiny scoops can waste time and energy too. The sweet spot depends on snow type and your strength. For a visual guide and step-by-step technique on shoveling efficiently, see this helpful resource.
- Adjust to conditions: Wet, slushy snow can weigh 25–51 pounds per cubic foot. Cut your scoop size by half compared to light powder.
- Use the pusher first: Push snow into windrows, then scoop smaller batches from the pile to toss.
- Keep it even: If the shovel feels unbalanced or wobbly, you’re overloading. Make the next scoop smaller.
Helpers, Melt, And Timing With Weather And Plows
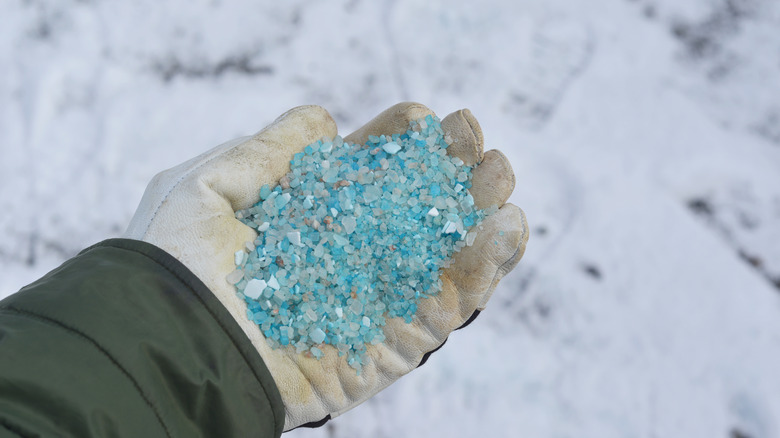
Mistake 6: Skipping Helpful Tools And Ice-Melting Products
Shovels do a lot—but not everything. Ignoring power tools and ice-management products can turn a one-hour job into an all-morning grind.
- Snowblower assist: Use a blower for deep or wide areas, then finesse edges and steps with a shovel.
- Ice melt smartly: Apply with a broadcast spreader for even coverage. Consider pet-safe or plant-safe formulas near landscaping.
- Chip, don’t hack: A dedicated ice chipper/scraper breaks up hardpack far better than a shovel edge.
- Traction add-ons: Keep sand or fine gravel handy for immediate grip on slick spots.
Mistake 7: Waiting Too Long To Begin Shoveling

Waiting until a storm ends can leave you facing a backbreaking, compacted mass, especially after foot traffic or vehicle tires press it down. Early action cuts the workload in half.
- Divide the storm: For big totals, do one pass mid-storm and a second at the end.
- Beat the compaction: Mornings are prime—clear before walkers and drivers pack it down.
- Work with the weather: If a warm-up is forecast, remove loose snow first so meltwater doesn’t refreeze into ice sheets later.
Placement Strategy And Property Protection
Mistake 8: Piling Snow Near Vents, Gutters, And Exits

Big piles in the wrong places cause headaches later. Blocked furnace or dryer vents risk dangerous carbon monoxide buildup. Snow against downspouts traps meltwater by your foundation and can freeze doors shut.
- Give vents breathing room: Keep at least 3 feet clear around furnace, dryer, and bath fan vents.
- Protect drainage: Keep downspouts open and route piles away from the foundation.
- Mind the exits: Don’t stack piles where doors need to swing open or where melt refreezes on steps.
Mistake 9: Blocking Your Own Path And Doubling The Work

Without a plan, it’s easy to toss driveway snow onto the sidewalk—or build a wall where you need to walk next. That means moving the same snow twice.
- Plan the flow first: Start where areas meet (sidewalk/driveway) and send snow away from all other routes.
- Stage smart piles: Keep piles low near the street for visibility and spread them out so they don’t freeze into immovable banks.
- Work top-to-bottom: Clear higher-traffic walkways and steps first, then driveways, finishing with the curb-edge apron.
Mistake 10: Clearing The Driveway Before The Plow Comes Through

Few things deflate morale like a fresh berm at the end of your driveway minutes after you finish. Plan your sequence so the plow’s pass doesn’t double your work.
- Leave the apron for last: Clear the main driveway and walkways first; finish the street edge after the plow passes.
- Create a pocket: If you must leave early, carve a small holding bay (a cleared space) upstream in your curb area to catch plow snow.
- Know your route timing: Ask neighbors or check city updates to predict when the plow typically arrives.
Overhead Hazards And Roof Safety
Mistake 11: Not Clearing Overhangs Or Branches Before You Shovel

Roofs and branches can drop heavy slabs of snow and ice right back onto your freshly cleared paths—or worse, onto you. Clearing overhead areas first prevents rework and reduces risk.
- Use a roof rake: Pull snow down in small sections while standing on the ground. Keep clear of falling debris. Protect sensitive indoor plants like Fiddle Leaf Figs by keeping windows closed and adjusting indoor humidity during heavy snowfalls, learn more here.
- Handle trees gently: Brush snow upward with a soft broom to avoid snapping frozen branches.
- Watch for ice dams: If you see thick edge ice, call a pro; chiseling can damage shingles and gutters.
Mistake 12: Using Poor Body Mechanics And Unsafe Lifting
Technique matters as much as the tool. Rounding your back, twisting while you toss, or yanking heavy loads overhead invites strains and next-day pain.
- Push, don’t lift when possible: Use a pusher to move snow across flat areas; lift only when you must, and keep loads small.
- Hinge at hips and knees: Keep your back neutral, step in the direction you’re throwing, and toss low—not high.
- Switch sides: Alternate lead hand and toss direction every few minutes to balance muscle use.
- Warm up and pace yourself: Two minutes of dynamic movement, then micro-breaks every 10–15 minutes reduce fatigue.
Pro Tip: Use A Roof Rake Safely And In Short Sessions
I limit roof-raking to a few passes at a time to avoid fatigue and missteps. I also keep a wide stance, extend the rake rather than leaning, and stop if wind gusts pick up. If the roof is steep, icy, or high, I call a professional—no pile of snow is worth a fall.
Conclusion
Shoveling smarter isn’t about brute force—it’s about the right tool, right time, and right flow. Plan your piles, work with the weather, and protect your body with good mechanics. You’ll move faster, stay safer, and save your back for things that actually spark joy.
I’ve learned that a little prep the night before (charged headlamp, sharpened edge, spreader filled) makes a big difference at 6 a.m. Embrace the same calm, methodical approach we use in the garden: assess, plan, and execute. The same approach works in winter gardening too; see our guide on how to garden through winter. That’s the smart, season-long mindset.
Actionable Checklist And Summary
| Mistake | Why It Slows You Down | Quick Fix / Tool |
|---|---|---|
| 1. Failing to Plan | Late starts, broken tools, blocked exits | Pre-storm checklist; stock ice melt; map piles |
| 2. One-Size-Fits-All Shovel | Wrong tool for snow type and surface | Use push + scoop combo; ergonomic handle |
| 3. Dull Blade | Skips over compacted snow and ice | Sharpen metal edge (20–30°) or replace plastic |
| 4. Shovel Too Heavy | Fatigue, slower pace, higher injury risk | Lighter materials (aluminum, fiberglass) |
| 5. Over/Underloading | Strain or wasted motions | Right-size scoops; push first, lift second |
| 6. Skipping Tools/Products | Wrestling with ice and depth | Snowblower; ice melt; ice chipper; spreader |
| 7. Starting Too Late | Compaction and deeper accumulations | Two-pass strategy; clear early |
| 8. Bad Pile Placement | Blocked vents, flooding, frozen doors | Keep vents/downspouts clear; route away |
| 9. Blocking Your Path | Moving the same snow twice | Plan flow from shared edges outward |
| 10. Beating the Plow | Fresh berm recreates work | Finish apron after plow; carve a pocket |
| 11. Ignoring Overhead Loads | Re-fall onto cleared areas; safety risk | Roof rake first; gently brush trees |
| 12. Poor Body Mechanics | Back and shoulder strain; slower pace | Push more; hinge at hips; switch sides |
If you found this helpful, I’d love to hear your best snow strategies. Share your wins and questions in the comments on Plant Care Dairy—let’s make winter maintenance easier together.
Disclaimer: This article is for general information only and is not a substitute for professional advice. Snow and ice are hazardous—use appropriate PPE, follow product labels, and consult local regulations and professionals for your specific conditions. Roof work and heavy ice removal can be dangerous; when in doubt, hire a qualified pro.