
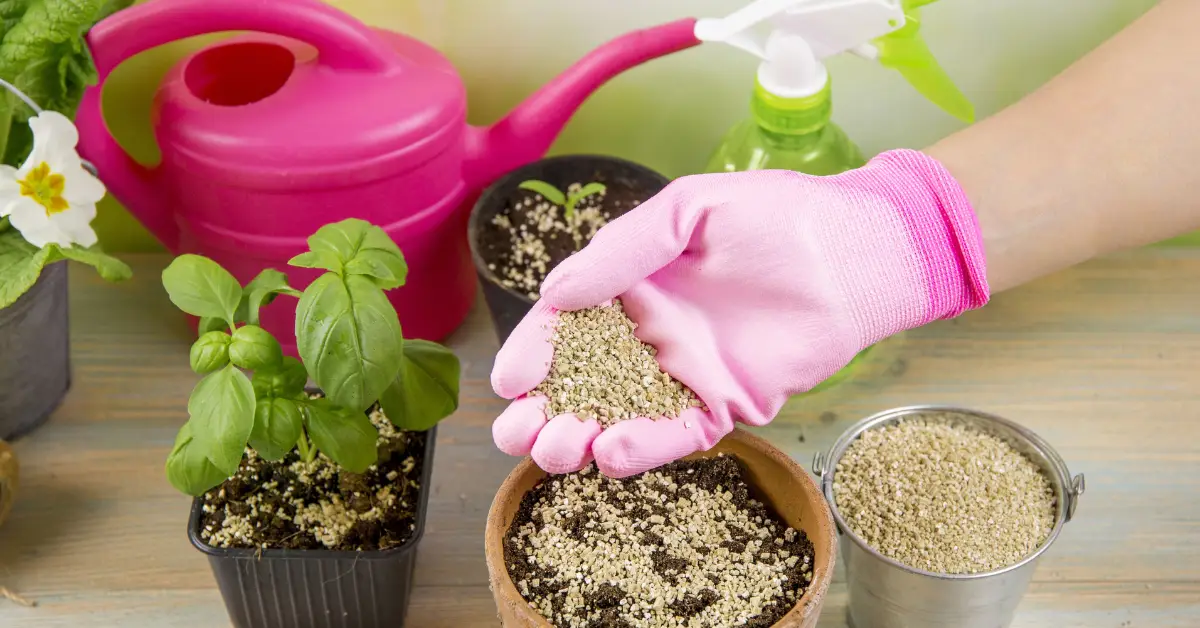
If you’ve spent any time mixing your own potting soil, you’ve probably seen bags labeled “vermiculite.” It sounds technical, right? When I first started gardening, I thought it was just another fancy soil additive that stores try to upsell. But once you understand what vermiculite actually does inside the pot, you realize it can completely change how your plants grow — for better or worse.
Vermiculite isn’t just filler. It’s a natural mineral that expands when heated, turning into light, sponge-like flakes that hold moisture and air at the same time. That means your roots stay hydrated without drowning — something every indoor plant owner has struggled with. But here’s the thing most blogs skip: not every plant or soil mix benefits from it. In fact, using vermiculite the wrong way can lead to soggy soil, stunted growth, and nutrient imbalances you don’t see coming.
In this guide, I’ll walk you through how to use vermiculite in potting soil the right way — when to use it, how much to mix, and when to skip it altogether. You’ll also get a few science-backed facts and real gardener experiences so you know what actually works in practice, not just in theory.
Before you start mixing your next batch of soil, let’s make sure you know exactly what you’re adding and why it matters. So tell me — have you ever noticed your potting mix drying out too fast, or staying soggy for days? If yes, this might be the one tweak that finally gets your soil balance right.
What Vermiculite Is — And Why It Matters
When I first heard about vermiculite, I assumed it was some kind of fertilizer. But it’s actually a mineral — a naturally occurring, shiny, layered rock that expands like popcorn when heated. That’s why you’ll see those light, flaky golden-brown pieces in potting soil mixes.
Once heated, this mineral turns into a lightweight material that traps both water and air — two things roots can’t live without. That unique structure is what makes it valuable in gardening, especially for indoor plants, seed starting, and potted mixes where drainage and moisture balance are everything.
Definition & Mineral Origin
Vermiculite forms deep within the Earth’s crust from a type of mica that transforms under heat and pressure. When mined and heated to high temperatures (about 1,000°F), it exfoliates — meaning it puffs up and becomes those small, sponge-like flakes you find in horticultural mixes.
So what you’re adding to your potting soil isn’t synthetic or chemical — it’s a natural mineral with a lot of structural magic.
Why this matters:
- It’s 100% natural and sterile — no pathogens or weed seeds.
- It’s lightweight yet retains water, which helps reduce how often you need to water.
- It provides gentle aeration, so roots can breathe even in tight pots.
Expanded Horticultural Vermiculite vs. Raw Form

Here’s where many gardeners get confused. The vermiculite used in gardening isn’t the raw mineral straight from the mine — it’s the expanded or exfoliated form. That’s what makes it so porous and absorbent.
Horticultural vermiculite also comes in different grades (fine, medium, coarse), and the size you choose really matters:
- Fine grade is great for seed starting because it holds moisture close to tiny roots.
- Medium grade works best for houseplants and container gardening.
- Coarse grade suits outdoor beds and mixes that need more drainage.
Picking the right grade helps you control how wet or dry your mix stays — and that can mean the difference between thriving plants and root rot.
Key Physical & Chemical Properties
Vermiculite’s magic lies in how it balances moisture, air, and nutrients. Here’s what’s going on at a microscopic level:
- Water-holding capacity: It can absorb three to four times its weight in water and slowly release it back to roots.
- Aeration: Even when wet, it doesn’t collapse — so air pockets stay open for roots to breathe.
- Cation Exchange Capacity (CEC): This is a fancy way of saying it can hold nutrients like potassium, magnesium, and calcium and release them as plants need them.
This combination is rare — few soil ingredients can hold water and keep soil breathable.
Safety & Sourcing Concerns
It’s worth knowing where your vermiculite comes from. Years ago, one mine in Montana was contaminated with asbestos, which gave the material a bad reputation. Today, horticultural vermiculite sold in the U.S. is considered safe — it’s tested and regulated by the EPA.
Still, it’s smart to:
- Buy only horticultural-grade vermiculite.
- Avoid breathing the dust — wear a mask or moisten it before mixing.
- Store it in a dry place to prevent mold or clumping.
Benefits of Adding Vermiculite to Potting Soil
So why should you actually use vermiculite in your potting mix? The answer depends on what kind of plants you’re growing — but in most cases, it helps your soil do its job better.
Enhanced Moisture Retention
If your plants dry out too quickly, vermiculite is a quiet game-changer. It soaks up water like a sponge and releases it gradually, keeping the soil evenly moist.
Here’s what that means for you:
- Fewer watering sessions — ideal if you travel or forget to water.
- Consistent moisture that reduces stress for thirsty plants.
- Less risk of wilt or “feast and famine” watering cycles.
It’s especially useful in container gardens, where soil tends to dry out faster than in the ground.
Improved Aeration & Root-Zone Health
Healthy roots need oxygen — even more than fertilizer. Because vermiculite doesn’t compact, it creates small air pockets in the soil that let roots breathe.
Think of it as giving your plants more “lung space.” The result?
- Stronger root systems
- Faster growth
- Fewer problems with fungal diseases caused by oxygen-deprived roots
You’ll notice your soil stays lighter and fluffier, even after months of watering.
Nutrient Retention & Availability
Vermiculite acts like a natural pantry for nutrients. It holds onto fertilizers and minerals, then releases them slowly so roots can absorb what they need — when they need it.
That means your feeding schedule becomes more effective, and you waste less fertilizer over time. If you’re curious about other natural ways to feed your plants, I’ve also explored how coffee grounds help plants grow — and the real science behind it. It’s a great read if you like experimenting with organic soil boosters. For indoor gardeners, this balance can prevent both overfeeding and nutrient burn.
Specific Scenarios Where It Shines
Vermiculite isn’t something you throw into every mix. It works best in:
- Seed starting trays — keeps soil moist without drowning new roots.
- Propagation setups — provides gentle support for cuttings to root.
- Houseplant mixes — helps with moisture control in dry indoor air.
- Container gardening — prevents pots from drying out too quickly in hot weather.
If you’ve ever lost seedlings to dry soil or found your pothos turning yellow from soggy roots, vermiculite might be the simple fix you were missing.
When Vermiculite Might Not Be the Best Choice
Most gardeners fall in love with vermiculite once they see how it transforms soil texture — but like anything in gardening, it’s not perfect for every plant or every setup. Knowing when to skip it helps you avoid headaches later.
Plants That Prefer Drier, Well-Drained Conditions
If you grow succulents, cacti, or Mediterranean herbs like rosemary, thyme, or lavender, vermiculite might actually hold too much water for them. These plants evolved in dry, rocky habitats where roots crave air, not constant moisture.
Adding vermiculite to their mix can lead to soggy roots and even fungal issues. In these cases, perlite or coarse sand is a better match because it drains quickly and keeps the mix light.
Quick tip: Think of vermiculite as a “moisture magnet.” If your plants like dry feet, go easy on it.
Risks of Over-Moist Soil
Overdoing vermiculite can leave your soil mix feeling spongy and heavy. It traps water between particles, and that excess moisture leads to:
- Root suffocation due to low oxygen levels.
- Algae and fungus gnat problems on the soil surface.
- Nutrient leaching, since water cycles through too fast.
Even plants that love moisture — like ferns or peace lilies — need short dry spells to breathe. The goal is steady dampness, not saturation.
A good rule of thumb: if you squeeze a handful of your soil and water drips out, there’s too much vermiculite in the mix.
Cost, Sourcing, and Sustainability
Vermiculite isn’t prohibitively expensive, but it’s mined from natural deposits and requires high heat for processing — not exactly the most sustainable option. Some gardeners prefer mixing smaller amounts of vermiculite with renewable materials like coco coir or compost to balance performance and footprint.
When shopping, look for:
- Clear sourcing info — brands that disclose where they mine from.
- Consistent expansion quality — cheap batches sometimes compact faster.
- Bulk options — saves cost and reduces packaging waste.
Handling & Compatibility Issues
If you’ve ever opened a bag of vermiculite, you know how dusty it gets. While modern formulations are safe, the fine dust can irritate your throat or lungs. Here’s how to stay comfortable:
- Lightly moisten it before mixing.
- Work outdoors or near an open window.
- Wear a basic dust mask if handling large quantities.
Also, vermiculite performs best in loose, organic soils. In heavy clay, it can clump and lose its airy texture — defeating the purpose of using it in the first place.
Vermiculite vs Perlite
According to GardenMyths, vermiculite holds around 71% water by volume, while perlite retains roughly 38%. That means vermiculite is better at locking in moisture and nutrients (thanks to its higher cation exchange capacity), but it also compresses over time, which can reduce airflow in pots that stay too wet.
So, if you’re growing moisture-loving plants like African violets, vermiculite is a win. But for anything that thrives in dry soil — go with perlite instead.
How to Incorporate Vermiculite into Your Potting Soil Mix
Now that you know when to use it (and when to skip it), let’s get hands-on. Mixing vermiculite correctly helps you hit that sweet spot — soil that’s moist but not soggy, airy but still nutrient-rich.
Choosing the Right Grade or Size
Vermiculite comes in fine, medium, and coarse grades, and each serves a purpose:
- Fine grade – best for seed starting or delicate seedlings.
- Medium grade – the all-rounder for most indoor and outdoor pots.
- Coarse grade – ideal for garden beds or large containers where drainage is crucial.
If you’re unsure, go with medium grade — it’s versatile and forgiving.
Recommended Mixing Ratios
You don’t need to reinvent your potting soil — just adjust the ratios based on what you’re planting:
- Indoor plants: 1 part vermiculite : 3 parts potting mix.
- Seed starting or moisture-loving plants: 1 part vermiculite : 2 parts mix.
- Outdoor containers or dry climates: 1 part vermiculite : 4 parts mix.
These aren’t rigid rules. You can tweak them based on your watering habits and local humidity.
Step-by-Step Mixing Process
- Start with your base mix – Use your usual potting soil or compost.
- Add vermiculite gradually – Sprinkle it in and mix evenly.
- Blend gently – Use your hands or a small trowel until it feels airy and uniform.
- Moisten slightly – It should clump softly without dripping.
- Check texture – If it feels muddy, you’ve added too much.
That’s it — you’re ready to pot.
Comparing Mixing Approaches
- Vermiculite alone: Great for rooting cuttings or seed starting but lacks nutrients.
- Blended with potting soil: Perfect for houseplants — gives structure, air, and moisture balance.
- Skipping it entirely: Best for dry-loving plants or those in terracotta pots where fast drying is an advantage.
Each approach has its place. The key is matching your mix to the plant’s natural environment.
Compatibility with Other Amendments
Vermiculite plays well with others — if you mix smartly:
- Perlite: Adds drainage and keeps the mix open.
- Coco coir: Adds organic texture and gentle moisture retention.
- Compost: Boosts nutrients that vermiculite helps retain.
- Peat moss: Improves structure but may make soil acidic — balance with lime if needed.
For a simple, reliable blend: 1 part compost + 1 part coco coir + 1 part vermiculite makes an ideal all-purpose potting mix for indoor plants.
Match the Mix to Plant Type, Pot Size & Growing Conditions

Every plant, pot, and climate plays by its own rules — and vermiculite behaves differently in each situation. Getting this part right is what separates thriving plants from those that just survive.
Container Plants & Indoor Potted Plants
If you grow most of your plants indoors, vermiculite can make a huge difference. Indoor environments dry soil out more slowly, so you don’t need as much vermiculite as you might in an outdoor mix.
A 1:3 vermiculite-to-soil ratio usually works best for container plants. It helps the roots breathe while preventing that dry, crusty top layer.
Here’s how to adjust your routine once it’s mixed in:
- Water less often, but water more deeply — the soil will hold moisture longer.
- Check moisture before watering by sticking your finger about an inch deep — if it’s still damp, wait another day.
- Use pots with open drainage holes to prevent any water from sitting at the bottom.
Plants like pothos, philodendrons, and peace lilies respond especially well to this kind of setup.
Seed Starting and Propagation Mixes
When it comes to seed germination and rooting cuttings, vermiculite is almost magic. It keeps the environment consistently moist — just what young roots need — without letting it get soggy.
For seed trays, you can use equal parts vermiculite and peat moss or coco coir. That’s a classic seed-starting mix that gives:
- Even moisture distribution.
- Gentle structure for delicate roots.
- Excellent oxygen flow to prevent damping-off diseases.
For propagation, you can even root soft-stem cuttings in 100% moist vermiculite — it supports the stem while holding steady humidity.
Raised Beds or In-Ground Use
Vermiculite can be helpful in raised beds if your soil dries out too fast, but it’s less effective in heavy or clay-rich soil.
- In sandy soils, it improves water retention beautifully.
- In dense or compact soil, it can actually make things worse by trapping water.
For in-ground use, think small: 1–2 inches of vermiculite blended into the top 6 inches of soil is plenty. Beyond that, it may compact and lose its airy structure over time.
Climate and Environmental Considerations
Vermiculite behaves differently depending on where you live:
- Hot, dry regions: It’s your best friend. Vermiculite holds moisture longer, so you can water less often without stressing the plants.
- Humid or cooler climates: Go easy — your mix already retains moisture, and too much vermiculite can cause soggy roots.
- Seasonal shifts: During winter, plants use less water, so reduce both vermiculite in mixes and watering frequency.
Gardeners in humid states like Florida or along the Gulf Coast often prefer perlite-heavy mixes, while those in Arizona or Nevada rely more on vermiculite for stability.
Plant Groups — Moist-Loving vs Drought-Tolerant
Here’s a quick breakdown so you can match your soil mix confidently:
Moisture-Loving Plants (Benefit from Vermiculite)
- Ferns
- Peace lilies
- African violets
- Calatheas
- Most tropical houseplants
Drought-Tolerant Plants (Avoid Vermiculite-Rich Mixes)
- Cacti
- Succulents
- Jade plants
- Aloe vera
- Herbs like rosemary, thyme, and sage
As The Spruce notes, tropical and foliage plants thrive in moisture-retentive soil blends, while dry-climate species need fast-draining mixes to mimic their natural habitats.
Common Mistakes to Avoid & Best Practices
Even with all the right information, it’s easy to go overboard or miss small details that matter. Here are some of the most common missteps — and how to avoid them.
Using Too Much Vermiculite
It’s tempting to think more vermiculite equals better results, but too much can drown roots in water and cut off air circulation. When in doubt, start with less and test the soil texture first. You can always add more later.
Neglecting Drainage
Vermiculite helps hold water, but it doesn’t replace proper drainage. Always:
- Use pots with holes.
- Add a light base layer of pebbles or coarse perlite.
- Avoid setting pots in standing water trays for long periods.
No matter how good your mix is, poor drainage can undo it.
Not Adjusting Watering Frequency
Once you add vermiculite, your soil will stay moist longer. That means your old watering routine may now be too frequent. Signs of overwatering include yellowing leaves, fungus gnats, and a musty smell near the soil surface.
Pro tip: Let the top inch dry before watering again — especially in cooler seasons.
Using Non-Horticultural Grade Vermiculite
Always buy horticultural-grade vermiculite, not construction or insulation-grade. Non-horticultural types may contain residues or fine dust not suited for plants. Fresh, clean vermiculite should be lightweight, uniform, and odor-free.
Forgetting to Refresh the Mix
Over time, vermiculite breaks down and compacts, losing its air-holding capacity. Refresh your potting mix every 12–18 months to keep it performing well. You can either:
- Replace one-third of the mix with fresh material.
- Fully repot the plant if it’s been over two years.
Not Updating Your Fertilizing Routine
Because vermiculite helps hold onto nutrients, you may need to reduce fertilizer frequency slightly. Overfertilizing in a moisture-retentive mix can lead to salt buildup, which stresses roots.
When in doubt, use diluted liquid fertilizer every 3–4 weeks instead of strong, slow-release pellets. And if you’ve ever wondered whether quick fixes like sugar water can replace proper nutrition, I actually tested it myself — here’s what really happens when you use sugar water on plants — miracle growth or gardening myth.
Final Garden-Ready Tips & Checklist
By now, you know vermiculite isn’t just another bag of “plant fluff” — it’s a serious soil game-changer when used right. Before you grab your trowel, let’s wrap things up with a clear, actionable checklist so you can decide how it fits into your garden plan.
Summary: When to Use It — and When to Skip It
Use Vermiculite When:
- You’re growing plants that crave steady moisture (like ferns, African violets, or tropical foliage).
- Your indoor air is dry, and soil tends to dry out too fast.
- You’re starting seeds or propagating cuttings that need consistent humidity.
- You want to boost nutrient retention and reduce fertilizer loss.
Skip or Limit Vermiculite When:
- You’re growing succulents, cacti, or herbs that love dry, fast-draining soil.
- Your local climate is humid and soil already stays moist.
- You don’t have proper drainage holes in your pots.
- You prefer organic-only or low-impact gardening and want to avoid mined materials.
Think of it this way — vermiculite is best for “thirsty roots,” not “desert souls.”
Pre-Mix Checklist
Before mixing vermiculite into your soil, ask yourself these quick questions:
- Plant type: Does it prefer moist or dry soil?
- Pot size: Smaller pots hold moisture longer — adjust vermiculite down.
- Drainage: Are there open holes in the pot base? If not, add perlite or grit.
- Watering routine: Do you tend to overwater or underwater?
- Amendment ratio: Have you tested a small batch first?
This checklist helps you balance moisture, aeration, and nutrients — the three things every healthy root system needs.
Suggested Experiment
If you really want to understand what vermiculite can do, don’t take my word for it — test it yourself.
Try this simple experiment:
- Take two identical pots and fill one with your regular mix, and the other with the same mix plus 25% vermiculite.
- Plant the same type of plant in both (a peace lily or pothos works great).
- Water them equally for 4–6 weeks and observe:
- Which one dries out faster?
- Which one grows new leaves quicker?
- Which one feels lighter and airier after watering?
You’ll see firsthand how vermiculite changes soil structure and root behavior — that’s the kind of insight you can’t get from a bag label. Once you’ve tried this experiment, you might also want to explore how to use sea salt for plants — it’s another simple, natural way to strengthen plant growth and boost soil vitality without relying on heavy fertilizers.
If you found this guide helpful and want more real-world plant care insights, visit Plant Care Dairy — where I share deep-dive tips, soil recipes, and honest gardening lessons from hands-on experience.
Now I’d love to hear from you — have you ever tried vermiculite in your potting mix? Did it make your plants happier or cause more trouble than it solved? Drop your experience in the comments — your story might help another gardener get it right.
Disclaimer: The information shared in this guide is based on practical gardening experience and credible horticultural sources. It’s meant for general educational purposes only and may not apply to every plant, soil type, or climate. Always test soil amendments in small batches first and follow local gardening guidelines for safety and environmental care.