
When the first frost threatens, it’s easy to feel overwhelmed by conflicting advice. My goal here is to cut through the noise and give you straightforward, actionable guidance so you can keep container plants alive and thriving through cold snaps—without overcomplicating it.
In this guide, you’ll learn how to pair the right protection with the right situation: grouping and insulating pots, choosing smart mulches, using shelters like cold frames, creating effective windbreaks, and layering covers. I’ll walk you through what to do before a freeze, how to vent when it warms, and exactly when to remove plastic so you don’t cook your plants in morning sun. These are the five smart moves I rely on every winter for root-hardy perennials and tender favorites alike.
I learned most of this the hard way. In late fall, the first frost rolls through my region and I reassess what must come in, what can stay, and what needs reinforcement. The years I waited until after the freeze, I lost plants; the years I prepared, I kept even marginally hardy containers going. Consider this your friendly nudge to act early and stack your protections.
1. Group Plants Together
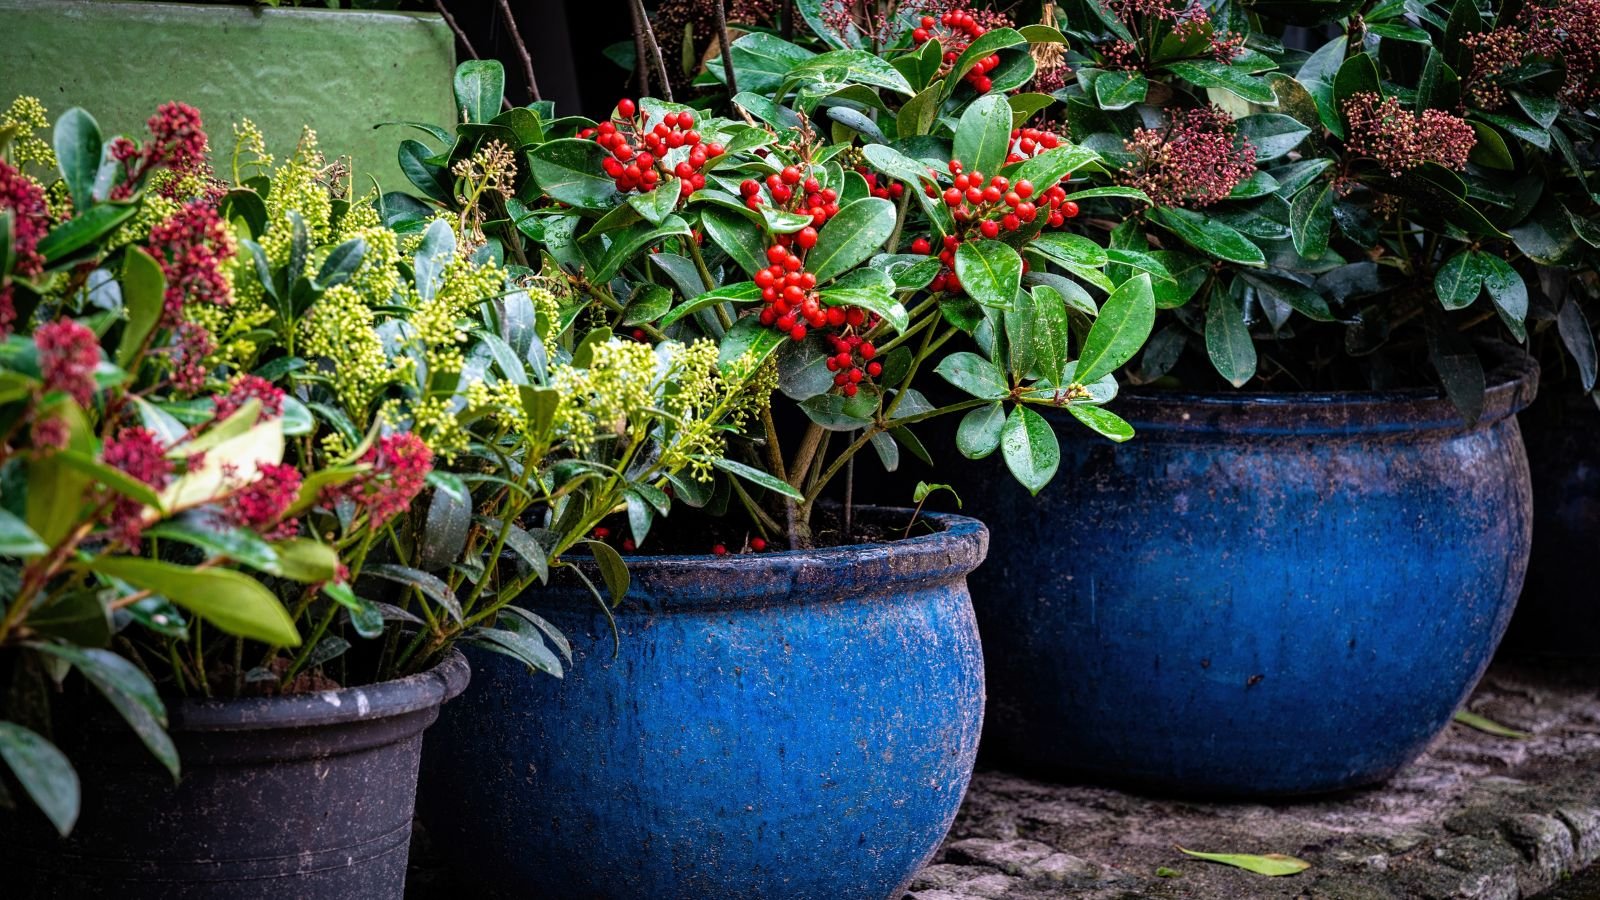
Grouping is your fastest, most cost-effective first line of defense. Clustering containers reduces exposure on all sides and lets plants share residual heat.
Cluster for Shared Warmth
- Pack pots tightly: Eliminate air gaps between containers so they buffer one another from wind and radiant heat loss.
- Raise off bare concrete: Set pots on wood slats or plant caddies to cut conductive cold from slabs.
- Sort by hardiness: Put root-hardy perennials at the outer ring and tender plants in the middle for maximum protection.
Choose the Warmest Wall
- Pick a sun-warmed exposure: In the Northern Hemisphere, south-facing walls get the most sun; in the Southern Hemisphere, north-facing walls are warmest.
- Snug to the house: Exterior walls radiate a bit of warmth at night and block wind, boosting survival odds.
- Avoid roof drip lines: Freezing runoff can saturate and supercool potting mix—shift clusters away from eaves during storms.
Stuff the Gaps for Insulation
- Use free materials: Tuck fallen leaves, evergreen boughs, or burlap between containers to trap insulating air.
- Wrap the cluster: A loose sheet or burlap around the entire group adds another protective layer while still breathing. For practical steps to prevent planters from freezing, see how to stop planters from freezing.
- Shield pot sides: Cold travel through thin pot walls is real—insulate exposed sides first to protect roots.
Hydrate Before the Hit
- Water the day before a freeze: Moist soil holds heat better than dry. Learn more about watering and frost protection from Iowa State Extension’s frost and freeze guidelines. Give pots a deep drink while avoiding waterlogged saucers. For alternative watering methods that can benefit winter plants, see watering plants with rice water.
- Stop late-evening dousing: Finish watering several hours before sunset so foliage dries and ice doesn’t form on leaves.
- Move the most tender plants: Bring tropicals indoors when nights are consistently below 55°F (13°C)—don’t risk it outside. If you’re considering seasonal potted trees, see how to care for a potted Christmas tree during winter.
2. Mulch Generously
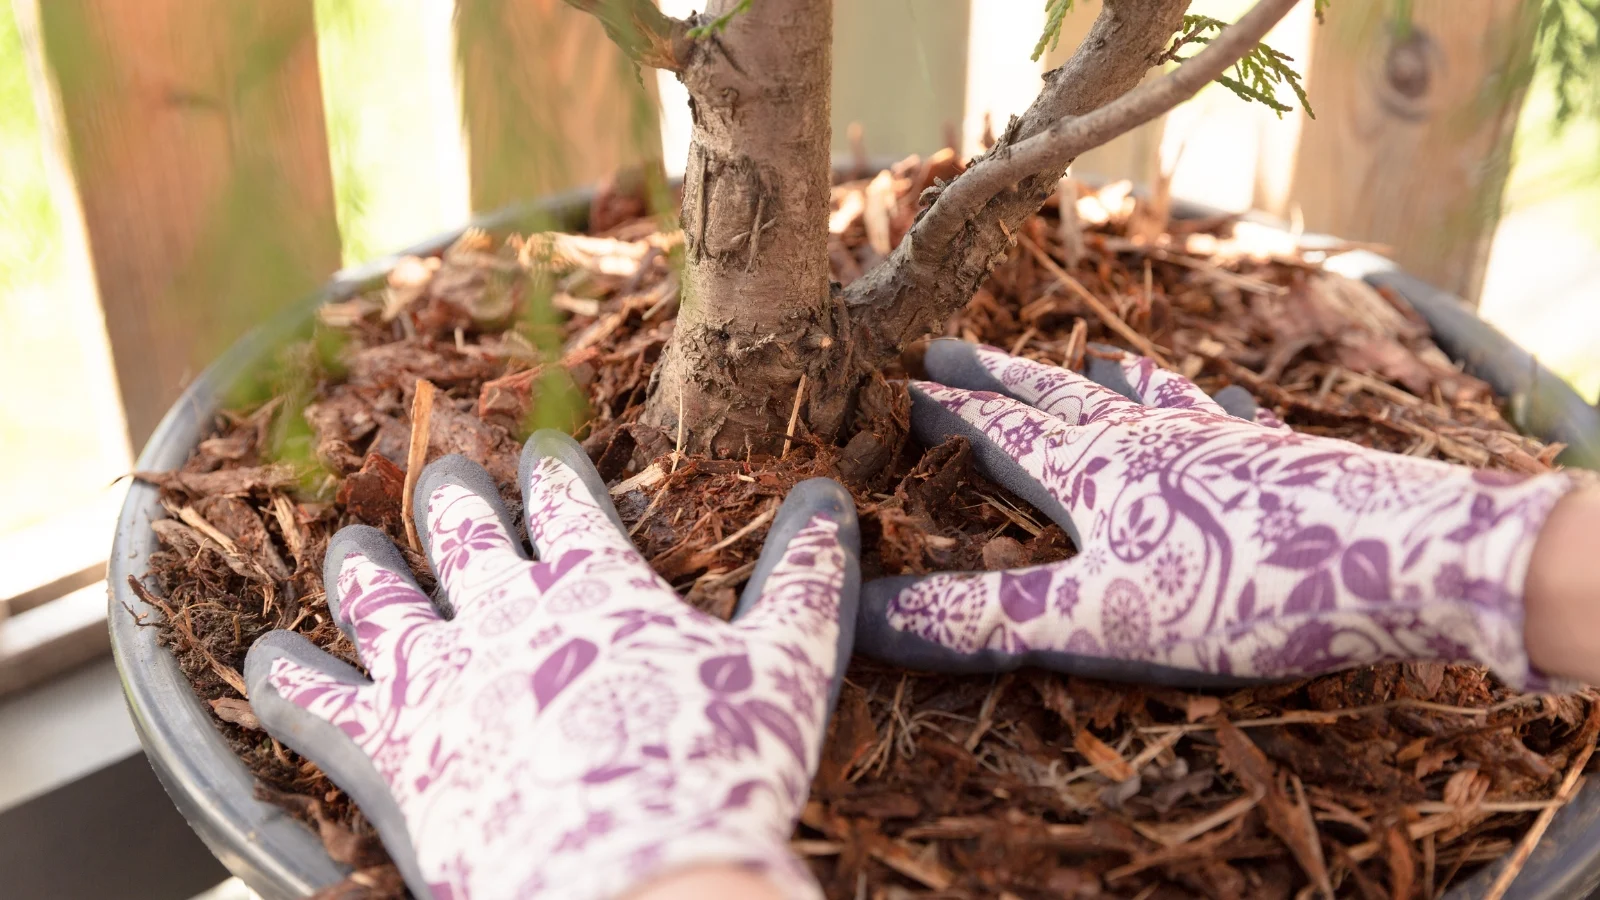
Just like in-ground beds, mulch on containers stabilizes soil temperature, slows evaporation, and reduces freeze–thaw stress. It’s one of the simplest ways to protect roots.
Pick the Right Organic Mulch
- Straw or shredded leaves: Excellent insulators that are easy to tuck around stems and crowns.
- Wood chips or bark: Long-lasting and tidy; great for large containers exposed all winter.
- Nut hulls and evergreen branches: Useful when you need airflow plus insulation; branches also block light to deter winter weeds.
How Thick and Where to Place
- Apply 2–4 inches: A minimum of two inches insulates and reduces evaporative loss from drying winter winds.
- Keep mulch off crowns: Leave a small ring open at the base of stems to prevent rot, especially in perennials and woody shrubs in pots.
- Skirt the pot sides: For thin-walled containers, extend mulch or wrap burlap partway down the pot to insulate root zones.
Bonus Benefits Through Winter
- Nutrient drip-feed: Organic mulches break down to feed the soil slowly, setting you up for a strong spring flush.
- Weed suppression: Mulch prevents germination of opportunistic winter weeds that steal moisture during thaws.
- Moisture management: Paired with deep but infrequent watering, mulch keeps roots evenly hydrated between cold snaps.
3. Find an Outdoor Shelter

Outdoor shelters—from simple cold frames to full greenhouses—buffer wind, frost, and icy precipitation. Even a modest frame can be the difference between setback and survival.
Greenhouses and Cold Frames 101
- Seal against drafts: To adequately protect potted plants, cold frames need tight-fitting lids and weatherstripping where possible.
- Orient for winter sun: Place frames on the side of your home that receives the most sunlight for passive warmth.
- Mind the microclimate: A sheltered nook with reflected light can outperform an exposed spot with more raw sun.
DIY Cold Frame Setup
- Repurpose materials: Old windows, cabinet doors, or greenhouse plastic make excellent lids for a budget-friendly frame.
- Insulate the base: Line the inside perimeter with straw bales or rigid foam to reduce heat loss through the frame walls.
- Elevate containers: Set pots on pallets or bricks to avoid cold pooling at ground level and to improve drainage.
Venting and Supplemental Heat
- Open above 50°F (10°C): Vent the frame to prevent leaf scorch when the sun hits. Close again as temperatures fall.
- Use lights for gentle heat: A string of incandescent bulbs raises interior temps a few degrees—often enough to tip the balance.
- Watch the forecast: If another cold wave is coming, pre-warm by closing vents early in the afternoon to capture residual heat.
4. Provide Windbreaks

Drying winds can be more damaging than cold alone, especially for containerized roots. A good windbreak prevents desiccation, reduces windchill, and keeps coverings from whipping.
Use What You Already Have
- Hug sturdy structures: The lee side of your house, a stone wall, or a secure garden fence creates a calm pocket of air.
- Leverage hedges and trees: Dense evergreen screens filter wind without turbulence that can topple tall pots.
- Mind stability: Avoid makeshift barriers that could blow over and crush containers during a storm.
Build Temporary Barriers
- Snow fencing or burlap: Stretch between posts to create a breathable wind buffer that’s quick to install and remove.
- Panel windbreaks: Lattice panels or pallets set a foot off the ground slow wind while letting it bleed through.
- Weight bases well: Sandbags or paving stones prevent your windbreak from turning into a sail.
Positioning Matters
- Angle to prevailing winds: Set barriers perpendicular (or slightly angled) to the dominant wind direction for best protection.
- Create a calm zone: Leave 2–3 feet between the windbreak and plant cluster to allow air to slow without swirling.
- Combine tactics: Windbreaks plus mulch and covers magnify protection more than any single method alone.
5. Cover Them Well

When extreme cold hits, add a final layer. The right cover blocks frost, holds radiant heat near foliage and soil, and shields from icy precipitation.
What to Use: Sheets, Frost Cloth, Plastic
- Old sheets or towels: Readily available, breathable, and perfect for quick overnight frosts.
- Frost cloth: Designed for plants; it blocks frost while allowing air exchange—but provides less heat retention than plastic.
- Greenhouse plastic: Excellent at trapping heat when sealed properly. Remove or vent when temps reach 50°F (10°C) or higher. For more ideas on using covers and plastics to protect pots, see Gardening Naturally’s winter pot protection tips.
Layering Strategy for Deep Freezes
- First layer (insulation): Drape sheets or frost cloth over supports so fabric doesn’t rest directly on foliage.
- Second layer (weather shield): Add greenhouse plastic over the fabric to block wind and precipitation.
- Seal at the base: Use clips, boards, or bricks to limit drafts—leave a small vent if sun may hit early.
Morning Warm-Up: Remove and Reapply
- Uncover with the sun: As direct sunlight hits and the air warms, remove plastic first to prevent steam heat from scorching leaves.
- Keep fabric on if cool: Leave sheets or frost cloth in place if temperatures remain low and skies stay bright but cold.
- Reset at dusk: Re-cover in late afternoon ahead of the next cold night so captured warmth carries into evening.
Wrap-Up, Summary Table, and Checklist
Cold protection isn’t about one magic trick—it’s about stacking small advantages. For additional strategies on protecting potted plants from winter freezes, see HGTV’s tips on safeguarding container plants. Grouping, mulching, sheltering, windbreaking, and covering work best together. Here’s a quick-reference checklist and a concise table to guide your decisions on any cold night.
Quick-Action Checklist
- 1. Group: Pack pots tightly against the warmest wall; stuff gaps with leaves, evergreen boughs, or burlap.
- 2. Mulch: Apply 2–4 inches of straw, shredded leaves, or wood chips; keep mulch off plant crowns.
- 3. Shelter: Move the most sensitive containers into a greenhouse or cold frame; vent above 50°F (10°C).
- 4. Windbreak: Tuck clusters behind a sturdy fence, hedge, or wall; add temporary barriers if needed.
- 5. Cover: Layer breathable fabric under greenhouse plastic during hard freezes; remove plastic as the sun hits.
- Before the freeze: Water deeply the day before and bring tropicals indoors if nights stay below 55°F (13°C).
Summary Table: Cold Protection at a Glance
| Action | When to Do It | Why It Works | Pro Tips |
|---|---|---|---|
| Group Pots | Before first frost and ahead of each cold snap | Reduces surface exposure; shares residual warmth | Place against a south-facing wall (north-facing in Southern Hemisphere) |
| Mulch 2–4 Inches | Early to mid-fall; refresh midwinter if compacted | Insulates roots; slows evaporation during dry, cold winds | Keep mulch off crowns to prevent rot |
| Use a Cold Frame/Greenhouse | For sensitive plants or extended freezes | Buffers frost and wind; captures passive solar heat | Vent at ≥50°F (10°C); add incandescent lights for gentle heat |
| Provide Windbreaks | Anytime wind is forecast with temps near/below freezing | Prevents desiccation and windchill damage | Angle to prevailing wind; secure bases with sandbags |
| Layer Covers | During hard freezes or freezing precipitation | Blocks frost and traps warmth near foliage and soil | Fabric under plastic; remove plastic with morning sun |
Smart-Gardening Mindset: Final Thoughts
I treat winter plant care as a series of small, smart habits instead of one big production. I group early, mulch generously, and keep a simple cold frame ready. On the coldest nights, I layer covers and sleep better knowing I’ve stacked the odds.
Remember: gardening is trial and error. Each season teaches us what to adjust—when to water, how to vent, and which plants can tough it out with the right support. With these five moves, you’ll protect roots, preserve foliage, and greet spring with healthier, happier containers.
I’d love to hear what’s worked in your climate. Drop your questions and tips in the comments over at Plant Care Dairy—our community is full of clever, field-tested ideas you can put to use this week.
Disclaimer: Always follow local guidelines and use caution with electrical devices, plastics, and coverings near heat sources. The advice provided is based on personal experience and general best practices; adapt methods to your plants, containers, and climate. Test changes on a small scale before applying broadly.