I can’t tell you how many times I’ve bent down to admire a healthy plant, only to notice tiny black specks crawling across the leaves. At first, you think it’s just dirt. Then you look closer—and realize they’re moving. That’s the moment your heart sinks, because if you’ve kept houseplants long enough, you know bugs can sneak in overnight and turn a thriving plant into a weak, drooping mess.
If you’re seeing these little black dots, you’re not alone. Garden forums, Facebook groups, and even university plant clinics are full of people asking the same anxious question: “What are these bugs, and how do I get rid of them without killing my plant?” I’ve been there too, and the truth is most guides online either dump a laundry list of pests on you without helping you figure out which one you actually have—or they jump straight to chemical sprays without thinking about the damage those can do indoors.
In this guide, I want to give you something better: a simple way to identify exactly which bug you’re dealing with, and clear, natural steps to eliminate them before they spread. No fluff, no guesswork—just real-world fixes you can try today.
Quick question before we dive in: when you spotted those black bugs, were they mostly on the leaves or crawling up from the soil? That one detail can save you days of trial and error.
Quick Diagnostic Flow: What Could These Tiny Black Bugs Be?
The hardest part isn’t killing the bugs—it’s figuring out which ones you’re actually dealing with. I’ve learned the hard way that if you treat for the wrong pest, you’ll waste time and your plant will keep suffering. Let’s break down the most common “tiny black bug” suspects and how you and I can tell them apart quickly.
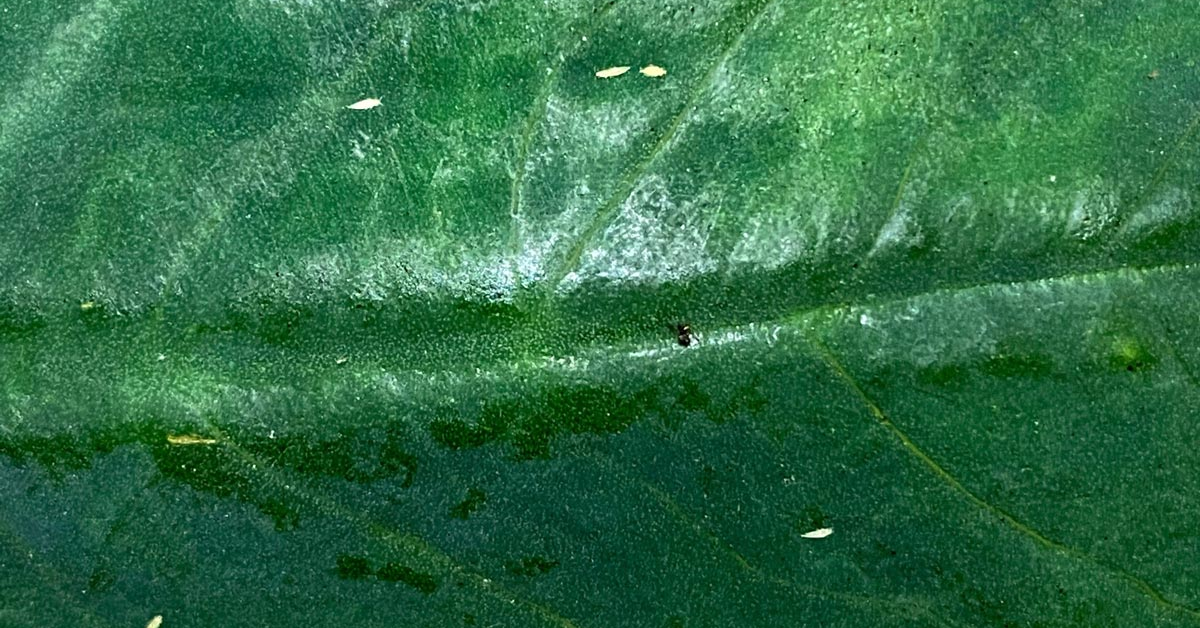
- Thrips: These are slender, fast movers. If you see streaky, silvery patches or tiny black specks (droppings) on leaves, thrips are a strong suspect. They usually run when disturbed, so look closely.
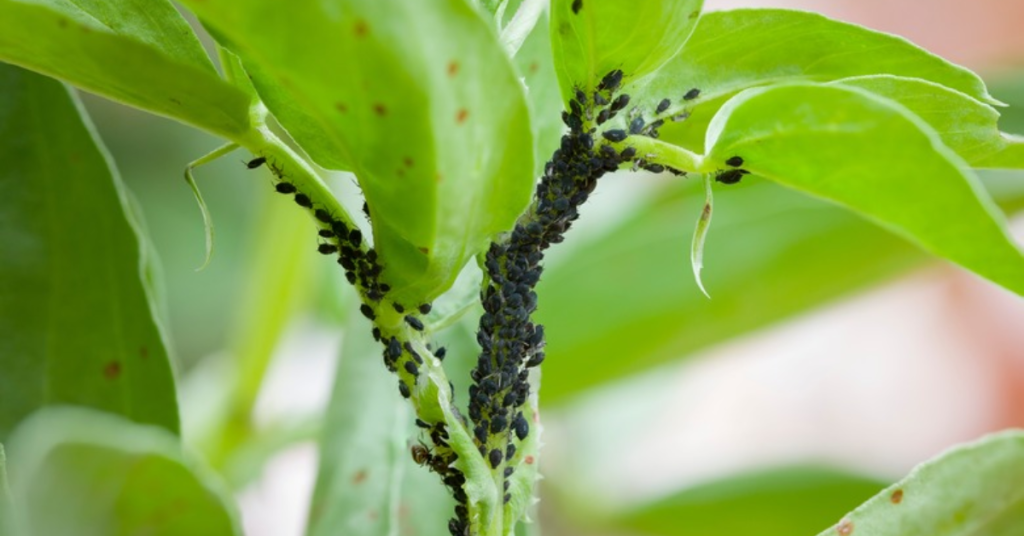
- Black Aphids: Aphids are easier to spot because they gather in groups. They’re oval, soft-bodied, and love clustering on new growth. If your leaves feel sticky or you see shiny residue (honeydew), that’s a classic aphid sign.
- Scale Insects (black form): Unlike the others, scale bugs don’t really move once attached. They look like tiny dark bumps or shells stuck on stems and the undersides of leaves. If you try to scrape them gently and they pop off, that’s scale.
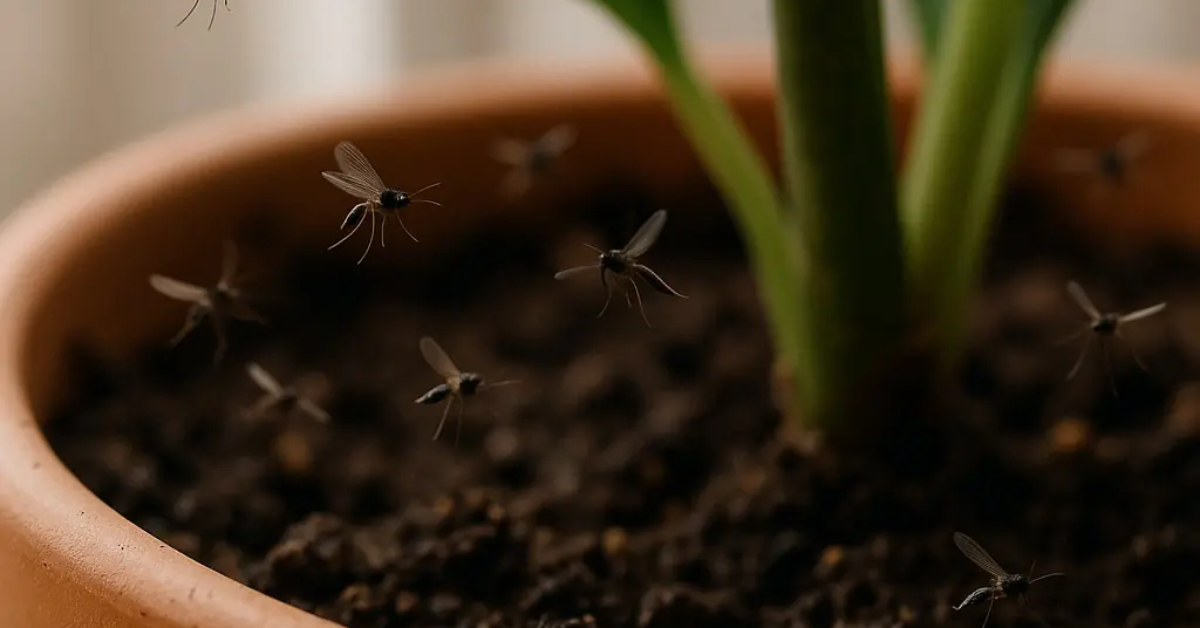
- Fungus Gnats (adults): These look like little black flies buzzing near the soil. They don’t chew leaves but their larvae in the soil can hurt roots. If bugs scatter every time you water, gnats might be the culprit. According to the University of Minnesota Extension, gnats thrive in damp soil, so overwatering is often the trigger.
- Springtails: Tiny, dark, and often found in soil, springtails jump when disturbed. They’re more startling than harmful. Most of the time, they don’t actually damage plants, but their presence can still be annoying.
Quick Comparison Table
| Bug Type | Size | Movement | Location | Damage / Signs |
|---|---|---|---|---|
| Thrips | Very small, thin | Fast runners | On leaves | Silver streaks, black specks |
| Black Aphids | Small, oval | Slow, cluster | New shoots, stems | Sticky honeydew, curled leaves |
| Scale Insects | Tiny bumps | Immobile | Stems, underside leaves | Yellowing leaves, weak plant |
| Fungus Gnats | Gnat-sized flies | Fly around soil | Soil surface, flying near pot | Larvae harm roots, adults nuisance |
| Springtails | Pin-sized | Jump when touched | Soil | Usually harmless, just alarming |
If you pause for a second and really observe—movement style, where the bug hangs out, and what damage it leaves—you’ll be able to tell exactly which one you’re facing. Once you and I know that, we can move on to the natural fixes that actually work.
Quick check: when you first spotted the bugs, did they scatter fast, or did they stay stuck in one spot? That single clue can narrow it down.
Natural Elimination Methods: Gentle Ways to Get Rid of Bugs
Once you know which bug you’re fighting, the next step is taking action—without reaching for harsh chemicals that can burn leaves or put your home environment at risk. Over the years, I’ve tried a handful of natural fixes, and these are the ones that consistently work.
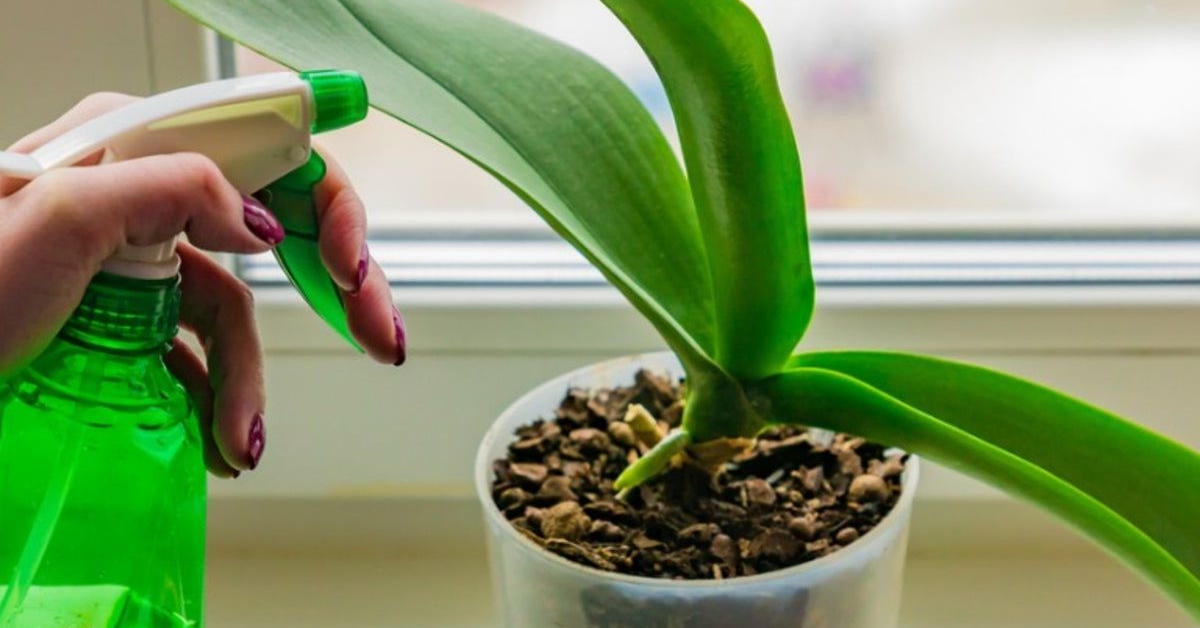
- Manual Washing / Rinsing Leaves: Sometimes the simplest solution is the best. Rinsing leaves in the sink, shower, or with a gentle sprayer helps dislodge pests like aphids and thrips. It won’t kill every single one, but it knocks down their numbers quickly and gives your plant breathing room.
- Alcohol or Soap Spot Application: For bugs like scale or mealybugs, dipping a cotton swab in diluted rubbing alcohol or mild soap solution and dabbing the insect directly works wonders. It’s targeted, safe, and avoids soaking the entire plant.
- Neem Oil or Horticultural Oil Spray: A natural pest control staple, neem oil suffocates soft-bodied insects and disrupts their growth cycle. Just make sure to dilute it properly and spray during the evening to avoid leaf burn.
- Soil Drench for Gnats: If your problem lives in the soil, not on the leaves, drenching the potting mix with a natural treatment helps kill larvae before they mature. Gardeners on Bunnings Workshop often recommend solutions like beneficial nematodes or simple household remedies to stop gnats at the source. And while gnats are an indoor headache, outdoor growers often face similar battles. If you’ve dealt with slimy pests outside, you’ll know there are safe fixes too—like learning how to get rid of slugs without chemicals, which follows the same “gentle but consistent” approach.
- Sticky Traps for Flying Adults: Yellow sticky cards are inexpensive and surprisingly effective. Place them near the soil surface, and within days you’ll see gnats and other flying pests stuck there, breaking their lifecycle.
These methods are gentle, affordable, and safe for most plants. The real key is consistency—you and I can’t just do it once and forget. A routine over several days or weeks makes the difference between a short reprieve and actually eliminating the infestation.
Integrated Strategy: Layered Treatment Plan
The truth is, no single trick will fix everything. The best results come when you layer methods together, treating both the plant and its environment over time. Here’s the approach I’ve used when an infestation starts to spread:
- Isolate affected plants immediately: Don’t wait. Bugs travel fast—moving one pot away from the group can save the rest of your collection.
- Start with a gentle wash + spot treatment: Knock down the initial population with a rinse, then follow up by targeting stubborn pests with alcohol or soap.
- Apply neem or soap spray regularly: Spray every 5–7 days for at least three cycles. This breaks the lifecycle and catches the pests that hatch after your first treatment.
- Treat the soil if needed: If gnats or springtails are the culprits, add a soil drench or adjust watering habits to dry the top layer between waterings.
- Use sticky traps and monitor: Traps act like silent guards. They let you see whether pests are still active and help keep adult numbers low.
- Know when to walk away: If the infestation is severe and the plant keeps declining, sometimes the most practical option is to discard it. That one sacrifice can save the rest of your plants from months of frustration.
When you take this layered approach, it doesn’t feel overwhelming. Each step builds on the last, and within a couple of weeks you’ll start to notice new growth and fewer bugs.
Tell me—when you’ve fought plant pests before, did you try just one method, or did you stack a few together? That choice usually makes all the difference.
Prevention & Maintenance: How to Keep Your Houseplants Pest-Free Long Term
The best cure is prevention—I’ve learned this lesson after rescuing one too many bug-ridden plants. If you and I can stop infestations before they start, we’ll save ourselves time, money, and plenty of frustration. Here are habits worth building into your plant routine:
- Quarantine new plants for about a week: Always keep new arrivals away from your main collection. Many infestations begin with one “innocent” plant brought home from a nursery.
- Inspect regularly: A quick underside check of leaves and a glance at the soil surface once a week makes a huge difference. Early spotting = easier fixes.
- Maintain balanced watering: Overwatering is practically an invitation for fungus gnats and root rot. Keep the soil slightly moist but not soggy.
- Use clean pots and fresh soil: Reusing old soil or dirty pots introduces pests and pathogens. Fresh, sterile potting mix plus good drainage keeps roots healthier.
- Encourage beneficial insects: Indoors, it’s trickier, but some people use predatory mites or introduce ladybugs in controlled conditions to help balance pests naturally.
- Control the environment: Balanced humidity, decent airflow, and good light levels reduce the stress that makes plants vulnerable to bugs.
- Mulch or top-dress soil: Adding a layer of sand, gravel, or decorative mulch discourages gnats and springtails from laying eggs on exposed soil.
If you’ve ever noticed leaves yellowing right after a pest outbreak, it’s often stress showing up in your plant’s foliage. For example, Peace Lily leaves turning yellow can signal both pest pressure and care imbalances—worth checking before you assume it’s just bugs.
According to Real Simple, a little extra care with environment and soil choice keeps indoor plants both healthier and more resistant to pests.
Special Cases & Challenges: Sensitive Plants and Tricky Scenarios
Not all plants react the same way to treatments. Some need extra caution:
- Delicate-leaf plants (like ferns or calatheas): Their fine leaves scorch easily. Skip harsh sprays; instead, focus on gentle rinsing and targeted swabs.
- Succulents or hairy-leaved plants: Oils (like neem) can cling to their surface and cause damage. Use sparingly or avoid altogether.
- Low-light, high-humidity rooms: These create a breeding ground for fungus gnats and mold. Improve airflow and let the topsoil dry before watering again.
- Large, multi-plant setups: Bugs spread fast across close-packed plants. Space them out and rotate your inspections.
- Mixed infestations: Sometimes you’ll have more than one bug at once—like aphids and gnats. In that case, combine methods: soil drench plus foliage spray.
Some plants show pest stress in unique ways—like Monstera leaves curling, which can happen from thrips damage, but also from humidity or watering issues. Knowing the difference helps you choose the right fix without over-treating.
Every plant collection comes with quirks, and knowing your plant’s sensitivity helps you adjust treatment without doing more harm than good.
Out of curiosity, have you ever lost a plant because the treatment itself was too strong? That’s often the silent struggle plant parents don’t talk about.
Cost, Time & Effort Estimate: What to Expect
Before diving into treatments, it helps to know what you’re signing up for. I’ve gone through this enough times to realize that a realistic plan saves both energy and patience. Here’s what you can expect if you’re taking the natural route:
- Typical costs
- Neem oil: usually $8–12 for a small bottle, enough for several rounds.
- Mild soap solution: pennies if you already have dish soap at home.
- Sticky traps: around $5–10 per pack, lasting a season or more.
- Time commitment: Each treatment session—washing, spraying, soil drenching—takes about 10–20 minutes per plant. The bigger the plant, the longer it takes.
- Number of cycles: Most infestations need 3–4 rounds (every 5–7 days) to break the lifecycle. Skipping follow-ups often means the bugs bounce back.
- When it’s not worth it: If you’ve treated for over a month, spent more than the plant’s value in supplies, and the pest keeps spreading, it may be smarter to discard the plant. Sometimes one sacrifice protects your whole collection.
Your 3-Step Checklist to Battle Tiny Black Bugs Starting Today
You don’t need to overcomplicate this. Here’s a simple roadmap you can start with right now:
- Identify what bug you’re really dealing with by watching movement, location, and signs of damage.
- Eliminate using gentle methods—wash, spot treat, neem spray, and soil drench if needed.
- Prevent by quarantining new plants, keeping soil clean, and building a routine inspection habit.
That’s it—diagnose, treat, and prevent. Consistency is what saves your plants in the long run.
Now I’d love to hear from you: Have you ever dealt with these tiny black bugs on your houseplants, and what worked (or didn’t) for you? Drop your experience in the comments below—your story might help another plant parent.
For more practical plant care tips and deep-dive guides, visit Plant Care Dairy—your space for smarter, stress-free gardening.
Disclaimer: The methods shared here are for general houseplant care and natural pest control. Always test treatments on a small area first, and consult a plant specialist for rare or sensitive species. Results may vary depending on plant type and severity of infestation.