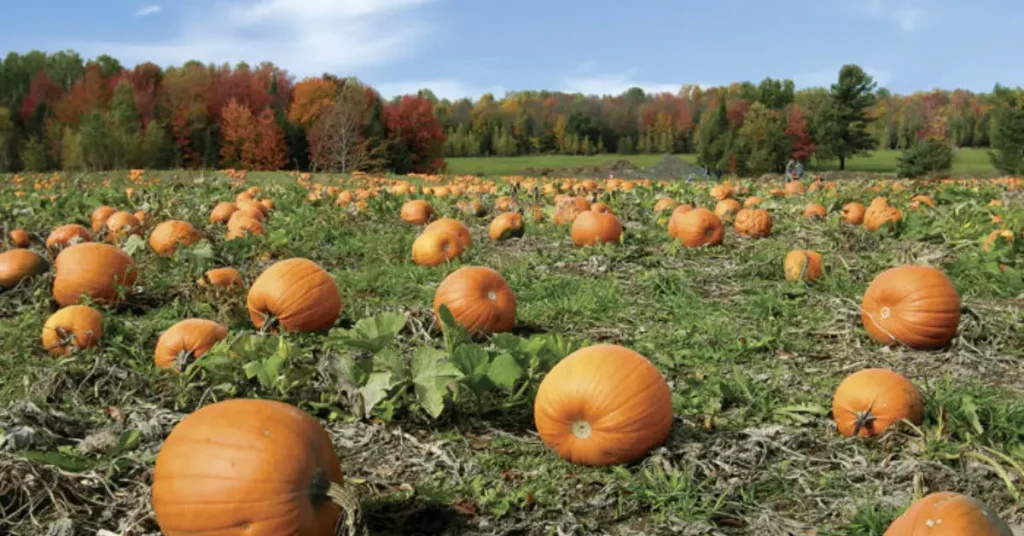
Every year around late summer, I start watching my pumpkin vines like a hawk. It’s that mix of hope and impatience—you plant those tiny seeds in spring, and for weeks it feels like nothing’s happening. Then suddenly the vines crawl across the garden, flowers pop open overnight, and you can’t help but wonder: how long will it take before I finally get a full, ripe pumpkin sitting on that soil?
If you’ve asked yourself that question, you’re not alone. I’ve grown pumpkins for over a decade, and the truth is—they don’t all follow the same clock. Some take just under three months, while others stretch past 120 days before they’re ready to harvest. It depends on the variety you choose, your climate, how warm your soil gets, and even how well your pollinators show up that season.
So before you toss those seeds into the ground, let’s look at what really determines how long it takes to grow a pumpkin—and how you can make every day of that growing season count.
What made your first pumpkin-growing experience most challenging—the wait, the weather, or something else?
Why the Timeline Matters
Every year around mid-summer, I start checking my pumpkin patch like clockwork. The vines stretch wider, the leaves grow thicker, and I can’t help but wonder—how long until those little green orbs turn into full-grown pumpkins? If you’ve planted pumpkins before, you’ve probably felt the same mix of excitement and impatience.
Time matters more than most people realize when it comes to pumpkins. Whether you’re planning to bake a pie in November or carve jack-o’-lanterns for Halloween, knowing how long it takes to grow a pumpkin from seed to harvest can save you from last-minute surprises. Most varieties take three to four months—or even longer—to mature, and that window changes with the weather, soil, and the type of pumpkin you plant.
In my experience, small decorative pumpkins can be ready in under 90 days, while big, field-style ones easily cross 120 days. The catch is, most articles just throw around numbers like “90–120 days” without explaining what actually happens in those days—or why your pumpkins might take more or less time. That’s what I want to break down here: a clear, stage-by-stage look at what’s really going on underground and above it, plus how you can keep your pumpkins right on schedule.
So before you plant those seeds, let’s walk through what actually happens from the day you sow until harvest—because when you understand the process, you can plan smarter, avoid delays, and enjoy that perfect orange glow right on time.
Growth and Development Stages (Seed → Harvest)
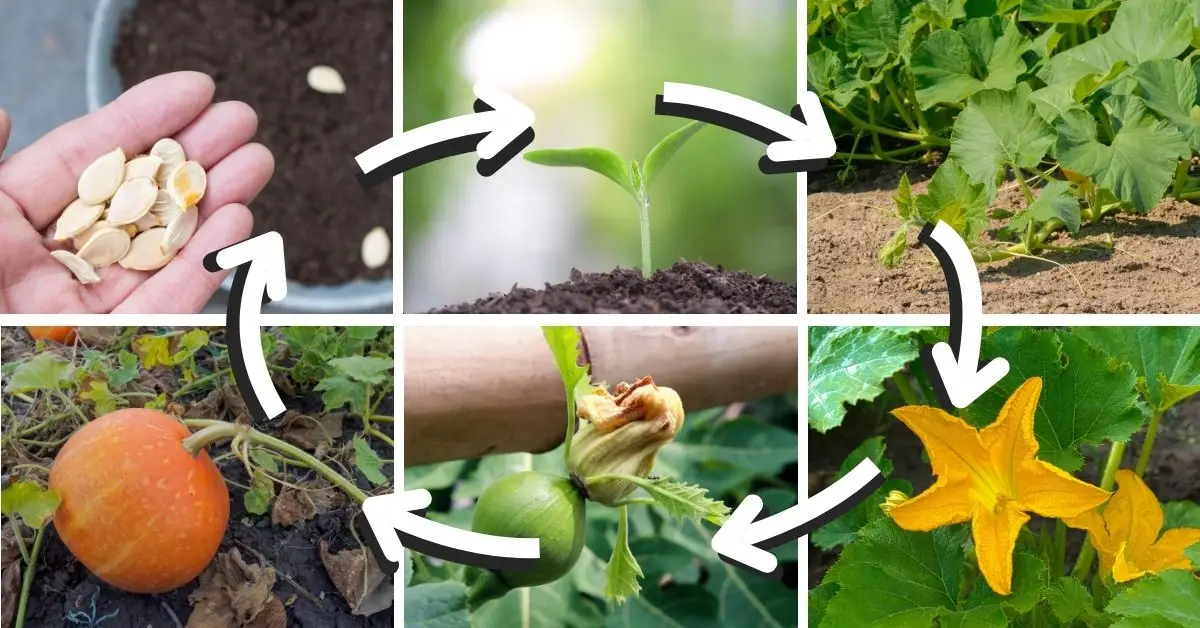
Growing pumpkins isn’t just about waiting; it’s about understanding the rhythm of the plant. Every stage has its own pace, and once you learn the signs, you’ll know exactly what your pumpkins need to stay healthy and on time.
1. Germination (Days 1–10)
Once your seeds hit warm soil—ideally between 70°F and 90°F—they’ll usually sprout within 5 to 10 days. Cold, damp soil can stall them, so warmth and drainage are key. If your growing season is short, try starting seeds indoors a couple of weeks early to get ahead.
2. Seedling & True Leaves (Week 2)
About a week after sprouting, you’ll see true leaves forming. That’s the moment your pumpkin officially begins to grow on its own energy. Keep the soil evenly moist and start thinning weaker seedlings so the strongest ones have room to thrive.
3. Vine Growth (Weeks 3–6)
This is when your garden suddenly feels alive. The vines start spreading, sometimes growing 4–6 inches a day in good weather. Give them plenty of space—at least six feet between plants—so they don’t choke each other out. The more room the vines have, the healthier and faster they’ll grow.
If you’re interested in using companion planting techniques to make the most of your garden space, check out the Three Sisters Gardening Method—a traditional approach where corn, beans, and squash grow together in harmony for stronger, healthier plants.
4. Flowering (Weeks 8–10)
Once vines are strong, you’ll see bright yellow blossoms open up. The male flowers appear first, followed by female flowers (you can spot them by the tiny bulb beneath the petals). Bees usually handle pollination, but if your garden’s quiet, you can hand-pollinate with a small brush to keep things on track.
5. Fruit Set & Development (Weeks 10–14)
After pollination, small green pumpkins start forming—and here’s where patience really counts. Most pumpkins take 40 to 55 days from fruit set to maturity. You’ll notice steady growth if you water deeply and keep the soil rich. Too much nitrogen, though, can lead to more vines than fruit.
As explained by The Spruce, this stage depends heavily on sun exposure and pollination success—two factors that make or break your harvest timeline.
6. Maturation & Signs of Ripeness (Weeks 14–18)
When the vines begin to dry and fade, the pumpkin’s rind hardens and turns its final color. A good test is to press your fingernail gently against the skin—if it doesn’t puncture, it’s ready. This is also the time to reduce watering so the fruit cures properly on the vine.
7. Harvesting & Curing (Final Weeks)
Cut the pumpkin with a 3–4 inch stem still attached to prevent rot. Then cure it in a warm, dry spot for one to two weeks to harden the skin and extend storage life. With proper curing, your pumpkins can last months after harvest.
8. Giant Pumpkin Path (Optional)
If you’re chasing the thrill of growing a giant pumpkin, expect the journey to stretch past 150 days. These require more space, extra feeding, and constant pruning so all energy goes into one fruit. It’s a commitment—but watching that pumpkin swell week after week is worth it.
Each phase might test your patience, but that’s what makes pumpkin growing rewarding. When your first bright orange fruit finally appears, you’ll know every day of tending, watering, and waiting paid off.
So tell me—what’s the hardest part of the process for you: getting the seeds to sprout, pollinating at the right time, or waiting for that perfect harvest color?
Factors Influencing the Pumpkin Growth Timeline
Here’s the truth: even if you plant the same pumpkin seeds as your neighbor, your harvest time might look completely different. That’s because pumpkin growth isn’t ruled by a single factor—it’s a mix of genetics, weather, and care. Once you understand what affects the timeline, you can actually take control of it.
1. Variety Matters
Not all pumpkins grow at the same pace. Mini varieties like Jack Be Little can be ready in under 90 days, while large field pumpkins often take 100–120 days. The giants? They can push 150 days or more. If your growing season is short, choosing the right variety can save your harvest from an early frost.
Quick tip: Check the “days to maturity” on your seed packet before planting. It’s your best clue for planning backward from your target harvest date.
2. Climate and Growing Zone
Your zip code plays a bigger role than you think. Shorter seasons in northern states mean fewer frost-free days, so you’ll want a faster-maturing variety—or start your seeds indoors to get ahead. The ideal planting window shifts depending on your region’s climate and soil warmth. For southern growers, planting can happen later because the soil stays warm longer, but in northern zones, every warm day counts.
3. Soil Temperature & Readiness
Pumpkins are heat-loving plants. If you plant them before the soil reaches at least 70°F, germination will crawl or fail altogether. Cold, wet soil is one of the most common reasons gardeners lose time early in the season. Always check soil warmth before planting, and resist the urge to sow too soon—it’s better to be late than to replant.
Managing soil warmth is crucial for any heat-loving plant. If you want to see how gardeners grow tropical crops in cooler regions, here’s a practical guide on how to grow banana plants at home—even without a tropical climate.
4. Space and Vine Growth
These plants don’t do well in tight quarters. A cramped garden means tangled vines, reduced airflow, and slower growth. Big pumpkins need space—up to 8 feet between plants. If you’re limited on room, try smaller or bush-type varieties that mature faster and stay compact.
5. Pollination Success
No pollination means no pumpkin. If your flowers bloom but no fruit sets, you’ll lose valuable time waiting. Bees usually handle the job, but if pollinator activity is low, try hand-pollinating using a small brush. Even missing a week during peak flowering can push your harvest back by several days.
6. Care and Consistency
Pumpkins are resilient, but they demand regular attention. Uneven watering, poor nutrients, or pest problems can slow down the plant’s energy cycle. Keep the soil moist but not soggy, feed with balanced compost, and check for signs of squash bugs or powdery mildew before they spread. A healthy vine stays on schedule; a stressed one lags behind.
7. Harvest Timing and Curing
Even when your pumpkin looks mature, you’re not done yet. Proper curing—letting the pumpkin sit in a warm, dry place for 10–14 days—hardens the rind and improves storage life. It adds a little extra time but ensures your pumpkin lasts long after harvest.
When you combine all these elements, your pumpkin’s “days to maturity” suddenly makes sense—it’s not a guarantee, it’s an estimate. The more control you have over these variables, the more predictable (and rewarding) your harvest becomes.
Planting Schedule for a Fall Harvest

If your goal is to have pumpkins ready for Halloween or Thanksgiving, you can’t rely on guesswork—you need to plan backward from your desired harvest date.
How to Calculate When to Plant
Take the number of days your variety needs to mature (usually listed on the seed packet) and count backward from your target date. For example, if you want pumpkins ready by October 31 and your variety takes 100 days, plant around late July or early August.
As The Old Farmer’s Almanac notes, this backward method is the most reliable way to align your pumpkins with fall festivities. It ensures your fruit ripens before the first frost hits and avoids having overripe pumpkins sitting too early.
Example Scenarios
- Short-season areas (Northern U.S.) – Start seeds indoors in May, transplant after frost in early June, and harvest by late September.
- Moderate climates (Midwest) – Direct sow in early June for an October harvest.
- Warm zones (Southern U.S.) – You can plant as late as early August and still get ripe pumpkins before Halloween.
Indoor Seed-Starting vs Direct Sowing
If your frost-free season is short, start seeds indoors about 2–3 weeks before your last frost date. Transplant carefully once the soil warms up. For longer seasons, direct sowing works fine—just make sure the soil is warm and loose for quick germination.
Zone-Specific Planning
- Zone 3–5: Start early indoors; expect a full 120 days to maturity.
- Zone 6–7: Plant by late June for late-October harvests.
- Zone 8–10: You have flexibility—plant mid to late July for Halloween pumpkins.
Pumpkin growing isn’t about luck—it’s timing, planning, and knowing your environment. Once you understand your variety, zone, and soil, you can hit your harvest goals year after year.
When do you usually plant your pumpkins—and have you ever tried counting backward from Halloween to plan your garden?
Common Mistakes That Delay Harvest (and How to Avoid Them)
After years of growing pumpkins, I’ve learned that most delays aren’t random—they’re usually the result of a few small but costly mistakes. If you want your pumpkins to stay on schedule, here’s what to watch out for.
1. Planting Too Early in Cold Soil
It’s tempting to sow seeds as soon as spring arrives, but pumpkins hate cold starts. If your soil is below 70°F, germination slows dramatically—or fails altogether. Waiting for consistent warmth gives your plants a stronger, faster start.
Pro tip: If you can’t resist getting a head start, warm your soil with black plastic or plant indoors, then transplant once temperatures stabilize.
2. Crowding the Vines
Pumpkins need elbow room. When vines compete for sunlight, air, and nutrients, everything slows down—especially fruit development. Always give large varieties at least 6–8 feet between plants. Smaller ones can manage with 3–4 feet.
Think of space as speed—more room means faster, healthier growth.
3. Ignoring Pollination
This is one of the most common reasons for “pumpkin delays.” You might see flowers but no fruit, simply because pollination didn’t happen. Remember, male flowers appear first, then female ones (with a tiny pumpkin at the base). If bees aren’t around, step in and hand-pollinate to keep things moving.
4. Overwatering or Poor Drainage
Too much water drowns roots, while too little stresses vines. Both can stall your timeline. Aim for deep watering once or twice a week, allowing the top inch of soil to dry between sessions. Good drainage matters—soggy roots mean slow growth and disease.
5. Choosing the Wrong Variety
If your growing season is short, planting a 120-day variety is a recipe for disappointment. Match your variety to your climate and target harvest date. Always check the “days to maturity” label before planting—especially in cooler regions.
6. Harvesting Too Early (or Too Late)
A pumpkin harvested too soon won’t last; one left too long risks frost damage or rot. Watch for color deepening, a dry stem, and a hard rind before cutting. Timing your harvest right keeps your fruit both beautiful and durable.
7. Skipping the Curing Stage
Even if your pumpkins look perfect, skipping curing—that one to two weeks of drying time—can ruin your effort. Without curing, moisture and microbes creep in, shortening shelf life dramatically.
In short: a little patience and precision can shave weeks off your total grow time and keep your harvest healthy long after the vines fade.
Example Timelines for Popular Varieties
One of the biggest gaps in most pumpkin-growing guides is a lack of real-world examples. Here’s a simple breakdown of common varieties and how their growth timelines compare.
| Variety Name | Days to Maturity | Ideal Planting Window (U.S.) | Notes |
|---|---|---|---|
| Jack Be Little (Mini) | ~85 days | Late June – Early July | Fast grower; perfect for short seasons and decoration. (Source: Southern Living) |
| Connecticut Field (Medium) | ~95–100 days | Early to mid-June | Classic carving pumpkin; needs moderate space. |
| Big Max / Atlantic Giant (Large) | 110–125+ days | Late May – Early June | Requires large space, steady feeding, and warm weather. (Source: Transition Farm) |
Note: Longer-growing varieties are more sensitive to pests, weather swings, and soil inconsistencies—so they require more active care to stay on track.
Use this table as your planning tool: find your target date (like Halloween), count backward by the days-to-maturity listed, and plant accordingly.
Harvesting, Curing & Storage – Extending Life After Maturity

Getting your pumpkin to maturity is only half the story. How you harvest and store it determines how long it’ll actually last. Many gardeners lose weeks of usable life just because they rush this part.
Recognizing the Right Harvest Moment
Your pumpkin is ready when:
- The rind has deep color and feels hard when pressed.
- The stem is dry and corky.
- The vine around the fruit starts to wither.
- A gentle knock gives a hollow sound.
How to Cut Safely
Use sharp shears or a clean knife, and always leave 3–4 inches of stem. Cutting too close invites rot. Handle gently—bruises can shorten shelf life.
Curing for Longevity
Once harvested, cure your pumpkins in a warm, dry place (around 80°F) for 10–14 days. This step allows the rind to harden and small surface wounds to seal. As My Garden explains, proper curing dramatically extends storage time and helps pumpkins resist decay.
Storage Conditions
After curing:
- Store in a cool, dry, well-ventilated spot (around 50–55°F).
- Keep them off the ground on straw or shelves.
- Avoid stacking; give air room to circulate.
When stored right, pumpkins can last for two to three months—sometimes even longer.
Eating vs. Decoration
If you’re planning to cook your pumpkins, prioritize flavor varieties like sugar pumpkins. For decorative use, focus on firm rinds and vibrant color instead of taste. Each type has a slightly different “ideal harvest point,” depending on your goal.
For another quick harvest guide, learn how to harvest eggplant the right way—it’s full of practical timing and technique tips that apply to many garden crops.
Bonus Tip
If you plan to transport or display pumpkins outdoors, always cure them first, then coat lightly with a diluted vinegar or mild bleach solution. It helps delay rot and keeps the skin bright through the season.
Pumpkin growing is a waiting game, but when you avoid the common pitfalls, match your variety to your climate, and handle the harvest with care—you’ll not only grow on time, you’ll make every pumpkin count.
Tell me—do you grow pumpkins for eating, decorating, or the thrill of growing the biggest one in the neighborhood?
Final Takeaways & Quick Checklist
If you’ve made it this far, you already know that growing pumpkins isn’t just about tossing seeds into the ground—it’s about timing, care, and smart planning. Before you grab your trowel, here’s a quick wrap-up to keep your season on track.
Key Takeaways
- Choose the right variety: Match your pumpkin type (mini, medium, or giant) to your local growing season.
- Count the days: Check the days to maturity on your seed packet—it’s your timeline guide.
- Plan backward from your harvest date: Want Halloween pumpkins? Count back 90–120 days, depending on variety.
- Prepare your soil and space: Warm, well-drained soil and plenty of room mean faster, healthier vines.
- Monitor each growth stage: From sprouting to pollination, stay consistent with watering and feeding.
- Pollinate if needed: Low bee activity? Hand-pollinate to stay on schedule.
- Harvest smartly: Cut with a 3–4 inch stem and handle gently.
- Cure before storing: A warm, dry cure of 10–14 days extends your pumpkins’ life and beauty.
Quick Pumpkin-Grower Checklist
Here’s your printable/ready-to-save list—perfect for taping to your garden wall or adding to your journal:
- Choose your pumpkin variety (based on your growing zone).
- Check “days to maturity” and mark your target harvest date.
- Count backward and set your planting date.
- Prep soil: warm, loose, rich in compost.
- Space plants properly (mini: 3 ft | medium: 6 ft | giant: 8+ ft).
- Track growth stages (germination, vine, flowering, fruit set).
- Support pollination (natural or hand).
- Watch for color change, dry stem, and hollow sound before harvest.
- Cut with stem, cure 10–14 days, store cool and dry.
Tip: Keep a small garden notebook or calendar—note what worked this season, what didn’t, and how long each stage took in your zone. It’ll make next year’s crop even smoother.
If you found this guide helpful, visit Plant Care Dairy for in-depth growing calendars, seed variety lists, and seasonal planting tips designed for gardeners.
And before you go—tell me in the comments: When do you usually start your pumpkin seeds, and what variety are you planning to grow this year?
Disclaimer: The information in this guide is based on general gardening best practices and publicly available expert sources. Growing results can vary depending on local climate, soil conditions, and variety. Always check your regional planting guidelines and seed packet instructions before starting your pumpkin crop.