If you’ve been wondering whether there’s a simple, low-cost way to nudge your lilacs toward bigger, brighter blooms, you’re in the right place. This guide cuts through the confusion so you can use common household throwaways—specifically wood ash and Epsom salt—with confidence and care.
By the end, you’ll know exactly what to add, how much to use, and when to apply these boosters, plus how to pair them with smart pruning, sunlight, and watering practices for consistent, showy flowers each spring.
I’ll be honest: I once overdid “fancy fertilizer,” and my old lilac responded with lush leaves and almost no flowers. Since then, I’ve learned that less is more and that a bit of wood ash or Epsom salt—used properly—can be the nudge lilacs actually need.
Why Wood Ash and Epsom Salt Work for Lilacs
What Wood Ash Adds to Soil
Wood ash is the mineral-rich residue left after burning natural, untreated wood. It contains plant-available potassium, sulfur, magnesium, and phosphorus—nutrients that lilacs appreciate for healthy growth and bloom development.
Beyond nutrients, wood ash acts like a gentle liming agent that can neutralize excess acidity. Seed companies like Gurney’s also discuss the relationship between lilacs and soil pH in their overview of wood ash and lilacs. Lilacs tend to perform best in slightly alkaline to neutral soils, so if your soil is too acidic, the right dose of wood ash can move pH back toward a comfortable range.
- Key benefit: Adds potassium for vigor and bloom quality.
- Secondary benefit: Lightly raises pH in overly acidic soils.
- Important caveat: Only use ash from natural, untreated wood; avoid ash from treated lumber, painted wood, charcoal briquettes, or trash. If you’re unsure why charcoal products are excluded, this article explains whether charcoal ash is beneficial for plants and when it causes problems.
Why Epsom Salt Helps Flowering Shrubs
Epsom salt is simply magnesium sulfate. Magnesium supports chlorophyll production and can help foliage maintain rich green color while supporting the plant’s ability to utilize other nutrients effectively.
In lilacs growing in magnesium-poor soils, a light dose can be just enough to support bloom performance without forcing leafy growth the way heavy, high-nitrogen fertilizers often do. This targeted use aligns with nursery guidance on whether Epsom salts can help lilac bushes flower.
- When it helps: Soils low in magnesium or plants showing telltale interveinal yellowing.
- When it won’t help: Waterlogged or deeply compacted soils, or plants pruned at the wrong time.
When “More Fertilizer” Backfires
It’s tempting to push fertilizer when blooms are scarce, but lilacs respond to excess nitrogen by producing more leaves at the expense of flowers. That’s why many gardeners see lush growth and few blossoms after using heavy, all-purpose fertilizers.
Wood ash and Epsom salt aren’t meant to replace full nutrition forever; they’re targeted tools that avoid the leaf-heavy growth spurt and instead support flowering and soil balance.
The Right pH Range for Lilacs
Lilacs typically prefer a soil pH around 6.5 to 7.5. If your garden soil is significantly lower (more acidic), a carefully measured addition of wood ash can nudge it closer to neutral, where lilacs tend to set buds reliably.
I often start with a simple soil test. If pH is already neutral, I skip ash and focus on pruning, sun, and water—because getting those right will often unlock blooms all by themselves.
How to Add Wood Ash to Your Lilac Bushes
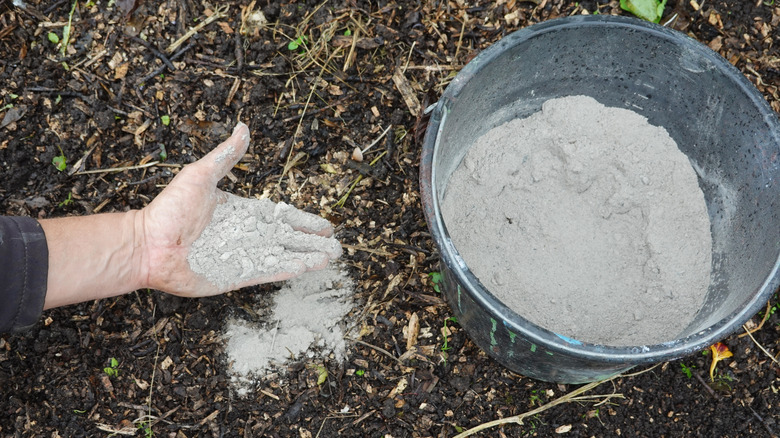
Gather and Screen Only Safe Ash
Start by collecting ash from a fireplace, wood stove, or bonfire where only natural wood was burned. Let it cool completely and sift out large charcoal chunks so you’re working with fine, even material.
Avoid ash from treated or painted wood, plywood, or manufactured logs. Additives and chemicals can harm plants and soil life.
- Always cooled: Ash should be fully cold before handling.
- Debris-free: Remove nails, staples, or unburned chunks.
- Stored dry: Keep ash covered and dry until application day.
Apply the Right Amount Around Each Bush
For established lilacs, a sensible starting dose is about 1 to 2 quarts of wood ash per plant. Sprinkle it in a thin, even ring under the drip line rather than dumping a mound against the trunk.
Gently rake or scratch it into the top inch of soil to prevent it from blowing away, and water lightly to help it settle. Overdoing ash can backfire by pushing pH too high or locking up nutrients, so be measured and patient.
Best Timing, Weather, and Frequency
Apply wood ash once per year during the non-summer months—late fall through early spring is ideal. This gives time for nutrients to mellow into the soil before the next bloom cycle.
Choose a calm, dry day so ash doesn’t drift. If rain is forecast, a light shower afterward can be helpful, but avoid heavy storms that could wash ash away.
Safety Gear and Clean Handling
Wood ash is alkaline and dusty, so suit up with gloves, eye protection, and a dust mask. Long sleeves help prevent skin irritation.
Clean tools and containers after use, and keep ash away from water features, metal surfaces, and acid-loving plants such as rhododendrons and azaleas.
Epsom Salt Boost: Simple, Targeted Magnesium
The Correct Dose and Placement
For a modest magnesium nudge, apply about one cup of Epsom salt sprinkled around the perimeter (drip line) of each lilac bush. Scratch it into the top inch of soil and water in well.
This light touch can support foliage color and overall vitality without pushing overabundant leaf growth. I like to pair this application with early spring cleanup or late-fall ash application, spacing them a few weeks apart.
Clues Your Lilac Wants Magnesium
Watch for interveinal chlorosis—pale leaves with green veins—especially on older foliage. Magnesium’s role in chlorophyll and flowering is explained further in this overview of how Epsom salt supports vibrant flowers.
Slow, lackluster growth in otherwise well-sited plants can also signal a magnesium shortfall.
A quick soil test that checks magnesium levels can confirm your hunch and help you avoid unnecessary applications.
- Yellowing between veins: Classic sign of possible magnesium deficiency.
- Otherwise healthy plant: Good sun and drainage but lackluster color.
- Test before repeating: Verify with a soil test if symptoms persist.
What Epsom Salt Won’t Fix
Epsom salt is not a cure-all. This limitation is covered in more detail in our breakdown of Epsom salts for plants, including when it helps and when it doesn’t.
It won’t correct severe pH problems, poor drainage, root damage, or pruning mistakes that remove next year’s flower buds.
If blooms are scarce, always review the basics—sunlight, pruning time, and soil moisture—before reaching for any additive.
Pruning, Sun, and Water: The Overlooked Essentials
Annual Pruning That Protects Next Year’s Buds
Prune lilacs right after they finish blooming. That’s when you can shape plants, remove spent flower clusters, and thin older stems without sacrificing next year’s buds.
Each year, remove a few of the oldest, thickest canes at ground level to keep the shrub youthful and open. I also keep height in check to encourage better airflow and easier maintenance.
- Right timing: Immediately after bloom, not fall or winter.
- Renewal approach: Remove 1–3 of the oldest canes each year.
- Dead/diseased wood: Prune any time you see it.
Sunlight and Airflow for Disease-Free Bloom
Lilacs crave full sun—ideally 6 or more hours daily. In too much shade, flower buds are sparse, and powdery mildew tends to linger.
Good spacing and occasional thinning increase airflow, which helps foliage dry quickly after rain and reduces disease pressure.
Watering and Drainage That Lilacs Love
Lilacs prefer moderately moist, well-drained soil. Deep, infrequent watering encourages stronger roots compared with frequent, shallow sips.
In heavy clay, improve drainage with compost and consider elevating the planting area slightly. Sitting in waterlogged soil is a recipe for disappointment.
Common Mistakes to Avoid
- Over-fertilizing with high nitrogen: Leads to leafy growth and fewer flowers.
- Late-season pruning: Removes next year’s buds.
- Planting in deep shade: Starves buds of energy.
- Ignoring soil pH: Too acidic can suppress bloom performance.
Seven Actionable Tips Every Lilac Gardener Needs
The 7 Tips, in Order
- Test Your Soil First: Check pH and basic nutrients so you’ll know whether wood ash (to gently raise pH) or Epsom salt (to add magnesium) makes sense for your yard.
- Use Only Clean, Natural Wood Ash: Collect fully cooled ash from untreated wood; sift out charcoal chunks, and avoid ash from treated or painted sources.
- Apply 1–2 Quarts of Ash per Bush: Sprinkle in a thin, even ring under the drip line, scratch it into the top inch of soil, and water lightly.
- Time It for Non-Summer Months: Add ash once a year in late fall through early spring on a calm, dry day to prevent drift and loss.
- Add One Cup of Epsom Salt at the Drip Line: Scratch in gently and water; this offers a targeted magnesium boost without pushing excessive leaves.
- Prune Right After Bloom: Remove old canes, thin crowded growth, and keep height in check so next year’s buds and airflow are protected.
- Prioritize Sun and Drainage: Ensure 6+ hours of sun, improve drainage where needed, and water deeply but infrequently for resilient roots.
When to Skip or Delay Wood Ash
Hold off on wood ash if a soil test shows your pH is already neutral to alkaline or if nearby beds host acid-loving plants. The same pH cautions apply across ornamentals, as outlined in this guide on whether wood ash is good for roses. In these cases, focus on pruning, sun, and water, and rely on compost or leaf mold for gentle, pH-neutral organic matter.
If your lilac has struggled with drought or transplant shock, prioritize recovery (watering and mulch) before adjusting pH or nutrients.
Simple Soil Testing for Confidence
Home test kits are quick and inexpensive. For the most precise read, use a local extension service or professional lab that reports pH, organic matter, and nutrient levels, including magnesium and potassium.
Armed with those numbers, you can fine-tune ash and Epsom salt use rather than guessing—saving time, money, and plant stress.
Smart-Gardening Wrap-Up and Quick Reference
At-a-Glance Summary Table
| Action | When | How Much | Why It Works | Watch Outs |
|---|---|---|---|---|
| Apply Wood Ash | Once yearly, non-summer months (late fall–early spring) | 1–2 quarts per mature bush | Adds K, S, Mg, P; gently raises low pH | Only use natural wood ash; avoid windy days; don safety gear |
| Add Epsom Salt | Early spring or late fall; separate from ash by a few weeks | ~1 cup at the drip line per bush | Targets magnesium for color and vigor | Won’t fix pruning mistakes or drainage issues |
| Prune After Bloom | Immediately after flowering | Remove 1–3 oldest canes; thin for airflow | Protects next year’s buds, reduces disease | Avoid late-season pruning that removes bud wood |
| Maximize Sun | Site selection/season-long | 6+ hours direct sun daily | Energy for abundant blossoms | Too much shade = fewer blooms |
| Water Wisely | During dry spells | Deep, infrequent soaks | Encourages strong root systems | Avoid waterlogging; improve drainage in heavy clay |
Final Thoughts
Smart gardening is about targeted actions at the right time. A measured amount of wood ash and a modest dose of Epsom salt—paired with good pruning, sun, and water—can turn a shy bloomer into a spring showstopper.
When in doubt, I test, I start small, and I observe. That steady, curious approach pays off with healthy shrubs and armfuls of fragrant lilacs year after year.
Join the Conversation
Have a question or a tip that worked in your garden? I’d love to hear it. Share your experience in the comments on Plant Care Dairy so we can all grow better lilacs together.
Disclaimer: The information in this article is for educational purposes only. Always consider your local conditions and conduct soil tests before applying amendments. Use protective gear when handling wood ash or other additives, and keep products away from children, pets, and water sources.