If you’ve ever wondered whether you can leave shriveled, mushy, or dry leaves tucked under your succulent, here’s the clear, no-nonsense answer: you shouldn’t. This article cuts through the confusion and gives you actionable guidance to keep your plants healthy, pest-free, and looking their best.
I’ll show you exactly why dead leaves become trouble indoors, how to remove them safely, and the simple weekly habits that prevent rot, pests, and fungus. By the end, you’ll know how to match the right timing and techniques to your plants so they stay clean, open at the base, and primed for strong growth.
When I first started with succulents, I thought those crunchy lower leaves were harmless “mulch.” Within weeks, fungus gnats showed up and the base of my echeveria softened. After one thorough cleanup and a few small routine tweaks, the pests disappeared and new growth took off. You can do the same with a few smart steps.
What Happens When Dead Leaves Stay On Your Succulent

How Trapped Moisture Breeds Rot
In the hot, arid regions where many succulents evolved, fallen leaves blow away or decompose quickly. Indoors, those same leaves linger, hold water, and create tiny humid pockets where succulents actually prefer airflow. That trapped dampness presses against tender stem tissue and can trigger rot—especially in tight rosettes that naturally collect debris.
- Moisture builds at the base: Dead leaves absorb splashes during watering and hold humidity where stems should stay dry.
- Soft tissue becomes vulnerable: Prolonged contact with wet debris can soften and break down the plant’s lower stem.
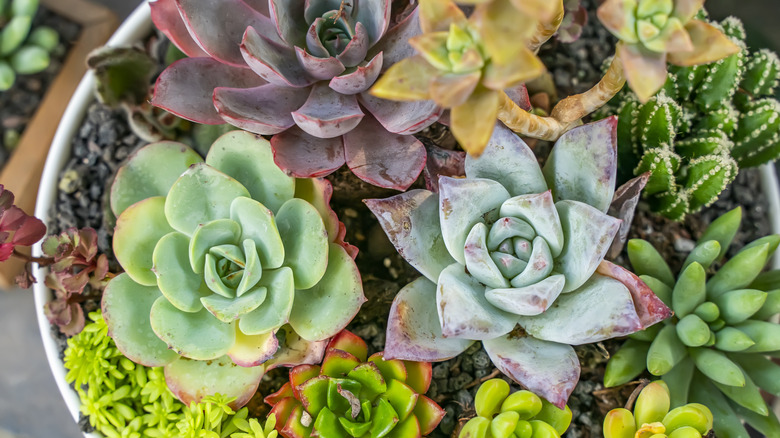
- Rosette varieties are at risk: Echeveria, Sempervivum, and other tight rosettes can trap litter and moisture more easily.
Why Pests Love Leaf Litter
Old leaves create the shaded, protected crevices that pests crave. Mealybugs and fungus gnats are classic followers of clutter. The problem escalates fast because pests multiply in hidden areas before you see the damage on the plant.
- Mealybugs hide in creases: They settle under dry leaves and along the stem, feeding undisturbed.
- Fungus gnats thrive in damp zones: Leaf litter creates the moisture and organic matter they need to reproduce.
- Prevention beats treatment: A quick clean-out interrupts their life cycle before they gain a foothold.
If pests do show up, I dab them with 70% isopropyl rubbing alcohol using a cotton swab—effective on contact and safe for most succulents. Still, prevention through regular cleanup is the least stressful path for you and your plants.
Airflow, Mildew, And Stalled Growth
Succulents rely on excellent airflow around the lower stem. A layer of dead leaves restricts circulation, raises local humidity, and invites fungal growth. When debris presses tightly against healthy tissue, it can even irritate growth points and slow development.
- Restricted airflow: Crowded bases trap moisture and heat, fostering mildew and other fungi. For practical tips on removing dust and maintaining airflow around succulents, see this discussion on Greg.
- Blocked growth points: Leaves wedged under the rosette can rub or restrict new growth.
- Stressed plants look tired: You’ll see stretched growth, sluggish recovery, and fewer healthy new leaves.
The 7 Smart Steps To Clean Up Succulents Safely
Tools And Setup
Gather a few simple tools so you can work gently and precisely. I keep a small kit in a zipper pouch so cleanup takes minutes, not an afternoon.
- Sterile tweezers or chopsticks: For teasing out leaves from tight rosettes.
- Fine tip scissors or snips: For trimming mushy, decomposing material without tugging the stem.
- Soft paintbrush or blower: To dust soil and debris away from crown and leaf axils.
- 70% isopropyl alcohol + cotton swabs: For spot-treating mealybugs or disinfecting tools between plants.
- Tray or paper towel: To catch debris and keep the topdressing tidy.
For step-by-step grooming techniques, this Leaf & Clay guide shows how to clean succulents without damaging leaves or stems.
Your 7-Step Clean-Up Routine
- Wait Until Soil Is Dry: Work on your plant when the mix is dry or nearly dry. For a complete guide on cleaning succulents and tips on propagating them while you tidy, check out this Succulent Source article. Dry conditions reduce breakage, minimize the chance of spreading fungus, and keep the crown from getting soggy while you clean.
- Lift The Rosette Gently: Tilt the plant or the pot to see the base. Use a finger or chopstick to gently lift outer leaves so you can access the lower stem and crown without pulling on healthy tissue.
- Remove Loose, Dry Leaves First: Use tweezers to pinch and wiggle dry, crispy leaves free. If a leaf resists, don’t yank—move on and return later.
- Trim Mushy Or Rotting Bits: Snip away soft, decomposing pieces so they don’t smear across healthy tissue. Wipe blades with alcohol between each plant.
- Dust And Clear The Crown: Use a soft brush or a gentle puff of air to clear crumbs from the rosette center and around the stem. Keeping the crown open improves airflow immediately.
- Spot-Treat Pests: If you see white fluff (mealybugs) or suspicious residue, dab with alcohol on a cotton swab. Repeat every few days until new growth is clean.
- Finish With A Dry Perimeter: Ensure no damp debris touches the stem or rests on the soil surface. Add a breathable topdressing (like coarse sand, pumice, or small gravel) to discourage gnats and keep the base dry.
After-Care And Monitoring
Cleanup is only half the win; observation seals the deal. I like to check the base again 48 hours later and then weekly.
- Watch for softness: If the lower stem stays soft or darkens, increase airflow and extend the time between waterings.
- Spot new pests: Mealybugs often return to the same sheltered spots; repeat alcohol dabs as needed.
- Encourage resilience: Bright light, a gritty mix, and a dry crown help plants rebound quickly.
Common Mistakes And How To Avoid Them
Leaving Debris After Watering
Watering splashes soil and bits of leaf into rosettes where they hold moisture. That tiny mess becomes a big problem in tight crowns.
- Water at the soil line: Aim a spout or squeeze bottle at the potting mix, not the leaves.
- Blot the crown: If the rosette gets wet, wick out moisture with a corner of paper towel.
- Dust after each watering: A quick brush-out prevents buildup that pests love.
Overcleaning Tight Rosettes
It’s possible to do too much. Constant poking and tugging can stress plants or snap healthy leaves.
- Be selective: Only remove leaves that are clearly dead or mushy. Also, if you’ve bought decorative succulents with glued-on flowers, check out this guide to avoid harming the plant while cleaning.
- Work in sessions: If debris is stubborn, clean a bit now and a bit next week.
- Support the stem: Hold the plant steady at the base while teasing out litter.
Forgetting To Sterilize Tools
Dirty tweezers and snips move fungi and pests from one plant to another. A quick swipe with alcohol keeps your whole collection safer.
- Disinfect between plants: Wipe blades and tips with 70% isopropyl alcohol.
- Swap cotton swabs often: Don’t dip a dirty swab back into the bottle.
- Air-dry before the next cut: Alcohol evaporates fast and won’t harm healthy tissue.
Troubleshooting: Read The Signs Before They Spread
Signs Of Rot And What To Do
Rot starts subtly: a faint musty smell, translucent patches, or a base that stays cool and squishy. For more guidance on diagnosing and rescuing struggling succulents, see this detailed article.
Catch it early and you can usually save the plant.
- Isolate the plant: Keep it away from your collection while you assess the damage.
- Remove affected tissue: Trim mushy parts back to firm, healthy material.
- Dry, then repot if needed: Let the plant callus, then replant in a gritty, fast-draining mix.
- Reduce watering frequency: Water only when the mix is fully dry, and keep the crown dry.
Spotting Pests Early
Mealybugs look like tiny bits of white fluff; fungus gnats resemble small black flies that hover near damp soil. Early detection makes removal simple.
- Check hidden zones: Look under lower leaves, in leaf axils, and along the stem.
- Use alcohol on contact: Dab mealybugs directly; treat again in several days to catch hatchlings.
- Dry the top layer: Let the top inch of mix dry out and add a coarse topdressing to deter gnats.
- Improve airflow and light: Breezier, brighter conditions make plants less hospitable to pests.
When Lower Leaves Naturally Shed
Succulents do shed older leaves as they grow. The trick is not to confuse normal aging with a mess that invites trouble.
- Normal shedding is gradual: Outer leaves dry and loosen over time—remove them once they detach easily.
- Abnormal shedding is sudden: Rapid leaf drop or mushiness points to overwatering, poor light, or pests.
- Keep the base open: Even when shedding is normal, don’t let dry leaves pile up around the stem.
Soil And Pot Issues That Make Debris Worse
Slow-draining mixes and oversized pots keep roots wet, turning innocent leaf litter into a fungal hotspot.
- Use a gritty mix: Combine quality succulent soil with perlite, pumice, or coarse sand for faster drainage.
- Right-size the pot: Too much volume stays wet for too long; size up only when roots fill the current pot.
- Choose breathable containers: Terracotta helps water evaporate and keeps the crown drier.
Smart Succulent Care At A Glance
Your Weekly Mini-Routine
Five minutes a week keeps problems from snowballing. I set a reminder and do a quick loop through my plants.
- Scan the bases: Remove any new dry leaves before they collect moisture. For indoor succulent enthusiasts, these mini succulent growing tips pair perfectly with a weekly cleanup routine.
- Check for pests: Look for white fluff, sticky residue, or tiny flies; treat on the spot.
- Feel the mix: Water only when the potting mix is fully dry.
- Brush out rosettes: A soft brush clears dust, soil crumbs, and keeps airflow high.
Quick Reference Table
| Problem | Why It Happens | What To Do | Tools |
|---|---|---|---|
| Rot At Base | Moisture trapped by dead leaves | Remove debris, improve airflow, delay watering | Tweezers, snips, soft brush |
| Mealybugs | Hidden, protected crevices under leaf litter | Dab with 70% alcohol; repeat every few days | Alcohol, cotton swabs |
| Fungus Gnats | Damp top layer and decaying organic matter | Let top dry, add topdressing, increase light/air | Topdressing, fan, grow light |
| Poor Growth | Blocked airflow; debris irritating growth points | Clear crown, maintain dry base, ensure bright light | Brush, tweezers |
| Recurring Mess | Watering overhead; no cleanup routine | Water at soil line; do weekly 5-minute tidy | Watering can with spout, reminder app |
Handy Tools I Keep On Hand
- Slim tweezers and fine snips: Gentle precision for tight crowns.
- Soft brush or blower: Keeps leaf axils and the crown free of crumbs.
- Disinfectant on standby: 70% isopropyl alcohol for tools and mealybugs.
- Topdressing: Coarse sand, pumice, or gravel to keep the base dry.
Conclusion And Next Steps
Smart gardening is about small, consistent actions that prevent big problems. With succulents, that means keeping the base clean and dry, protecting airflow, and removing dead leaves before they turn into pest hotels or rot traps.
I suggest building the 7-step cleanup into your regular care, pairing it with bright light and a gritty mix. In a few weeks, you’ll see tighter rosettes, steadier growth, and far fewer pest issues.
If this guide helped, I’d love to hear what you’re growing and which steps made the biggest difference. Drop a comment and swap tips with the community over at Plant Care Dairy—and don’t forget to share photos of your freshly tidied succulents!
Disclaimer: The information in this article is for general educational purposes and reflects personal gardening experience. Always consider your specific growing conditions and plant varieties. Test treatments on a small area first, and consult a local professional if you suspect severe disease or infestation.